 Networking has played a huge role in Android apps since API level 1.
Most apps don’t work in
Networking has played a huge role in Android apps since API level 1.
Most apps don’t work inisolation; rather, they connect to an online service to retrieve data or perform other networking functions.
In this Android networking tutorial, you will create a simple app which connects to the GitHub API to retrieve and display a list of repositories.
In the process, you will learn about the following:
- How to check your network connection status.
- How to perform network operations.
- How to leverage open source libraries to perform network operations.
Note: This tutorial assumes you’re already
familiar with the basics of Android development. If you are completely
new to Android development, read through our Android Tutorial for Beginners to familiarize yourself with the basics.
Getting Started
Download the starter project for this tutorial and extract the project. Open the starter project in Android Studio by selecting Open an existing Android Studio project from the Quick Start menu: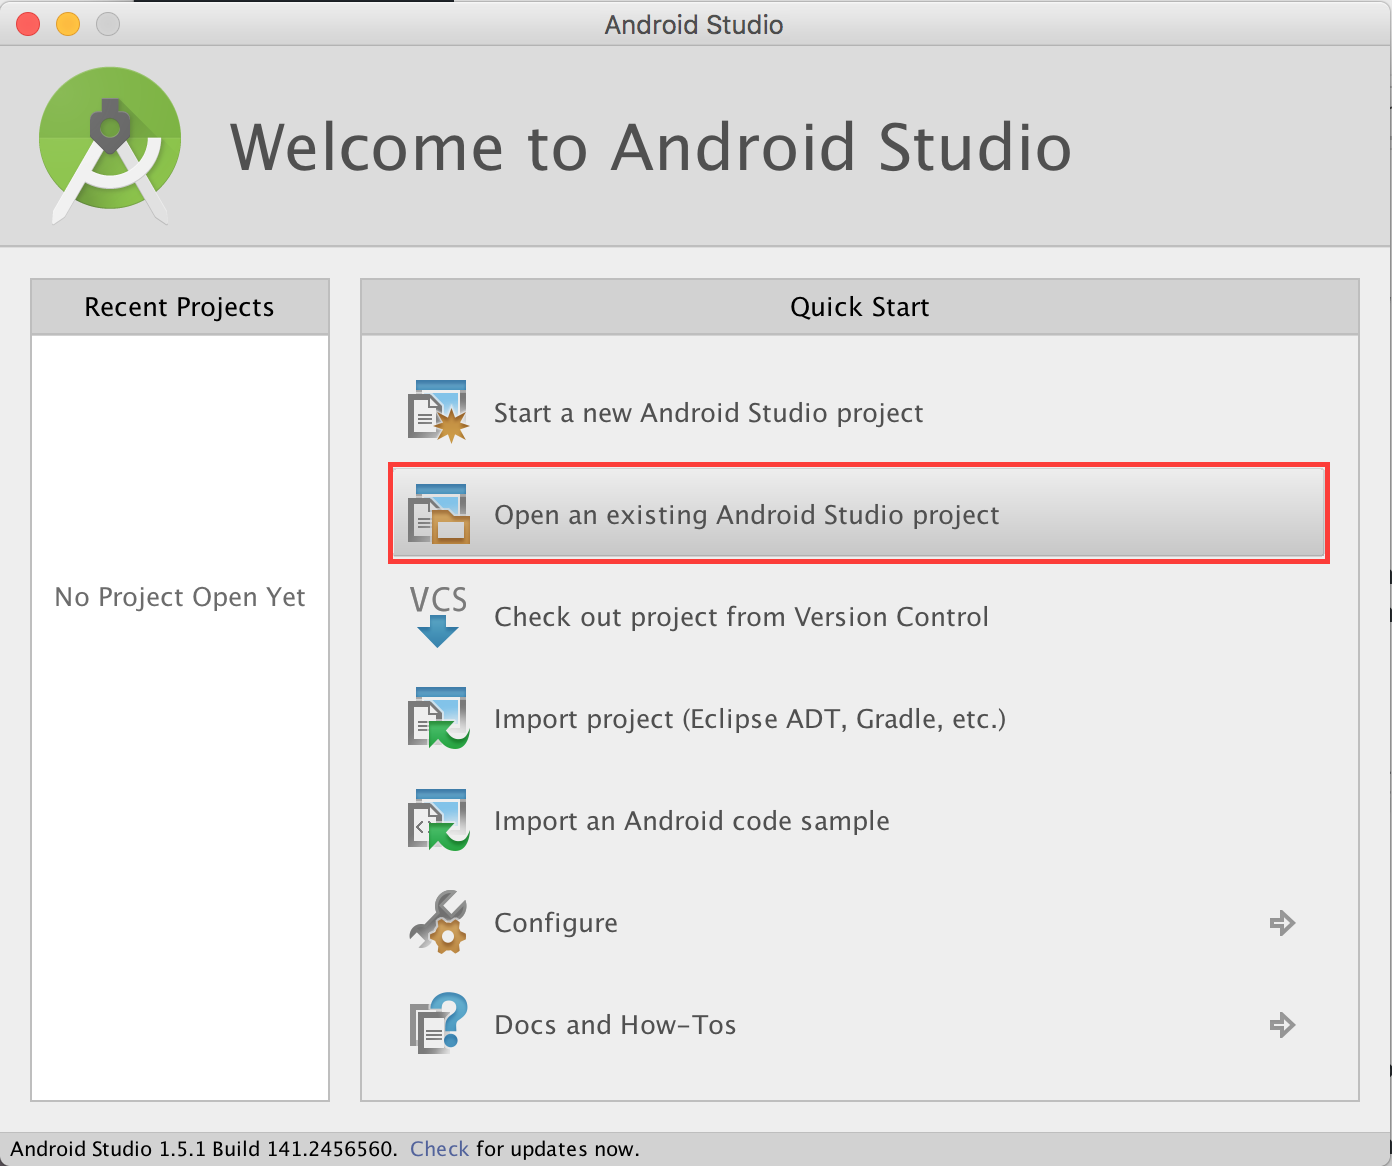
You can also use File\Open. Navigate to and select the starter project folder.
Open Util.java and look inside; this file contains a helper method which you’ll use to convert a JSON string to a list of repository objects. Repository.java is your model class that represents a Github repository.
Build and run the project to see what you have to work with:

Required Permissions
To perform network operations in Android, your application must include certain permissions.Open manifest/AndroidManifest.xml, and add the following permissions just before the
application tag:<uses-permission android:name="android.permission.ACCESS_NETWORK_STATE"/> <uses-permission android:name="android.permission.INTERNET" /> |
Before you attempt to perform any network operations, it is advisable to check first that the device is connected to a network! :]
Checking the Network Connection
Before adding any Java code, you’ll need to configure Android Studio to automatically insert import statements to save you from having to add each one manually.Go to Android Studio\Preferences\Editor\General\Auto Import, select the Add unambiguous imports on the fly checkbox and click OK.
Open MainActivity.java, and add the following method to the class:
private boolean isNetworkConnected() { ConnectivityManager connMgr = (ConnectivityManager) getSystemService(Context.CONNECTIVITY_SERVICE); // 1 NetworkInfo networkInfo = connMgr.getActiveNetworkInfo(); // 2 return networkInfo != null && networkInfo.isConnected(); // 3 } |
isNetworkConnected() checks that the device has an active Internet connection as follows:- Retrieves an instance of the ConnectivityManager class from the current application context.
- Retrieves an instance of the
NetworkInfoclass that represents the current network connection. This will benullif no network is available. - Check if there is an available network connection and the device is connected.
You will need to manually add the following import statements to the top of the file since Android Studio can’t automatically determine which packages to include:
import android.content.DialogInterface; import android.support.v7.app.AlertDialog; |
showListFragment(new ArrayList()); line in onCreate() with the following code:if (isNetworkConnected()) { mProgressDialog = new ProgressDialog(this); mProgressDialog.setMessage("Please wait..."); mProgressDialog.setCancelable(false); mProgressDialog.show(); startDownload(); } else { new AlertDialog.Builder(this) .setTitle("No Internet Connection") .setMessage("It looks like your internet connection is off. Please turn it " + "on and try again") .setPositiveButton(android.R.string.ok, new DialogInterface.OnClickListener() { public void onClick(DialogInterface dialog, int which) { } }).setIcon(android.R.drawable.ic_dialog_alert).show(); } |
startDownload() if the device is connected to a network; if it isn’t connected, it displays an alert to the user instead.Build and run your app; if your device is connected to a network, the app will show a ProgressDialog like so:

Now turn off all network connections on your device and start the app again. The app should now show an alert with the Internet connection error message:

Note: If using the emulator, check out the Android Emulator 2.0 section of our tutorial What’s New in Android Studio 2 for tips on mocking different network states.
Determining the Connection Type
When you have an app that retrieves huge amounts of data, you might want to restrict network connections to particular network types, such as Wi-Fi. You can do this usinggetType() on the NetworkInfo object.Add the following method to MainActivity:
private boolean isWifiConnected() { ConnectivityManager connMgr = (ConnectivityManager) getSystemService(Context.CONNECTIVITY_SERVICE); NetworkInfo networkInfo = connMgr.getActiveNetworkInfo(); return networkInfo != null && (ConnectivityManager.TYPE_WIFI == networkInfo.getType()) && networkInfo.isConnected(); } |
true if the device is connected to a Wi-Fi network.Replace the
isNetworkConnected() call in onCreate() with the following:isWifiConnected() |
Now turn off the Wi-Fi connection on the device (leaving packet data active) and restart the app. You’ll see an alert with the Internet connection error message:
Performing Network Operations
Android best practice is to handle any long-running tasks that may hang your application in a thread separate from the user interface thread. Network operations fall into this category of tasks.Since Android 3.0 (Honeycomb), the system has been configured to crash with a
NetworkOnMainThreadException exception if the network is accessed in the user interface thread.The AsyncTask class lets you perform asynchronous tasks in the background and publish results on the UI thread without any thread manipulation.
Since AsyncTask is an abstract class, you must subclass it before you can use it.
To create a new class, select the package in which you want to create the class – in this case, reposearch. Next, select File/New/Java Class:

In the Create New Class dialog, enter DownloadRepoTask as the name of the class and click OK:

Replace the class declaration with the following code:
public class DownloadRepoTask extends AsyncTask<String, Void, String> { // 1 @Override protected String doInBackground(String... params) { return null; } // 2 @Override protected void onPostExecute(String result) { } } |
AsyncTask makes it possible to perform (long-running) operations in the background and publish results on the UI thread without having to write threading code. The declaration for DownloadRepoTask contains the keywords
extends AsyncTask. The first parameter in the diamond operator determines the type of the input parameter to the doInBackground method while the third parameter in the diamond operator determines the type of the return value of the onPostExecute method. The second parameter determines the type of the return value of the onProgressUpdate method which is not used here so it is set to Void.doInBackground()is where your background task executes – in this case, the data download task.- When your background task is done,
onPostExecute()is called is called with the results.
startDownload() in MainActivity.java:new DownloadRepoTask().execute("https://api.github.com/repositories"); |
Connecting to a Network URL
Open DownloadRepoTask.java and add the following method:private String downloadData(String urlString) throws IOException { InputStream is = null; try { URL url = new URL(urlString); HttpURLConnection conn = (HttpURLConnection) url.openConnection(); conn.setRequestMethod("GET"); conn.connect(); return null; } finally { if (is != null) { is.close(); } } } |
Replace the
return statement in doInBackground() with the following:try { return downloadData(params[0]); } catch (IOException e) { e.printStackTrace(); return null; } |
downloadData() and passes to it the URL you passed in from the task execution.Retrieving Repositories
Now that you’ve created a connection to the resource, you can retrieve the data. You get the data as an InputStream by callinggetInputStream() method on the HttpURLConnection object.Add the following code to the DownloadRepoTask.java class, just before the
return statement:is = conn.getInputStream(); |
Add the following method to DownloadRepoTask.java:
private String convertToString(InputStream is) throws IOException { BufferedReader r = new BufferedReader(new InputStreamReader(is)); StringBuilder total = new StringBuilder(); String line; while ((line = r.readLine()) != null) { total.append(line); } return new String(total); } |
convertToString() uses the StringBuilder class to build a string from the input stream.Replace the
return statement in downloadData() with the following:return convertToString(is); |
To create a new interface, select the package in which you want to create the interface – in this case, the reposearch package. Next, select File/New/Java Class.
In the Create New Class dialog, enter the name of the interface as DownloadCompleteListener, select the Interface option in the Kind select box and click OK.
Add the following method declaration inside
DownloadCompleteListener:void downloadComplete(ArrayList<Repository> repositories); |
implements DownloadCompleteListener to the beginning of the class declaration of MainActivity.java so it looks like the following:public class MainActivity extends AppCompatActivity implements DownloadCompleteListener |
downloadComplete() in MainActivity.java like so:@Override public void downloadComplete(ArrayList<Repository> repositories) { } |
DownloadCompleteListener to DownloadRepoTask.java:DownloadCompleteListener mDownloadCompleteListener;
|
DownloadCompleteListener parameter and uses it to set the DownloadCompleteListener field in the class:public DownloadRepoTask(DownloadCompleteListener downloadCompleteListener) { this.mDownloadCompleteListener = downloadCompleteListener; } |
try { mDownloadCompleteListener.downloadComplete(Util.retrieveRepositoriesFromResponse(result)); } catch (JSONException e) { e.printStackTrace(); } |
downloadComplete().Open MainActivity.java and replace the code in
startDownload() with the following:new DownloadRepoTask(this).execute("https://api.github.com/repositories"); |
Next, add the following code to
downloadComplete():showListFragment(repositories); if (mProgressDialog != null) { mProgressDialog.hide(); } |
Make sure the device has a working Internet connection, then build and run:
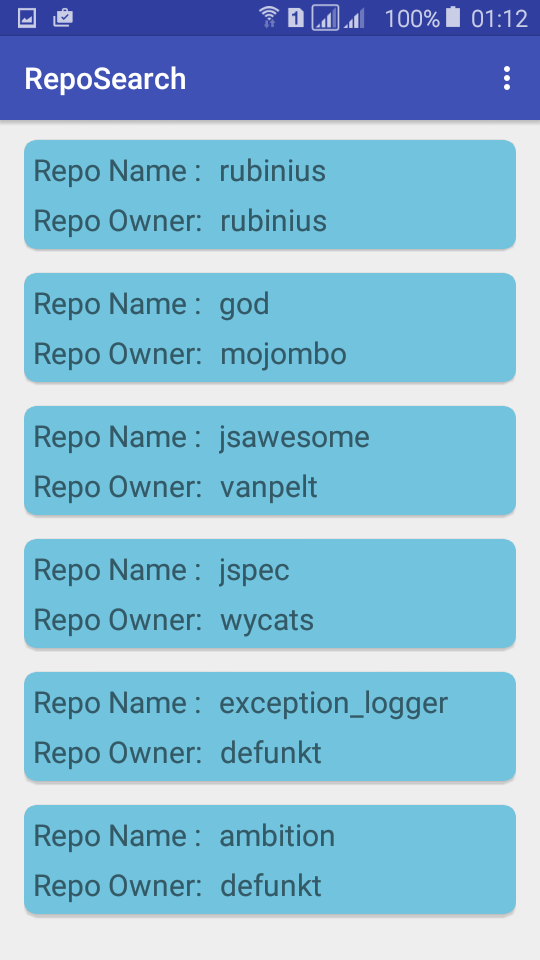
Cool – your app connected to the GitHub API and retrieved a list of repositories for your perusal!
Performing network operations in Android can be a bit tedious; you have to open and close connections, handle
InputStream conversions and ensure you’re performing the network operation in a background thread.As usual, the geniuses of the open source community have come to the rescue in the form of open source libraries that take care of the tedious details for you.
Open Source To The Rescue
There are a number of open source libraries that simplify a lot of Android networking operations. I’ve put together a few notes on the three most popular ones below.OkHttp
OkHttp is an efficient HTTP client which supports synchronous and asynchronous calls. It handles the opening and closing of connections along with InputStream-to-string conversion. It’s compatible with Android 2.3 and above.Implementing OkHttp is pretty simple and reduces the overall amount of code needed to make network calls – but there’s a catch.
Since OkHttp is built as a Java library, and not an Android library, it doesn’t take into consideration the Android Framework limitations of only permitting view updates on the main UI thread. To update any views, or post data back to the main thread, you will need to use
runOnUiThread() provided in the Android Activity superclass.To use OkHttp, you have to first add it as a dependency to your project.
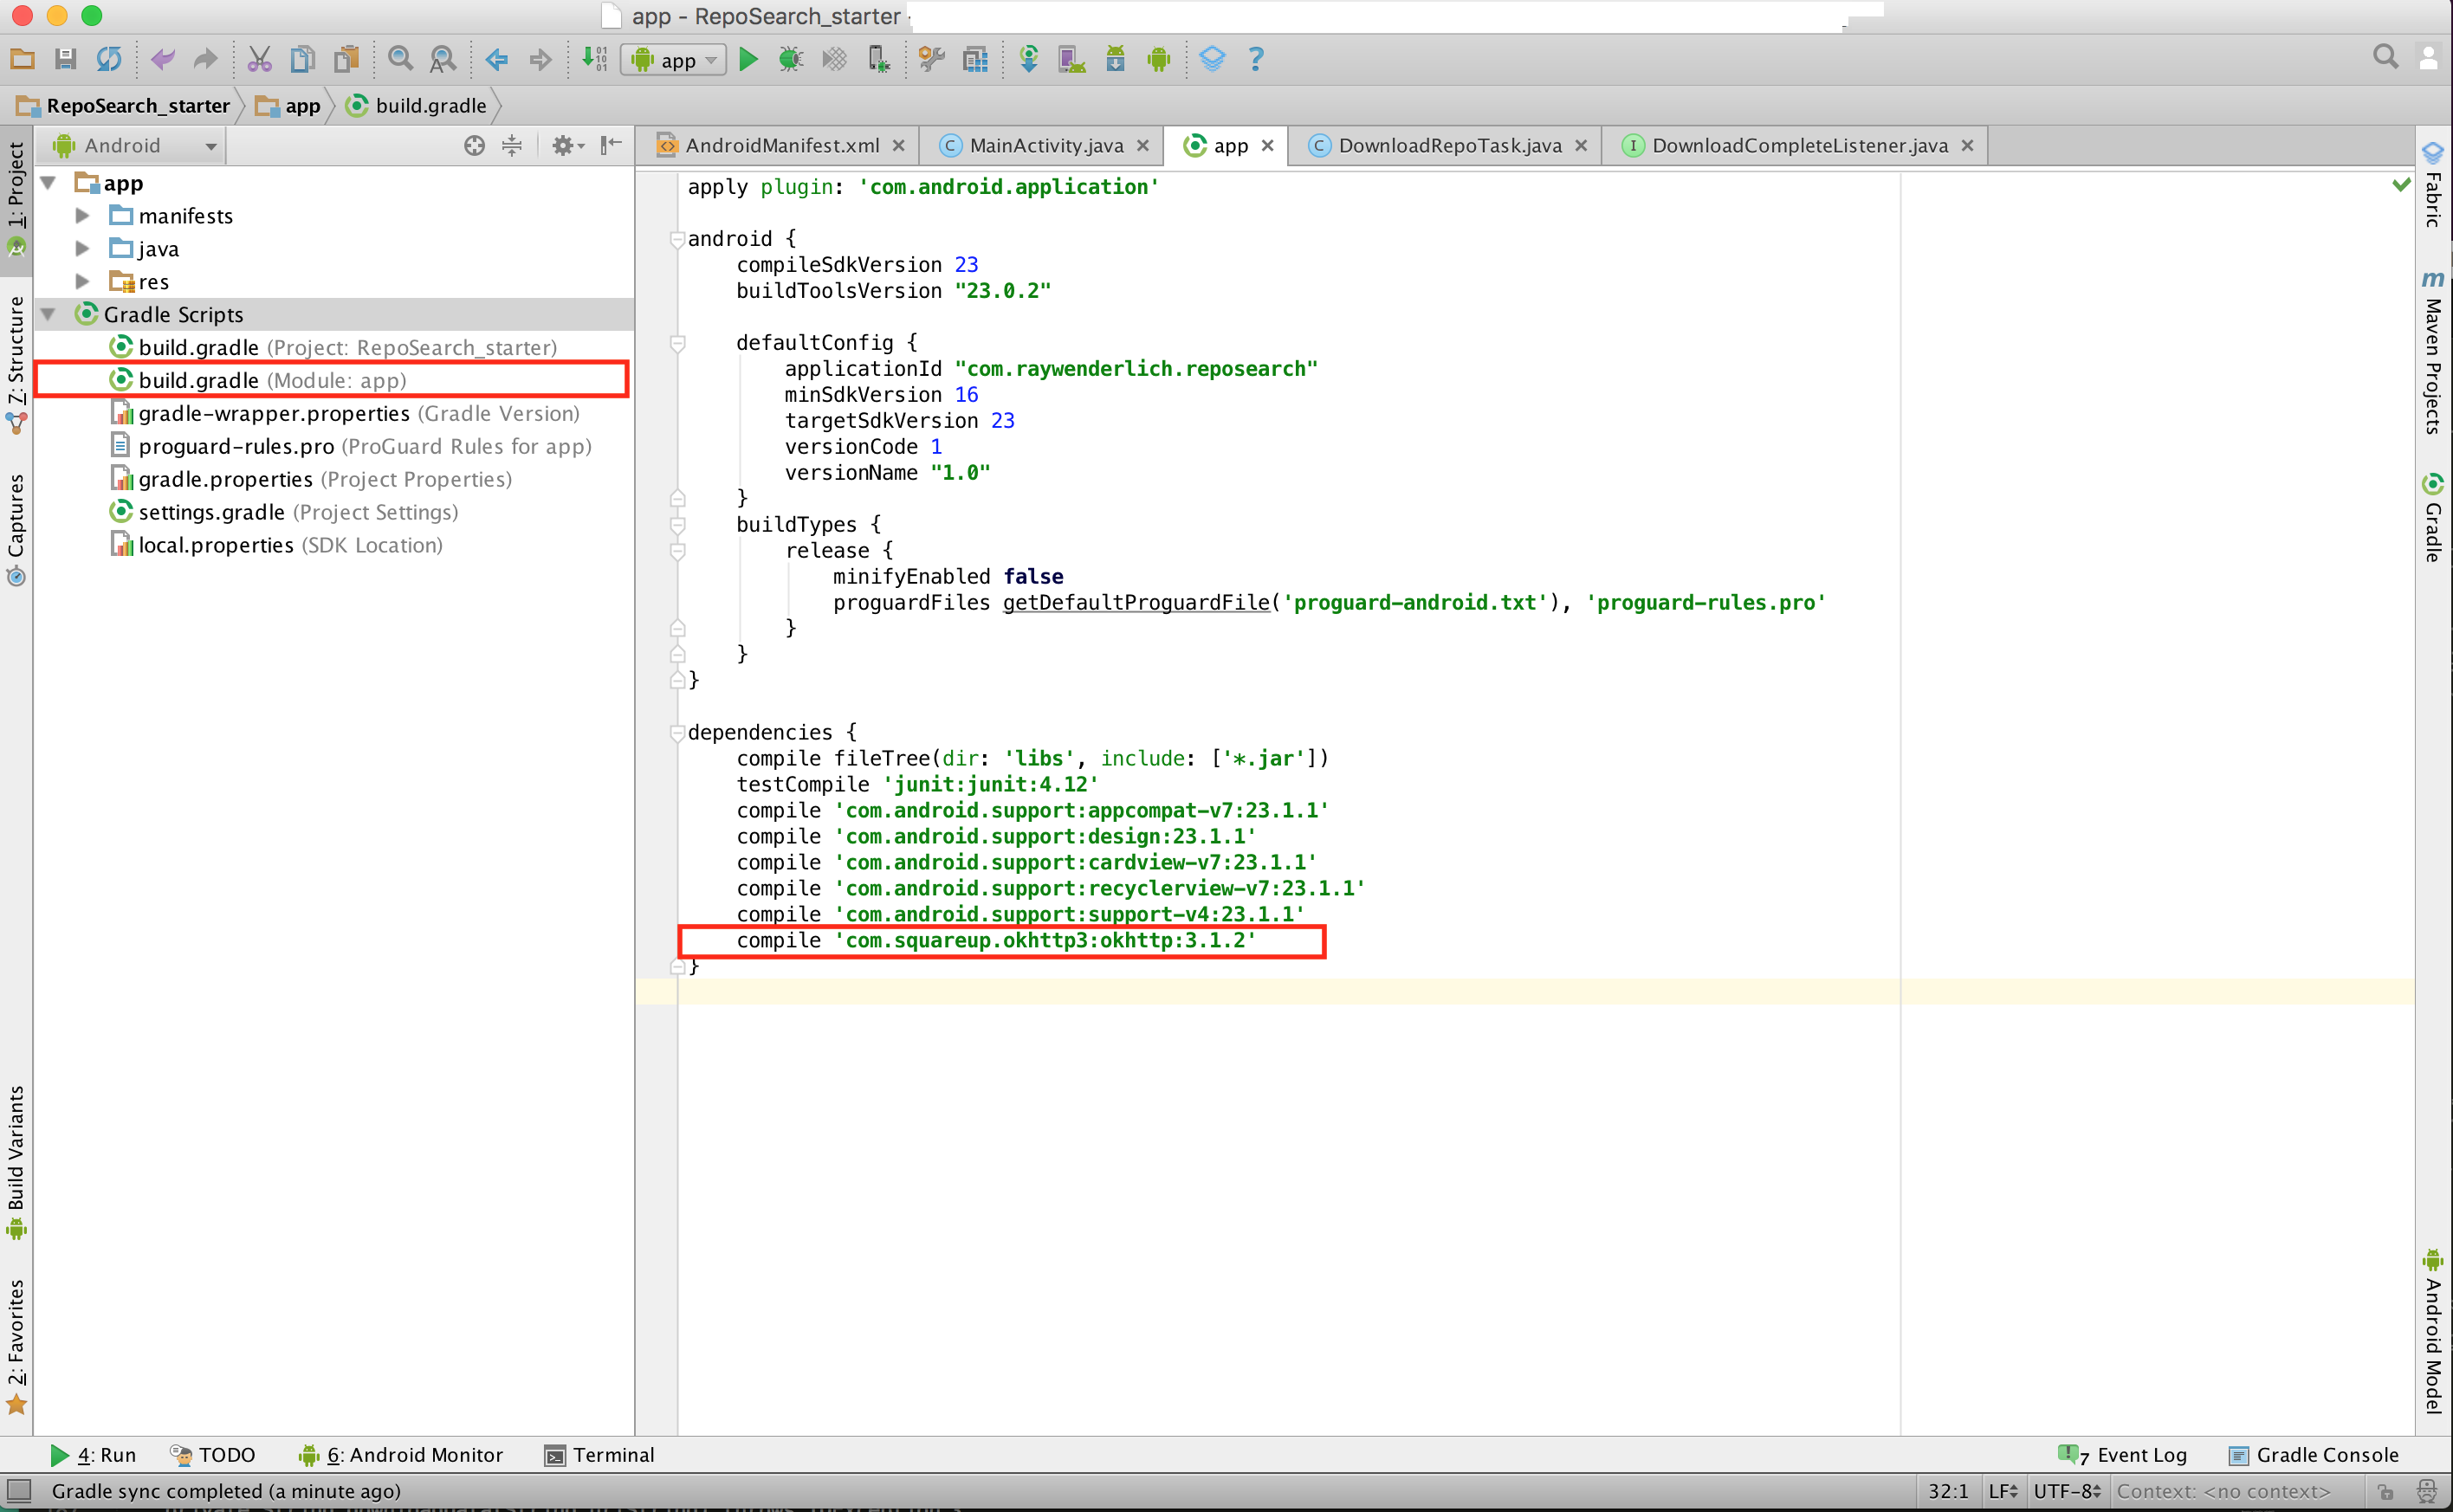
Add the following dependency to build.gradle of the app module:
dependencies {
  ...
  compile 'com.squareup.okhttp3:okhttp:3.1.2'
}
|
Now rebuild your project:
Open MainActivity.java and add the following method:
private void makeRequestWithOkHttp(String url) { OkHttpClient client = new OkHttpClient(); // 1 okhttp3.Request request = new okhttp3.Request.Builder().url(url).build(); // 2 client.newCall(request).enqueue(new okhttp3.Callback() { // 3 @Override public void onFailure(okhttp3.Call call, IOException e) { e.printStackTrace(); } @Override public void onResponse(okhttp3.Call call, okhttp3.Response response) throws IOException { final String result = response.body().string(); // 4 MainActivity.this.runOnUiThread(new Runnable() { @Override public void run() { try { downloadComplete(Util.retrieveRepositoriesFromResponse(result)); // 5 } catch (JSONException e) { e.printStackTrace(); } } }); } }); } |
- Creates an OkHttpClient object.
- Builds an OkHttpClient request with the URL you want to connect to.
- Queues the request call.
- Retrieves the response as a string.
- Converts and passes the results to the main thread.
makeRequestWithOkHttp("https://api.github.com/repositories"); |
Pretty simple, right?
Volley
Volley is an Android library for making fast and easy network calls. Just like OkHttp, it does all the dirty work for you. One of its advantages over OkHttp is that it’s compatible with Android 1.6 and above.By default, Volley makes all calls in an asynchronous manner. Since it’s an Android library, it doesn’t require any extra work to return data to the main thread or update views.
To use Volley, add the following dependency to build.gradle of the app module and rebuild the project:
dependencies {
  ...
  compile 'com.android.volley:volley:1.0.0'
}
|
private void makeRequestWithVolley(String url) { RequestQueue queue = Volley.newRequestQueue(this); // 1 StringRequest stringRequest = new StringRequest(Request.Method.GET, url, new com.android.volley.Response.Listener<String>() { // 2 @Override public void onResponse(String response) { try { downloadComplete(Util.retrieveRepositoriesFromResponse(response)); // 3 } catch (JSONException e) { e.printStackTrace(); } } }, new com.android.volley.Response.ErrorListener() { @Override public void onErrorResponse(VolleyError error) { } }); queue.add(stringRequest); // 4 } |
makeRequestWithVolley does the following:- Creates a new request queue.
- Creates a new instance of
StringRequestwith the URL you want to connect to. - Converts and passes the results to
downloadComplete(). - Adds the string request to the request queue.
startDownload() with the following code:makeRequestWithVolley("https://api.github.com/repositories"); |
Retrofit
Retrofit is an Android and Java library which is great at retrieving and uploading structured data such as JSON and XML. Retrofit makes HTTP requests using OkHttp. Unlike the case of Volley, where you have to convert a JSON string to a Repository object, Retrofit does that conversion for you. Retrofit also lets you specify any of the following libraries for the data conversion:To use Retrofit, add the following dependencies to build.gradle of the app module and rebuild the project:
dependencies {
  ...
  compile 'com.squareup.retrofit2:retrofit:2.0.0-beta4'
  compile 'com.squareup.retrofit2:converter-gson:2.0.0-beta4'
}
|
Add the following code to RetrofitAPI.java:
@GET("/repositories") Call<ArrayList<Repository>> retrieveRepositories(); |
Add the following imports to MainActivity.java:
import retrofit2.Call; import retrofit2.Callback; import retrofit2.Response; import retrofit2.Retrofit; import retrofit2.converter.gson.GsonConverterFactory; |
private void makeRetrofitCalls() { Retrofit retrofit = new Retrofit.Builder() .baseUrl("https://api.github.com") // 1 .addConverterFactory(GsonConverterFactory.create()) // 2 .build(); RetrofitAPI retrofitAPI = retrofit.create(RetrofitAPI.class); // 3 Call<ArrayList<Repository>> call = retrofitAPI.retrieveRepositories(); // 4 call.enqueue(new Callback<ArrayList<Repository>>() { // 5 @Override public void onResponse(Call<ArrayList<Repository>> call, Response<ArrayList<Repository>> response) { downloadComplete(response.body()); // 6 } @Override public void onFailure(Call<ArrayList<Repository>> call, Throwable t) { Toast.makeText(MainActivity.this, t.getLocalizedMessage(), Toast.LENGTH_SHORT).show(); } }); } |
makeRetrofitCalls() does the following:- Specifies the base URL
- Specifies GsonConverterFactory as the converter which uses Gson for its deserialization.
- Generates an implementation of the RetrofitAPI.
- Generates the request call.
- Queues the request call.
- Passes the results to
downloadComplete().
startDownload() with the following:makeRetrofitCalls(); |
Where to Go From Here?
You’ve explored (and survived!) a crash-course on network operations in Android. :] You can download the final project from this tutorial here.For more details on the open source projects used in this Android networking tutorial, check out the OkHttp and Retrofit pages on Square’s GitHub pages and the Volley page on the Android developer site.
You can also check out the Networking Operations page on the Android developer site.
I hope you enjoyed this tutorial; if you have any questions or comments, please join the forum discussion below!


0 comments:
Post a Comment
Note: only a member of this blog may post a comment.