Monday 16 December 2019

VR - aka virtual reality experience

Harry
Have you ever thought about what it might be like to relive the best moments of your life, and be able to share them with others? Maybe it’s the dance floor at your wedding. Or the birth of your child or his or her first birthday. Maybe it’s that touchdown that led your team to victory in the last seconds of a game. With today’s mobile virtual reality technology, it’s possible to create virtual memories and it has never been easier to get started.
Humaneyes Technologies, an innovator in camera technology, has developed a user-friendly, dual camera that combines 360-degree photography with immersive 3-D Virtual Reality (VR), all in one simple-to-use solution that costs about the same as a decent DSLR
camera.


“360-degree pictures and video continue to change how we use cameras to capture the world around us,” says media expert Jim Malcolm of Humaneyes Technologies. “And the global adoption of VR headsets, combined with 3-D cameras, is providing even more ways to create virtual content and virtual memories.”
“We’ve done it with the best, from documenting Mako sharks with The Discovery Channel to weightless experiences in the International Space Station, floating more than 250 miles above the horizon.”
“We’re now excited to watch, firsthand, as consumers create their own immersive personal stories,” says Malcolm.
The Vuze XR flips easily from a 360-degree camera to a VR180 camera and shoots both virtual video and photos. Whether you’re recording or live streaming, users can create and share virtual experiences at that moment, and then save them to revisit next week or next decade. Special features of the VUZE include 18-Mega Pixel still images, built-in stabilization, filters, and a VR editing suite. Plus, it doesn’t get more portable.
“Everything can be viewed, controlled and edited, right from your phone, so that you can shoot, create and share virtual videos at a moment’s notice,” says Malcolm. But not everything needs to be virtual; the VUZE also functions as a 5.7K and 4K up to 60fps 2D camera for capturing high-resolution video and pictures to fill out your photo album.
Think ahead to the holidays and how the latest in VR technology can help make unforgettable memories and connect far-flung family and friends. The VUZE XR camera also features live streaming and social sharing for platforms, including Facebook and YouTube, so that you can bring your social media audience into the scene with you.
For more information on the VUZE XR camera and how to create your own virtual experiences and memories, visit www.humaneyes.com.

so what is phising

Harry

Phishing is a type of social engineering attack often used to steal user data, including login credentials and credit card numbers. It occurs when an attacker, masquerading as a trusted entity, dupes a victim into opening an email, instant message, or text message. The recipient is then tricked into clicking a malicious link, which can lead to the installation of malware, the freezing of the system as part of a ransomware attack or the revealing of sensitive information. This article will talk about the types of phishing techniques and the prevention.

Phishing techniques

Here's a brief look at five common phishing threats that often arise in enterprise settings. Each example features "Bob," a mid-level employee in the finance department who is trying to get through his busy day and respond to hundreds of emails.


  1. Breach of Trust - Bob gets an email from what he thinks is his bank asking him to confirm a wire transfer. The email takes him to a link that looks like his bank's website but it is actually a "spoofed" but identical copy of his bank's website. When he gets to the page, he entered his credential but nothing happened. Too late, Bob just gave his bank password to a cybercriminal.
  1. False Lottery - Bob gets an email saying he's won a prize from a sweepstakes. Normally, Bob is too savvy to fall for this trick. However, this email comes from his boss, Joe, and references a charity that they both support. He clicks, and ends up at a bogus page that loads malware.
  1. Data Update - Bob gets an email from Joe telling him to take a look at a document that is attached. The document contains malware. Bob may not even realize what has happened. He looks at the document, which seems normal. The resulting malware might log his keystrokes for months, compromise the entire network, and lead to massive security breaches throughout the organization.
  1. Sentimental Abuse - Bob gets an email from someone claiming to be Joe's brother-in-law. He's suffering from cancer and has had his insurance cancelled. He asks Bob to donate to help him recover from his illness. Bob clicks on the link and is taken to a bogus charity site. The site could host malware or just steal Bob's credit card information via a bogus "online donation".
  1. Impersonation - Bob gets an email from his boss Joe, who says that he needs money wired to a known vendor as pre-payment for an emergency job. Can Bob wire them the money right away? It seems fairly routine. Bob wires the money to the account requested. The money is untraceable and never seen again.
Prevent Phishing Attacks
  1. Keep Informed About Phishing Techniques - New phishing scams are being developed all the time. Without staying on top of these new phishing techniques, you could inadvertently fall prey to one. Keep your eyes peeled for news about new phishing scams. By finding out about them as early as possible, you will be at much lower risk of getting snared by one. For IT administrators, ongoing security awareness training and simulated phishing for all users is highly recommended in keeping security top of mind throughout the organization.
  1. Think Before You Click! - It's fine to click on links when you're on trusted sites. Clicking on links that appear in random emails and instant messages, however, isn't such a smart move. Hover over links that you are unsure of before clicking on them. Do they lead where they are supposed to lead? A phishing email may claim to be from a legitimate company and when you click the link to the website, it may look exactly like the real website. The email may ask you to fill in the information but the email may not contain your name. Most phishing emails will start with "Dear Customer" so you should be alert when you come across these emails. When in doubt, go directly to the source rather than clicking a potentially dangerous link.
  1. Install an Anti-Phishing Toolbar - Most popular Internet browsers can be customized with anti-phishing toolbars. Such toolbars run quick checks on the sites that you are visiting and compare them to lists of known phishing sites. If you stumble upon a malicious site, the toolbar will alert you about it. This is just one more layer of protection against phishing scams, and it is completely free.
  1. Verify a Site's Security - It's natural to be a little wary about supplying sensitive financial information online. As long as you are on a secure website, however, you shouldn't run into any trouble. Before submitting any information, make sure the site's URL begins with "https" and there should be a closed lock icon near the address bar. Check for the site's security certificate as well. If you get a message stating a certain website may contain malicious files, do not open the website. Never download files from suspicious emails or websites. Even search engines may show certain links which may lead users to a phishing webpage which offers low cost products. If the user makes purchases at such a website, the credit card details will be accessed by cybercriminals.
  1. Check Your Online Accounts Regularly - If you don't visit an online account for a while, someone could be having a field day with it. Even if you don't technically need to, check in with each of your online accounts on a regular basis. Get into the habit of changing your passwords regularly too. To prevent bank phishing and credit card phishing scams, you should personally check your statements regularly. Get monthly statements for your financial accounts and check each and every entry carefully to ensure no fraudulent transactions have been made without your knowledge.
  1. Keep Your Browser Up to Date - Security patches are released for popular browsers all the time. They are released in response to the security loopholes that phishers and other hackers inevitably discover and exploit. If you typically ignore messages about updating your browsers, stop. The minute an update is available, download and install it.
  1. Use Firewalls - High-quality firewalls act as buffers between you, your computer and outside intruders. You should use two different kinds: a desktop firewall and a network firewall. The first option is a type of software, and the second option is a type of hardware. When used together, they drastically reduce the odds of hackers and phishers infiltrating your computer or your network.
  1. Be Wary of Pop-Ups - Pop-up windows often masquerade as legitimate components of a website. All too often, though, they are phishing attempts. Many popular browsers allow you to block pop-ups; you can allow them on a case-by-case basis. If one manages to slip through the cracks, don't click on the "cancel" button; such buttons often lead to phishing sites. Instead, click the small "x" in the upper corner of the window.
  1. Never Give Out Personal Information - As a general rule, you should never share personal or financially sensitive information over the Internet. This rule spans all the way back to the days of America Online, when users had to be warned constantly due to the success of early phishing scams. When in doubt, go visit the main website of the company in question, get their number and give them a call. Most of the phishing emails will direct you to pages where entries for financial or personal information are required. An Internet user should never make confidential entries through the links provided in the emails. Never send an email with sensitive information to anyone. Make it a habit to check the address of the website. A secure website always starts with "https".
  1. Use Antivirus Software - There are plenty of reasons to use antivirus software. Special signatures that are included with antivirus software guard against known technology workarounds and loopholes. Just be sure to keep your software up to date. New definitions are added all the time because new scams are also being dreamed up all the time. Anti-spyware and firewall settings should be used to prevent phishing attacks and users should update the programs regularly. Firewall protection prevents access to malicious files by blocking the attacks. Antivirus software scans every file which comes through the Internet to your computer. It helps to prevent damage to your system.


Article Source: http://EzineArticles.com/10146591

Wednesday 11 December 2019

activate windows 10 with activation code

Harry
hello there
 i see that all of you want to update or upgrade your window 10 edition
so
here are the keys
to activate
1 go to search type activate
activation settings will open then press
change window product key
just type in one of these keys of the edition you want
Home: TX9XD-98N7V-6WMQ6-BX7FG-H8Q99
Home N: 3KHY7-WNT83-DGQKR-F7HPR-844BM
Home Single Language: 7HNRX-D7KGG-3K4RQ-4WPJ4-YTDFH
Home Country Specific: PVMJN-6DFY6-9CCP6-7BKTT-D3WVR
Professional: W269N-WFGWX-YVC9B-4J6C9-T83GX
Professional N: MH37W-N47XK-V7XM9-C7227-GCQG9
Professional Workstations: NRG8B-VKK3Q-CXVCJ-9G2XF-6Q84J
Professional Workstations N: 9FNHH-K3HBT-3W4TD-6383H-6XYWF
Professional Education: 6TP4R-GNPTD-KYYHQ-7B7DP-J447Y
Education: NW6C2-QMPVW-D7KKK-3GKT6-VCFB2
Education N: 2WH4N-8QGBV-H22JP-CT43Q-MDWWJ
Enterprise: NPPR9-FWDCX-D2C8J-H872K-2YT43
Enterprise N: DPH2V-TTNVB-4X9Q3-TJR4H-KHJW4
Enterprise G: YYVX9-NTFWV-6MDM3-9PT4T-4M68B
Enterprise G N: 44RPN-FTY23-9VTTB-MP9BX-T84FV
Enterprise LTSC 2019: M7XTQ-FN8P6-TTKYV-9D4CC-J462D
Enterprise N LTSC 2019: 92NFX-8DJQP-P6BBQ-THF9C-7CG2H
Enterprise LTSB 2016: DCPHK-NFMTC-H88MJ-PFHPY-QJ4BJ
Enterprise N LTSB 2016: QFFDN-GRT3P-VKWWX-X7T3R-8B639
Windows 10 Core: 33QT6-RCNYF-DXB4F-DGP7B-7MHX9
Windows 10 S (Lean): NBTWJ-3DR69-3C4V8-C26MC-GQ9M6
Windows 10 Pro build 10240: VK7JG-NPHTM-C97JM-9MPGT-3V66T


Saturday 26 October 2019

How to Install Eclipse IDE on Ubuntu 19.10

Harry
    Eclipse is a well known Integrated Development Environment. It is used by developers all around the world to code their application, it is primarily developed in Java, but programmers can use it to code their applications in various languages like C/C++, COBOL, Fortran, Perl, PHP, Python, Ruby on Rails etc. It is a cross platform application and runs fine on Microsoft Windows, Linux, Solaris and Mac OS.


Installation instructions:

    Installing Eclipse on ubuntu is not very complex process, first of all make sure to install Java on your Linux system, Eclipse needs java as pre-requisite , run following command to install java on your ubuntu 19.10 system.

 for Java 7


sudo apt-get install openjdk-7-jdk

or for Install Java 8  Click links
or for Install Java 9  Click links
or for Install Java 11  Click links
or for Install Java 13  Click links 
 
  It might take some moments to download and install java, once the installation is complete, download Eclipse according to your operating system architecture.

    run below commands one by one:


$ cd Downloads

$ tar –xvf lipse-jee-2019-09-R-linux-gtk-x86_64.tar.gz

$ sudo mv eclipse /opt

sudo gedit /usr/share/applications/eclipse.desktop

It will launch an empty file, copy and paste the followings into this empty file, as shown in following.

[Desktop Entry]

Name=Eclipse

Type=Application

Exec=/opt/eclipse/eclipse

Terminal=false

Icon=/opt/eclipse/icon.xpm

Comment=Integrated Development Environment

NoDisplay=false

Categories=Development;IDE;

Name[en]=eclipse.desktop

Save the file, and now run following command on terminal to automatically install this desktop file on your ubuntu system.

$ sudo desktop-file-install /usr/share/applications/eclipse.desktop

As last step of the install, go to /usr/local/bin and create eclipse symlink, following two commands should take care of this:

$ cd /usr/local/bin

$ sudo ln -s /opt/eclipse/eclipse

Eclipse has been installed successfully, launch it from Applications menu.

It will ask you to specify workspace when loaded, once done, main page will be loaded.


How to install Oracle Java 13 on Ubuntu 18.04, 16.04, 19.04, 19.10

Harry
Oracle will provide Java 13 as the Oracle OpenJDK release using the open source GNU General Public License v2, with the Classpath Exception (GPLv2+CPE), and also under a commercial license for those using the Oracle JDK release as part of an Oracle product or service, or who do not wish to use open source software.


Java 13 Changelog

Five enhancements are delivered with Java 13, inclusive of two preview features:

JEP 350 – Dynamic CDS Archives: Extends application class-data sharing to allow the dynamic archiving of classes at the end of Java application execution. The archived classes will include all loaded application classes and library classes that are not present in the default, base-layer CDS archive.

JEP 351 – ZGC: Uncommit Unused Memory: Enhances the z garbage collector to return unused heap memory to the operating system.

JEP 353 – Reimplement the Legacy Socket API:  Replaces the underlying implementation used by the java.net.Socket and java.net.ServerSocket APIs with a simpler and more modern implementation that is easy to maintain and debug. The new implementation will be easy to adapt to work with user-mode threads, a.k.a. fibers, currently being explored in Project Loom.

JEP 354 – Switch Expressions (Preview): Extends switch so it can be used as either a statement or an expression, which will simplify everyday coding, and prepare the way for the use of pattern matching (JEP 305) in switch.

JEP 355 – Text Blocks (Preview): Adds text blocks to the Java language, which will simplify the task of writing Java programs by making it easy to express strings that span several lines of source code, while avoiding escape sequences in common cases; enhance the readability of strings in Java programs that denote code written in non-Java languages; as well as support migration from string literals by stipulating that any new construct can express the same set of strings as a string literal, and interpret the same escape sequences, and be manipulated like a string literal.

Java continues to be the #1 programming language of choice by software programmers.  And as the on-time delivery of improvements with Java 13 demonstrates, through continued thoughtful planning and ecosystem involvement, the Java platform is well-positioned for modern development and growth in the cloud.

 See announcement for full details


Installation instructions:

Open terminal from Unity Dash, App Launcher, or via Ctrl+Alt+T keys. When it opens, run below commands one by one:

$ sudo add-apt-repository ppa:linuxuprising/java

$ sudo apt-get update

$ sudo apt-get install oracle-java13-installer

To set Oracle Java 13 by default, do:

$ sudo apt-get install oracle-java13-set-default
 
Check Installed Version
  
java --version


  Option, remove Java 13:

$ sudo apt-get remove oracle-java13-installer


Sunday 1 September 2019

Upgrade Oracle 11g to 18c

Harry

Environment

OS: CEntOS 6.10
Oracle: Oracle Database 11.2.0.4 SE with JUL2019 PSU Applied
Memory: 4G
HDD: 100G

Prerequisites

Verify all prerequisites packages are installed on the server. Install oracle-database-preinstall-18c package before upgrading. If you have internet access on the server you can download and install the package with yum command or you can download package from internet and install manually. Use link below to download it manually.


Execute yum command to download and install pre-install package.
yum -y install oracle-database-preinstall-18c


Create new Oracle Home for  Oracle 18c.
mkdir -p /u01/app/oracle/product/18.0.0/dbhome_1
chown -R oracle:oinstall /u01/app/oracle/product/18.0.0/dbhome_1/


Extract 18c source file to newly created Oracle Home.
su - oracle
cd /media/sf_Softwares/Oracle
unzip LINUX.X64_180000_db_home.zip -d /u01/app/oracle/product/18.0.0/dbhome_1


Add new Oracle Home setting to /etc/oratab. Make sure to comment or remove the older OH.
vi /etc/oratab


Modify response file.
Once extract is completed, change directory to 18c Oracle Home. Change environment variables and set recently created directory as ORACLE_HOME. Copy response file to some other location. This will preserve original respose file. Modify respose file till the Grid Option.
Set all the parameters value till you reach Grid Options.

. oraenv

cd $ORACLE_HOME
cd install/response/
cp db_install.rsp ~oracle/
cd ~oracle/
vi db_install.rsp 


Modify response file and fill-up all the required parameter values.  Before updating response file it has contents as below.

Once it has been modified and updated it looks as below.


Execute command below to start installation
./runInstaller -silent -ignorePrereq -waitforcompletion -responseFile ~oracle/db_install.rsp SECURITY_UPDATES_VIA_MYORACLESUPPORT=false DECLINE_SECURITY_UPDATES=true


Execute root.sh as  user root described in installation output.
/u01/app/oracle/product/18.0.0/dbhome_1/root.sh


Download and extract pre-upgrade file to new Oracle home location.

Download the latest "preupgrade.jar" file from MOS 884522.1.

cd /media/sf_Softwares/Oracle/
ls
unzip preupgrade_181_cbuild_7_lf.zip -d /u01/app/oracle/product/18.0.0/dbhome_1/rdbms/admin/


Executed pre-upgrade jar before upgrade. Make sure all issue reported should be fixed before upgrading database to latest version.


Output should be something like below. Fixes are available at the buttom.


Fix all the issues and execute preupgrade_fixups.sql

@/u01/app/oracle/cfgtoollogs/orcl/preupgrade/preupgrade_fixups.sql


Recompile all invalid objects
@?/rdbms/admin/utlrp


Stop database and listener process that is running from 11g
shutdown immediate
lsnrctl stop


Copy network configuration files, spfile and password files to new ORACLE_HOME.


Start listener and database in upgrade mode
Change environments to 18c
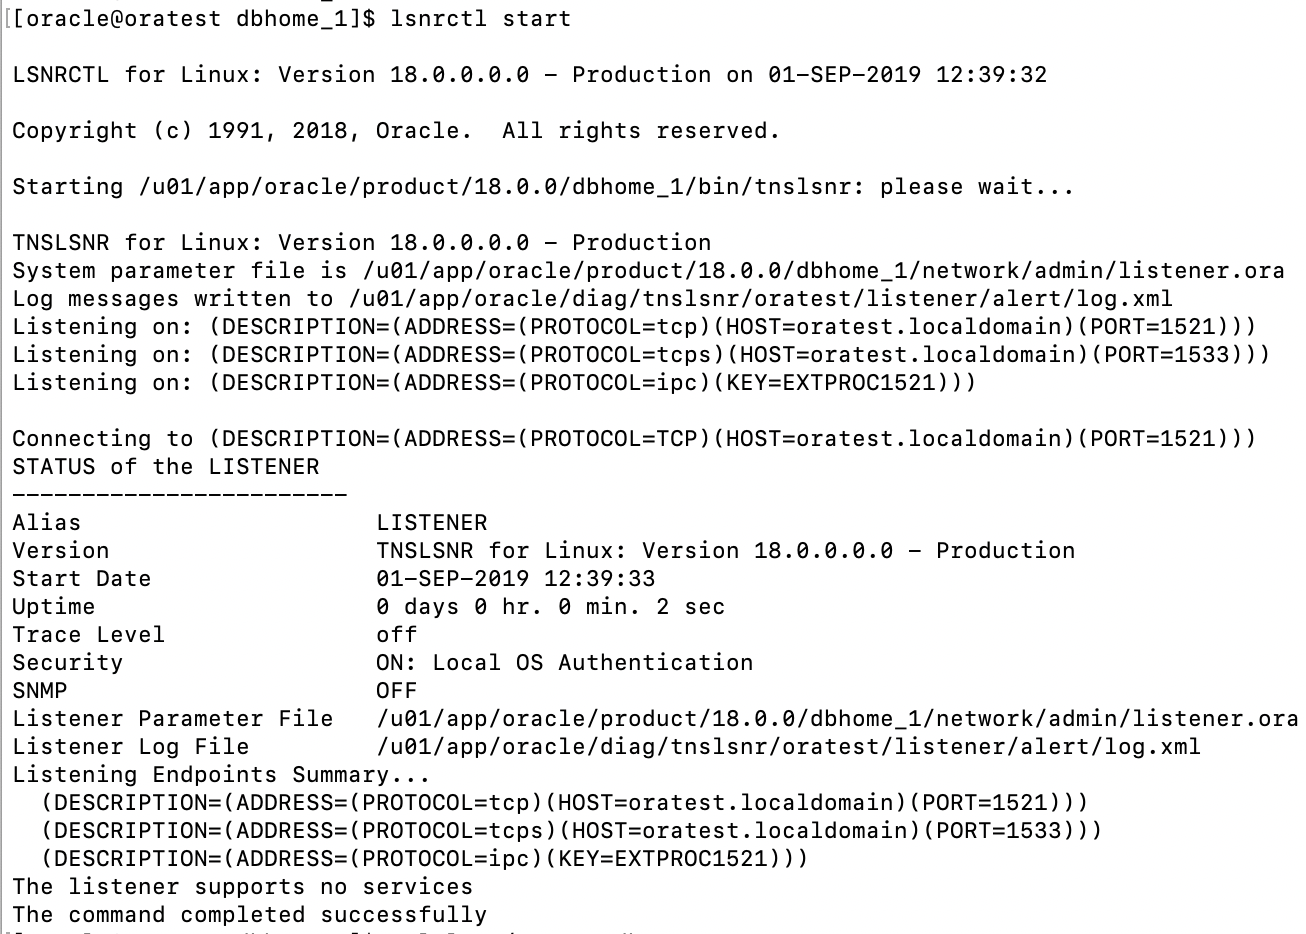
Start listener
Start database in upgrade mode

lsnrctl start
sqlplus / as sysdba
startup upgrade


Set following environments. Without these environment variable I had encountered error.
cat >> .bashrc
export LANG=en_US.UTF-8
export LC_ALL="en_US.UTF-8"
source .bash_profile 

echo $LANG
echo $LC_ALL

Error I have encountered:
[oracle@oratest ~]$ cat /u01/app/oracle/product/18.0.0/dbhome_1/cfgtoollogs/orcl/upgrade20190625090048/catupgrd_datapatch_upgrade.log
SQL Patching tool version 18.0.0.0.0 Production on Tue Jun 25 09:23:57 2019
Copyright (c) 2012, 2018, Oracle.  All rights reserved.

Log file for this invocation: /u01/app/oracle/cfgtoollogs/sqlpatch/sqlpatch_18753_2019_06_25_09_23_57/sqlpatch_invocation.log

Connecting to database...OK
Gathering database info...done
Bootstrapping registry and package to current versions...done
Error: prereq checks failed!
verify_queryable_inventory returned ORA-20001: Latest xml inventory is not loaded into table
Prereq check failed, exiting without installing any patches.

Please refer to MOS Note 1609718.1 and/or the invocation log
/u01/app/oracle/cfgtoollogs/sqlpatch/sqlpatch_18753_2019_06_25_09_23_57/sqlpatch_invocation.log
for information on how to resolve the above errors.

SQL Patching tool complete on Tue Jun 25 09:24:04 2019
[oracle@ oratest ~]$

Start Oracle database upgrading
Change directory to 18c ORACLE_HOME/bin
execute dbupgrade
cd $ORACLE_HOME/bin
./dbupgrade


Start database once up gradation is completed. Check timezone file version. If version of the file is less than 31 then apply timezone fix.

sqlplus / as sysdba
startup
SELECT * FROM v$timezone_file;


Top apply timezone fix start database in upgrade mode.
shutdown immediate
startup upgrade


Execute Timezone fix
SET SERVEROUTPUT ON
DECLARE
  l_tz_version PLS_INTEGER;
BEGIN
  l_tz_version := DBMS_DST.get_latest_timezone_version;

  DBMS_OUTPUT.put_line('l_tz_version=' || l_tz_version);
  DBMS_DST.begin_upgrade(l_tz_version);
END;
/


Start database normally and apply upgrades
shutdown immediate
startup

SET SERVEROUTPUT ON
DECLARE
  l_failures   PLS_INTEGER;
BEGIN
  DBMS_DST.upgrade_database(l_failures);
  DBMS_OUTPUT.put_line('DBMS_DST.upgrade_database : l_failures=' || l_failures);
  DBMS_DST.end_upgrade(l_failures);
  DBMS_OUTPUT.put_line('DBMS_DST.end_upgrade : l_failures=' || l_failures);
END;
/


Verify timezone file version.
SELECT * FROM v$timezone_file;

COLUMN property_name FORMAT A30
COLUMN property_value FORMAT A20

SELECT property_name, property_value
FROM   database_properties
WHERE  property_name LIKE 'DST_%'
ORDER BY property_name;


Execute post upgrade fixups once upgrade completes.
@/u01/app/oracle/cfgtoollogs/orcl/preupgrade/postupgrade_fixups.sql