Tuesday 28 February 2017

How to Install Stendhal 1.23 on Ubuntu 16.04, 16.10

Harry
   Stendhal is a fully fledged multiplayer online adventures game (MMORPG) developed using the Arianne game development system.
   Stendhal has a huge and rich world. You can explore cities, forest, mountains, plains and dungeons. You can fight monsters and become a hero


After an epic battle against evil forces, we released Stendhal 1.23: Cursed!
PS: If you are interested in contributing to Stendhal, please join us in #arianne-chat. Of course you can also join us just say hello :)


Installation instructions:

   The GetDeb repository contains the latest packages of Stendhal, available for Ubuntu 16.04, Ubuntu 16.10, and derivatives.

Opening terminal (Ctrl+Alt+T) and running the command:

Ubuntu 16.04 xenial
$ sudo sh -c 'echo "deb http://archive.getdeb.net/ubuntu xenial-getdeb games" >> /etc/apt/sources.list.d/getdeb.list'

$ wget -q -O - http://archive.getdeb.net/getdeb-archive.key | sudo apt-key add -

$ sudo apt-get update

$ sudo apt-get install stendhal

Ubuntu 16.10 yakkety

$ sudo sh -c 'echo "deb http://archive.getdeb.net/ubuntu yakkety-getdeb games" >> /etc/apt/sources.list.d/getdeb.list'

$ wget -q -O - http://archive.getdeb.net/getdeb-archive.key | sudo apt-key add -

$ sudo apt-get update

$ sudo apt-get install stendhal

How to Remove:

   To remove Stendhal, open terminal and run command:
 
$ sudo apt-get remove stendhal && sudo apt-get autoremoveus

   And you can remove the GetDeb repository by going to System Settings -> Software & Updates -> Other Software tab. 

How to Install ManaPlus 1.7.2.18 on Ubuntu 16.04, 16.10

Harry
   ManaPlus is extended client for Evol Online, The Mana World and similar servers based on eAthena fork. As a 2D style game, Evol Online aims to create a friendly environment where. people can escape reality and interact with others while enjoying themselves. through a fantasy style game. The Mana World (TMW) is a serious effort to create an innovative free and. open source MMORPG. TMW uses 2D graphics and aims to create a large and. diverse interactive world.


ManaPlus 1.7.2.18 Changelog:
  • fix: wrong buffer access.
  • fix: custom currency in shop items list.
  • fix: compilation warnings in some libs.
  • fix: possible use after free in web requests.
  • add: quests links in npc window.
  • add: show manaplus.log path in console at start.

Installation instructions:

   The GetDeb repository contains the latest packages of ManaPlus, available for Ubuntu 16.04, Ubuntu 16.10, and derivatives.

Opening terminal (Ctrl+Alt+T) and running the command:

Ubuntu 16.04 xenial

$ sudo sh -c 'echo "deb http://archive.getdeb.net/ubuntu xenial-getdeb games" >> /etc/apt/sources.list.d/getdeb.list'

$ wget -q -O - http://archive.getdeb.net/getdeb-archive.key | sudo apt-key add -

$ sudo apt-get update

$ sudo apt-get install manaplus

Ubuntu 16.10 yakkety

$ sudo sh -c 'echo "deb http://archive.getdeb.net/ubuntu yakkety-getdeb games" >> /etc/apt/sources.list.d/getdeb.list'

$ wget -q -O - http://archive.getdeb.net/getdeb-archive.key | sudo apt-key add -

$ sudo apt-get update

$ sudo apt-get install
manaplus


How to Remove:

   To remove ManaPlus, open terminal and run command:

$ $ sudo apt-get remove manaplus && sudo apt-get autoremoveus

   And you can remove the GetDeb repository by going to System Settings -> Software & Updates -> Other Software tab.


How to Install FlightGear 2017.1 on Ubuntu 16.04, 16.10

Harry
   The FlightGear development team is delighted to announce the v2017.1 "Bergen" release of FlightGear, the free, open-source flight simulator. This new version contains many exciting new features, enhancements and bugfixes. Highlights in this release include: Accurate buildings from OpenStreetMap, voice synthesis of tutorial instructions, improved rendering of Earth from orbit, and a more realistic blackout/redout system.


FlightGear 2017.1 release highlights:

Core

  • Support for additional layers of scenery, initially for use by OpenStreetMap buildings.

Aircraft Modeling

  • More realistic blackout/redout system based on studies for military training simulations (FGData commit 52e559)
  • Improved AI models for a number of aircraft, and AI schedules for an increasing number of airlines

Atmospheric Light Scattering

  • New shaders for drag chute animation, allowing to render flexing and deformation under stress
  • New "grain merge" and Fresnel option for environment reflections on the aircraft fuselage
Learn more in the Newsletter.

Environment Rendering

  • For rendering views from orbit, Earthview 2.0 is now available, with support for normal maps, better upper atmosphere edge, cloud relief shader, improved dawn zone, horizon estimation and improved resource management.

Performance

  • Canvas performance has been improved.
  • Support for SIMD operations added, improving performance on some architectures
  • AI performance has been improved

Usability

  • Bergen Airport, Flesland (ENBR) in Norway is the default airport for this release.
  • Tutorial instructions are now played through the built-in voice synthesis system, making them easier to follow.

Scenery

  • Accurate buildings generated through OpenStreetMap are now available via TerraSync. Buildings for the UK, Switzerland and large parts of Scandinavia are available already, with more to be generated in the future.
  • Improved scenery and terrain for the Azores

Canvas System

Highlighted new and improved aircraft

Bug fixes

  • Various bug fixes that cause crashes in multiplayer.
  • See our bugtracker for a list, albeit incomplete, of the bugs fixed in this release.

Installation instructions:

   The GetDeb repository contains the latest packages of FlightGear, available for Ubuntu 16.04, Ubuntu 16.10, and derivatives.

Opening terminal (Ctrl+Alt+T) and running the command:

Ubuntu 16.04 xenial

$ sudo sh -c 'echo "deb http://archive.getdeb.net/ubuntu xenial-getdeb games" >> /etc/apt/sources.list.d/getdeb.list'

$ wget -q -O - http://archive.getdeb.net/getdeb-archive.key | sudo apt-key add -

$ sudo apt-get update

$ sudo apt-get install flightgear

Ubuntu 16.10 yakkety

$ sudo sh -c 'echo "deb http://archive.getdeb.net/ubuntu yakkety-getdeb games" >> /etc/apt/sources.list.d/getdeb.list'

$ wget -q -O - http://archive.getdeb.net/getdeb-archive.key | sudo apt-key add -

$ sudo apt-get update

$ sudo apt-get install flightgear


Monday 27 February 2017

How to Install Simple Weather Indicator 0.9 on Ubuntu 16.04, 16.10, 17.04

Harry
     Simple Weather Indicator is an elegant and very simple weather indicator for Ubuntu unity and Gnome 3. It is developed with Python and uses an in-house free/open source Weather API called Eris to get the current weather condition of the user’s location.


Features
  • Simple & elegant
  •  Configurable
    •   Automatic/manual location detection
    •   Show/hide location
    •   Enable/disable indicator startup
    •   Temperature scale suppert (Celsius, Fahrenheit)
    •   Rounding weather temperature
  •  Feature-rich
    •   Overall weather condition
    •   Humdity level
    •   Wind speed
    •   Weather cloudiness
    •   Weather pressure
    •   Weather visibility
  •  Small footprint
  •  Available through PPA
  •  Free and public API (Eris Weather API)
  •  GPL v3.0 licensed
Simple Weather Indicator 0.9 Changelog:
  • Moved to Eris API
  • Added weather condition
  • Added humidity
  • Added wind
  • Added cloudiness
  • Added weather pressure
  • Added weather visibility
  • Fixed minor bugs

 Installation instructions: 
 
    We can add this PPA to Ubuntu Operating  Systems and install Simple Weather Indicator with few easy commands.

Open terminal and insert command line...


$ sudo add-apt-repository ppa:kasra-mp/ubuntu-indicator-weather

$ sudo apt-get update

sudo apt-get install indicator-weather

 Option remove Simple Weather Indicator, run following command in terminal:


$ sudo apt-get remove indicator-weather


How to Install HandBrake 1.0.3 on Ubuntu 16.04, 16.10

Harry
     HandBrake is a free and open-source video transcoder, originally developed in 2003 by Eric Petit (aka "titer" from his SVN repository username) to make ripping a film from a DVD to a data storage device easier. Since then, it has undergone many changes and revisions.
     HandBrake is available for Linux, macOS, and Windows. It uses third-party libraries such as Libav, libvpx, and x265.

HandBrake 1.0.3 Changelog:

Video
  •     Fixed H.264 decoding using Libav where the initial GOP was dropped
  •     Fixed 2-pass x265 encoding where the source header incorrectly specifies frame rate
  •     Fixed 2-pass encoding with bob deinterlace and constant frame rate
  •     Fixed a seek issue in Libav while reading MKV sources with embedded subtitles
  •     Fixed multiple issues preventing Libav from opening WMV sources properly
  •     Fixed miscellaneous issues in Libav
  •     Fixed memory leaks in OpenCL
  •     Improved sync for streams delayed by a large amount
Audio
  •     Fixed a Libav crash encoding AAC at very high bitrates
  •     Fixed a potential hang in Libav while decoding AAC
  •     Improved Libav audio sync with MP4 sources containing edit lists
  •     Improved mapping of single channel layouts to single channel layouts
Linux
  •     Fixed a potential crash when selecting video encoders
  •     Fixed various controls not applying values properly
Mac
  •     Fixed a crash when attempting to edit a queued job
  •     Improved audio start point to use edit lists when encoding using CoreAudio AAC
Windows
  •     Fixed Title Specific Scan for DVD/Blu-ray
  •     Fixed broken/missing NLMeans denoise tunes
  •     Fixed an issue that could cause error -17 when encoding using Intel QuickSync Video
  •     Fixed an issue where the SRT language code was not being set correctly


Installation instructions: 
 
    We can add this PPA to Ubuntu Operating  Systems and install HandBrake with few easy commands.

Open terminal and insert command line...

$ sudo add-apt-repository ppa:stebbins/handbrake-releases

$ sudo apt-get update

$ sudo apt-get install handbrake-gtk handbrake-cli

For those who have installed handbrake from Ubuntu’s main repository archive, remove it either via Ubuntu Software Center or using the command:

$ sudo apt-get remove handbrake && sudo apt-get autoremove


Facebook Single Name Trick (only 1min)

Harry
Today's I will show you how make single name on facebook. It's Very easy to use and simple tricks.


Note-This trick is easy to use and follow all step which i provie to you below.

Follow this steps


Step 1:First login ur facebook id 


Step 2: change Language to make tamil

Step 3:then go to settings & Privcay 


Step 4:there is first name click there to edit button..


Step 5:see this to image u have showing First name,Middle name and Last Name.clear that Middle name and Last Name make this field to empty 


Step 6:like this (see in img) u can choose ur any name to make single name there..


Step:7 And last and final click Review and Change .there u asking ur facebook password put ur passoword and click on save changes . and change Language to makeEnglsih(U.S).

Setp 8:Successfullly ur single name u can show on ur profile. 

Enjoy :))

Note : Once you have changed your name, you can make back the name change after sixty days..

Sunday 26 February 2017

How to Install Linphone 3.6.1 on Ubuntu 16.04, 16.10

Harry
   Linphone is an open source Voice Over IP phone (or SIP phone) that makes possible to communicate freely with people over the internet, with voice, video, and text instant messaging. available on mobile and desktop environments (iOS, Android, Windows Phone 8, Linux, Windows Desktop, MAC OSX) and on web browsers.


    Linphone makes use of the SIP protocol (an open standard for internet telephony) and can be used with any SIP VoIP operator, including our free SIP audio/video service.

Main features:
  •     Audio & video calls
  •     Multiple calls management
  •     Call transfer, pause and resume
  •     Audio conferencing (merge calls into a conference)
  •     Instant Messaging
  •     Pictures and files sharing
  •     Address Book
  •     Call History
  •     Display of advanced call statistics
  •     Echo Cancellation
  •     Quality of Service
  •     Secure communications: zRTP, TLS, SRTP
  •     Bluetooth headset support
  •     Languages: English, French, Japanese, Arabic
  •     Account creation assistant
  •     Dedicated tablet user interface
 
Installation instructions: 

   Open terminal and insert command line...

$ sudo add-apt-repository ppa:linphone/release

$ sudo apt-get update

$ sudo apt-get install linphone


How to Install UMLet 14.2 on Ubuntu 16.04, 16.10

Harry
   UMLet is a free, open-source UML tool with a simple user interface: draw UML diagrams fast, build sequence and activity diagrams from plain text, export diagrams to eps, pdf, jpg, svg, and clipboard, share diagrams using Eclipse, and create new, custom UML elements. UMLet runs stand-alone or as Eclipse plug-in on Windows, OS X and Linux.


UMLet 14.2 Changelog:
  • Fixed pixel displacements on exports
  • Improved relations
  • New option to embed pdf font
  • Many additional fixes
Installation instructions:

   The GetDeb repository contains the latest packages of UMLet, available for Ubuntu 16.04, Ubuntu 16.10, and derivatives.

Opening terminal (Ctrl+Alt+T) and running the command:

Ubuntu 16.04 xenial


$ sudo sh -c 'echo "deb http://archive.getdeb.net/ubuntu xenial-getdeb apps" >> /etc/apt/sources.list.d/getdeb.list'

$ wget -q -O- http://archive.getdeb.net/getdeb-archive.key | sudo apt-key add -

$ sudo apt-get update

$ sudo apt-get install
umlet

Ubuntu 16.10 yakkety

$ sudo sh -c 'echo "deb http://archive.getdeb.net/ubuntu yakkety-getdeb apps" >> /etc/apt/sources.list.d/getdeb.list'

$ wget -q -O- http://archive.getdeb.net/getdeb-archive.key | sudo apt-key add -

$ sudo apt-get update

$ sudo apt-get install
umlet

Saturday 25 February 2017

How to Install Docear 1.2 on Ubuntu 16.04, 16.10

Harry
   Docear is a unique solution to academic literature management and possesses three features that you will not find anywhere else, namely

  a) A unique approach for organizing literature, focusing on your annotations instead of documents
  b) A unique approach for drafting and writing your assignments, papers, books, thesis, etc.
  c) A research paper recommender systems that recommends papers that are entirely free, instantly to download, and tailored to your information needs


    Due to these three unique features, Docear will fundamentally change your way of organizing, creating, and discovering academic literature. But before explaining these three unique features in more detail, have a look what other researchers and students are saying about Docear…


Features
  •     Unique concept for organizing literature
    •  Single-section user-interface
    •  Focus on annotations instead of documents
  •     Unique ‘literature suite’ approach allowing, among others, to draft papers easily with:
    •  Mind mapping
    •  PDF annotation import (highlighted text, comments, bookmarks)
    •  Reference management (JabRef integration)
    •  File management
    •  Academic search engine*
    •  Add-On for MS-Word
  •     Unique recommender system with 2.000.000+ free academic PDFs
  •     Platform independent (Windows, MacOS, Linux)
  •     PDF Metadata extraction and retrieval (from database with 10.000.000+ entries)
  •     Monitoring function to watch folders for new PDFs
  •     Very powerful search & filter function (2-dimensional tags/attributes)
  •     Extended formatting options (adding screenshots, LaTeX formulas, formatting text)
  •     Multi-Language
  •     Open Source (GPL)
  •     Open data formats such as PDF, XML, and BibTeX
  •     Free to use
  •     Full control over your data (no registration required)
  •     Multiple project support
  •     Not evil
  •     Online backup (optional)
  •     Online viewer**
  •     Mobile version*
  •     Real-time Collaboration*
  •     Synchronization between different devices*
* coming soon
** partly implemented

Docear  1.2 Changelog:
  •     Improved PDF Metadata Retrieval
  •     Faster PDF Monitoring

Installation instructions:

   The GetDeb repository contains the latest packages of Docear, available for Ubuntu 16.04, Ubuntu 16.10, and derivatives.

Opening terminal (Ctrl+Alt+T) and running the command:

Ubuntu 16.04 xenial

$ sudo sh -c 'echo "deb http://archive.getdeb.net/ubuntu xenial-getdeb apps" >> /etc/apt/sources.list.d/getdeb.list'

$ wget -q -O- http://archive.getdeb.net/getdeb-archive.key | sudo apt-key add -

$ sudo apt-get update

$ sudo apt-get install
docear

Ubuntu 16.10 yakkety

$ sudo sh -c 'echo "deb http://archive.getdeb.net/ubuntu yakkety-getdeb apps" >> /etc/apt/sources.list.d/getdeb.list'

$ wget -q -O- http://archive.getdeb.net/getdeb-archive.key | sudo apt-key add -

$ sudo apt-get update

$ sudo apt-get install
docear


Friday 24 February 2017

How to install ImageMagick 7.0.5 released on Ubuntu 16.04, 16.10

Harry
    ImageMagick is a software suite to create, edit, compose, or convert bitmap images. It can read and write images in a variety of formats (over 200) including PNG, JPEG, JPEG-2000, GIF, TIFF, DPX, EXR, WebP, Postscript, PDF, and SVG. Use ImageMagick to resize, flip, mirror, rotate, distort, shear and transform images, adjust image colors, apply various special effects, or draw text, lines, polygons, ellipses Bézier curves.


Features and Capabilities

Here are just a few examples of what ImageMagick can do:
  •     Format conversion: convert an image from one format to another (e.g. PNG to JPEG).
  •     Transform: resize, rotate, deskew, crop, flip or trim an image.
  •     Transparency: render portions of an image invisible.
  •     Draw: add shapes or text to an image.
  •     Decorate: add a border or frame to an image.
  •     Special effects: blur, sharpen, threshold, or tint an image.
  •     Animation: create a GIF animation sequence from a group of images.
  •     Text & comments: insert descriptive or artistic text in an image.
  •     Image gradients: create a gradual blend of one color whose shape is horizontal, vertical, circular, or ellipical.
  •     Image identification: describe the format and attributes of an image.
  •     Composite: overlap one image over another.
  •     Montage: juxtapose image thumbnails on an image canvas.
  •     Generalized pixel distortion: correct for, or induce image distortions including perspective.
  •     Morphology of shapes: extract features, describe shapes and recognize patterns in images.
  •     Delineate image features: Canny edge detection, mean-shift, Hough lines.
  •     Motion picture support: read and write the common image formats used in digital film work.
  •     Image calculator: apply a mathematical expression to an image or image channels.
  •     Connected component labeling: uniquely label connected regions in an image.
  •     Discrete Fourier transform: implements the forward and inverse DFT.
  •     Perceptual hash: maps visually identical images to the same or similar hash-- useful in image retrieval, authentication, indexing, or copy detection as well as digital watermarking.
  •     Complex text layout bidirectional text support and shaping.
  •     Color management: accurate color management with color profiles or in lieu of-- built-in gamma compression or expansion as demanded by the colorspace.
  •     High dynamic-range images: accurately represent the wide range of intensity levels found in real scenes ranging from the brightest direct sunlight to the deepest darkest shadows.
  •     Encipher or decipher an image: convert ordinary images into unintelligible gibberish and back again.
  •     Virtual pixel support: convenient access to pixels outside the image region.
  •     Large image support: read, process, or write mega-, giga-, or tera-pixel image sizes.
  •     Threads of execution support: ImageMagick is thread safe and most internal algorithms are OpenMP-enabled to take advantage of speed-ups offered by multicore processor chips.
  •     Distributed pixel cache: offload intermediate pixel storage to one or more remote servers.
  •     Heterogeneous distributed processing: certain algorithms are OpenCL-enabled to take advantage of speed-ups offered by executing in concert across heterogeneous platforms consisting of CPUs, GPUs, and other processors.
  •     ImageMagick on the iPhone: convert, edit, or compose images on your iPhone.
  
ImageMagick 7.0.5 changelog :

  • Fix Spurious memory allocation message (reference https://www.imagemagick.org/discourse-server/viewtopic.php?f=3&t=31438).
     
Installation instructions: 

   Open terminal and insert command line...


$ wget http://www.imagemagick.org/download/ImageMagick.tar.gz

$ tar -xvf ImageMagick.tar.gz

$ cd ImageMagick-7.*

$ ./configure

$ make

$ sudo make install

sudo ldconfig /usr/local/lib

 Start ImageMagick, simply type ‘display’

$ display


How to install Endless Sky 0.9.6 released on Ubuntu

Harry
     Endless Sky is a sandbox-style space exploration game similar to Elite, Escape Velocity, or Star Control. You start out as the captain of a tiny space ship and can choose what to do from there. The game includes a major plot line and many minor missions, but you can choose whether you want to play through the plot or strike out on your own as a merchant or bounty hunter or explorer.


Endless Sky Changelog:
  • Bug fixes:
    • Coalition jobs will now "repeat" instead of only being offered once.
    • Typo fixes.
    • Fixed a bug that caused wildly inaccurate depreciation values on some computers.
    • Fixed a crash due to responding to mouse clicks when the player's flagship is dead.
    • Fixed a bug where "surveillance" ships never succeed in scanning.
    • Saved games on planets that were created by events now load correctly.
    • Fixed incorrect accelerator hints being displayed in the info panel.
    • Hopefully fixed the bug of the "last" sound not loading properly on some Windows systems.
    • "Entering" ships no longer forget their destination if the game is reloaded.
    • Clicking and dragging now only selects ships if no other panel was open when clicking.
    • Fixed a bug that kept the "Sad Archie" mission from working in 0.9.5.
    • Fixed depreciation not being applied to auto-sold fighters and outfits.
    • Made it so you can't hail wormholes, even if they're marked as "inhabited."
    • If you're in an uninhabited system, fixed how commodity prices in other systems show up in the map.
    • Made it so the first TMBR mission doesn't get offered on pirate worlds.
    • Fixed derelict ships that had been captured reappearing.
    • Fixed the NPC message showing multiple times if you capture a ship you needed to "evade."
    • The selected planet is now cleared in the map if you change your destination via the jump key.
    • Fixed shipyard and outfitter maps showing what's available in unexplored systems.
  • Game content:
    • Updated the scanner descriptions to describe the benefit of multiple scanners.
    • Drug running missions now only get offered in human space.
    • Added hail messages for friendly pirates.
    • The Coalition intro mission no longer assumes you have already met the Hai.
    • New landscape images.
    • Added messages when you succeed in destroying each "scattered remnant" Korath fleet.
    • Made the "Defend Spera Anatrusk" battle a little bit easier.
    • Added images for all the Coalition outfits and unique sounds for all their weapons.
    • Korath exile worlds no longer fine you for illegal cargo.
    • The TMBR missions can no longer interrupt missions from the main story line.
    • The first part of the Syndicate Capture mission now requires your escorts to accompany you.
    • Fixed an incorrectly set "habitable" zone in the Dokdobaru system.
    • Switched back to the full-resolution icon on Mac OS X (rather than the "window icon").
    • Added "autosave" tags to key missions in the Wanderer story line.
    • Reduced the Unfettered jump drive payoff to be more in line with the drive's depreciated value.
  • Game mechanics:
    • Made depreciation happen about three times slower.
    • Eliminated death benefits, since depreciation does a better job of balancing capture and plunder.
    • Drag now applies to the acceleration from firing weapons and being hit by them.
    • Escorts now ignore orders (except "hold position") if you're jumping or in another system.
    • You can now select a planet in the map to have the autopilot land there when it reaches that system.
    • You can now hail dominated planets to release them from paying tribute to you.
    • Auto-aiming now takes "random velocity" into account, making the Bombardment Turret more accurate.
  • User interface:
    • Added a preference to highlight your flagship to make it easier to distinguish from other ships.
    • When naming a new ship, added a button to have the game propose a random civilian name.
    • The zooming of the main view now pauses whenever it is not active.
    • In the main menu, the "New Pilot" shortcut now only works if no pilot is loaded.
    • Escort target brackets no longer show up for escorts that have not taken off yet.
    • Reduced the number of scanning warnings that display at the same time.
    • Added messages that tell you if someone succeeds in scanning your cargo or outfits.
    • The "fail" noise no longer plays over and over if you hold the jump key while out of fuel.
    • Ships exiting wormholes no longer make the "exiting hyperspace" noise.
  • Under the hood:
    • The help messages for new players are now configurable via a text file. 

Installation instructions:

 Opening terminal (Ctrl+Alt+T) and running the command:

$ sudo add-apt-repository ppa:mzahniser/endless-sky

$ sudo apt-get update

$ sudo apt-get install endless-sky

Thursday 23 February 2017

NethServer 7.3 Installation and Review on VMware

Harry
NethServer 7.3 Installation
NethServer 7.3 Installation, Configuration and Review on VMware

This tutorial shows NethServer 7.3 Installation, Configuration and Review on VMware Workstation/Player step by step. We also install VMware Tools (Open VM Tools) on NethServer for better VM performance and usability. This tutorial is also helpful to installing NethServer 7.3 on physical computer or bare-metal server hardware.

NethServer 7.3 Installation Steps:

  1. Download NethServer 7.3 ISO
  2. Create Virtual Machine on VMware Workstation/Player
  3. Start NethServer Installation
  4. NethServer Initial Configuration
  5. Install VMware Tools (Open VM Tools) on NethServer 7.3
  6. NethServer 7.3 Review

NethServer 7.3 Installation, Configuration and Review on VMware


What is NethServer?

NethServer is a CentOS-based Linux distribution for servers. NethServer offers number of built-in modules that can be used to turn any systems into a mail, Web, Proxy, DNS, FTP, Cloud, IDS, Samba, or VPN servers instantly within few minutes. It also includes a comprehensive web-based user interface that simplifies common administration tasks and enables single-click installation of several pre-configured modules. NethServer is designed primarily for small offices and medium-size enterprises.
NethServer Website: https://www.nethserver.org/

NethServer 7.3 New Features and Improvements

NethServer 7.3 is now able to act as a Samba Active Directory Controller. NethServer can replace a Microsoft Active Directory Domain Controller Native MS-Windows management tools, like RSAT tools and AD PowerShell are compatible with NethServer Group policies can be deployed through native MS-Windows tools Windows workstations can seamlessly join the AD Domain, no more registry tweaks are needed. NethServer 7 brings a centralized account management (so-called 'multi-site') supporting authentication and authorization against either a local or remote accounts provider.


NethServer 7.3 Minimum System Requirements

  1. 64 bit CPU (x86_64).
  2. 1 GB of RAM.
  3. 10 GB of disk space.
  4. At least 2 disks is recommended to setup a RAID 1. The RAID software will ensure data integrity in case of a disk failure.
Hope you found this NethServer 7.3 installation, configuration and review tutorial helpful and informative. Please consider sharing it. Your feedback and questions are welcome!

Hacking Wireless Networks - The Andreas Kolokithas full Pdf

Harry
DISCLAIMER: Following data/info/files are not owned/made/uploaded by latesttrickes On our last article about a lot of people asked about Hacking Wireless Networks - The  Andreas Kolokithas full PDF


The content of this book must be used only for educational purposes. The author does not have any responsibility if the attacking techniques that are described are used to gain unauthorized access or cause any damage to wireless networks.

Here Download Also Module and Lab PDf File..


 CONTENTS

1. Wireless Networking Background
1.1 The IEEE 802.11 Standard and Wi-Fi
1.2 Components of a Wireless Network
1.3 Wireless Architectures
1.4 Wireless Network Operation
1.5 Structure of Wireless Transmission Messages
1.6 Review Questions
2. Wireless Security Background
2.1 WEP Security
2.2 WEP Security Model
2.3 WEP Authentication Phase
2.4 WEP Encryption Phase
2.5 WEP Keys
2.5.1 Default Keys
2.5.2 Key Mapping Keys
2.6 WEP Security Issues
2.6.1 The standard downgrades the role of security
2.6.2 Authentication
2.6.3 Replay Protection
2.6.4 Integrity Protection
2.6.5 Key Management
2.6.6 Short Initialization Vector
2.6.7 Weak RC4 Keys
2.7 The IEEE 802.11i Standard
2.8 Transitional Security Network (TSN/WPA)
2.9 Robust Security Network (RSN/WPA2)
2.10 TSN/RSN Key Hierarchy
2.11 TSN/RSN Authentication
2.11.1 Preshared Key Authentication
2.11.2 802.1X Authentication
2.12 TSN/RSN Encryption
2.12.1 Temporal Key Integrity Protocol (TKIP)
2.12.2 Counter Mode CBC MAC Protocol (CCMP)
2.13 Technology Comparison (WEP,WPA,WPA2)
2.14 Wi-Fi Protected Setup (WPS)
2.15 Review Questions
3. Lab Setup – Use the right tools
3.1 Introduction
3.2 Lab Architecture
3.3 Required Tools
3.3.1 Hardware
3.3.2 Virtualization Platform
3.3.3 Security Tools
3.4 Installation of the Virtual Platform
3.5 Installation of the Guest Operating System (attacker’s machine)
3.6 Installing the Security Tools
3.6.1 Aircrack-ng Suite
3.6.2 Wireshark
3.6.3 Kismet
3.6.4 MDK3
3.6.5 TCPreplay
3.6.6 GHex
3.6.7 Hydra
3.6.8 Reaver
3.6.9 FreeRADIUS WPE
3.6.10 Asleap
3.6.11 Cowpatty
3.7 Review Questions
4. Discover Wireless Networks
4.1 Scope
4.2 Methodology Overview
4.3 Scenarios
4.3.1 Scenario #1: Active Discovery – Visible SSID
4.3.2 Scenario #2: Passive Discovery – Visible SSID
4.3.3 Scenario #3: Active Discovery – Hidden SSID
4.3.4 Scenario #4: Passive Discovery – Hidden SSID
4.3.5 Scenario #5: Active Discovery – Hidden SSID
4.4 Review Questions
5. Bring Down a Wireless Networks
5.1 Scope
5.2 Methodology Overview
5.3 Scenarios
5.3.1 Scenario #1: Authentication Request Flooding
5.3.2 Scenario #2: Deauthentication Attack
5.3.3 Scenario #3: Disassociation Attack
5.3.4 Scenario #4: CTS Attack
5.3.5 Scenario #5: Beacon Flooding Attack
5.4 Review Questions
6. Bypass Authentication Mechanisms
6.1 Scope
6.2 Methodology Overview
6.3 Scenarios
6.3.1 Scenario #1: Bypass Open Authentication
6.3.2 Scenario #2: Bypass MAC Filtering
6.3.3 Scenario #3: Bypass Shared Key Authentication
6.3.4 Scenario #4: Bypass 802.1X Authentication
6.4 Review Questions
7. Crack WEP Encryption
7.1 Scope
7.2 Methodology Overview
7.3 Scenarios
7.3.1 Scenario #1: Crack the WEP key using the Access Point and a connected Client
7.3.2 Scenario #2: Crack the WEP key using only the Access Point
7.3.3 Scenario #3: Crack the WEP key using only the Client
7.4 Recovered WEP Key Usage
7.4.1 Connect to a WEP Secured Wireless Network
7.4.2 Passively Decrypt WEP encrypted transmissions
7.5 Review Question
8. Crack WPA/WPA2 Encryption
8.1 Scope
8.2 Methodology
8.3 Scenarios
8.3.1 Scenario #1: Crack the WPA/WPA2 Passphrase using the Access Point and a
connected Client
8.3.2 Scenario #2: Crack the WPA/WPA2 Passphrase using only the Wireless Client
8.4 Revovered WPA/WPA2 Passphrase Usage
8.4.1 Scenario #1: Connect to a WPA/WPA2 Secured Wireless Network
8.4.2 Scenario #2: Passively Decrypt WPA/WPA2 Encrypted Transmissions
8.5 Review Questions
9. Speed Up the Cracking Process
9.1 Scope
9.2 Methodology Overview
9.3 Scenarios
9.3.1 Scenario #1: Precompute the PSK
9.3.2 Scenario #2: Use Multicore Processing
9.4 Review Questions
10 Attack Wi-Fi Protected Setup (WPS)
10.1 Scope
10.2 Methodology Overview
10.3 Scenarios
10.3.1 Scenario #1: Recover the PIN from a WPS enabled Access Point
10.4 Review Questions
11 Attack the Access Point Management GUI
11.1 Scope
11.2 Methodology Overview
11.3 Scenarios
11.3.1 Scenario #1: Use the default login credentials
11.3.2 Scenario #2: Dictionary/Brute Force Attack
11.3.3 Scenario #3: Password Sniffing Attack
11.4 Review Questions

 Download now-click here 

Note :- These hacking ebooks are only for the ethical knowledge purpose and must not be used for illegal purposes.

Hacking Computer by Gary Hall Full Pdf

Harry
DISCLAIMER: Following data/info/files are not owned/made/uploaded by latesttrickes On our last article about a lot of people asked about Hacking Computer by Gary Hallfull PDF 


Computer Hacking, Security Testing, Penetration,Testing And Basic Security

Here Download Also Module and Lab PDf File..

Introduction
PART I: INTO THE WORLD OF HACKING
Chapter 1: What is Hacking?
Chapter 2: Hacking and Basic Security
Chapter 3: The Ethical Hacking Plan
Chapter 4: The Hacker’s Methodology
PART II: THE HACK ATTACK
Chapter 5: How to Hack a Smartphone
Chapter 6: How to Hack Operating Systems
Chapter 7: Social Engineering Hacking
Chapter 8: Physical Security
Chapter 9: How to Hack Passwords
Chapter 10: Hacking Websites and Web Applications
Chapter 11: Hacking Wireless Networks
PART III: THE AFTERMATH
Chapter 12: Why Hacking Is Absolutely Necessary
Chapter 13: The Do’s and Don’ts of Hacking
Chapter 14: Predicting the Future of Hacking

Download Now -Click here


Note :- These hacking ebooks are only for the ethical knowledge purpose and must not be used for illegal purposes.

Viewing image using Gwenview on Ubuntu

Harry

By default ubuntu comes with gnome image viewer for viewing image on your computer, but the gnome image viewer is not very good, it is slow and doesn't show image nicely. I need a better image viewer on my ubuntu.


The solution is to use program called 'gwenview', 'gwenview' is a very nice looking, easy to use and fast image viewer on the planet, i love it.

To install 'gwenview' is simple as this:
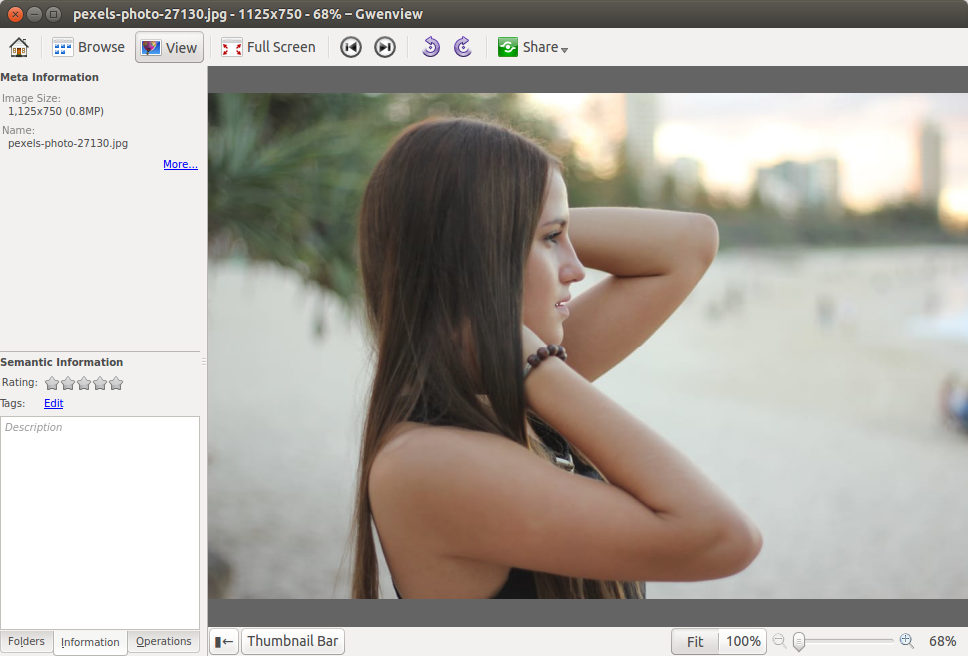
sudo apt-get install gwenview
Once installed you can run it, by search for 'gwenview' on ubuntu dash and click it to open the program.


Gwenview is simply the best image viewer on ubuntu that i have seen so far, i definitely use this instead of the default gnome viewer.

Comparing two files using Kompare on Ubuntu

Harry
Comparing two files using Kompare on Ubuntu

On ubuntu you can compare two identical files using program called 'kompare', let say you have two config files with same name and structure, you have no idea what are the differences between the two.

You will need a program that can compare two different files, you can use a command line tool called 'diff', but for more convenient we need to use graphical program, therefore we need 'kompare'.

'Kompare' is a GUI program for showing differences between two files, 'kompare' can highlight the differences between two files, so it's much easier to read for us.

You can install 'kompare' on ubuntu like this:
sudo apt-get install kompare
Let's do a little test

  • create config.json file with this content :
  • {
    "mode" : "race",
    "type" : "red",
    "status" : "active",
    "flag" : "true"
    }
  • copy the config.json into new file called config2.json
  • cp config.json config2.json
  • edit content of config2.json like this:
  • {
    "mode" : "race",
    "type" : "red",
    "status" : "active",
    "flag" : "true",
    "number" : "2"
    }
  • use 'kompare' to compare the two files and see what happen


Comparing two files using Kompare on Ubuntu

Comparing two files using Kompare on Ubuntu

Wednesday 22 February 2017

How to disable and enable ethernet on Ubuntu

Harry

If you are using ethernet cable for your network connection and you want to disable it without unplug the cable, you can do it from the command line.

Ubuntu has specific command dedicated for this type of situation, with this command you can disable and enable any network interfaces that you have including ethernet (usually eth0).

First you want to run 'ifconfig' command to see which network interface you want to disable, let's say the ethernet is eth0 and you want to disable it, so you run this:
sudo ip link set down eth0
You can run 'ifconfig' and see the eth0 should be gone, if you want to enable eth0 again, you can do this:
sudo ip link set up eth0
Using the command above, you can enable and disable any network interface basically, not just eth0, it could be eth1, eth2, wlan0, wlan1, etc.
sudo ip link set [up/down] [network-interface]

MX Linux 16 Installation and Review on VMware

Harry
MX Linux 16 Installation and Review
MX Linux 16 Installation and Review on VMware

This tutorial shows MX Linux 16 installation and review on VMware Workstation/Player step by step. This tutorial is also helpful to install MX Linux on physical computer or laptop hardware. We also install VMware Tools on MX Linux 16 Metamorphosis for better performance and usability features such as Fit Guest Now, Drag-Drop File and Clipboard Sharing.

MX Linux 16 Installation Steps:

  1. Download MX Linux 16 ISO
  2. Create Virtual Machine on VMware Workstation/Player
  3. Start MX Linux Installation
  4. Install VMware Tools
  5. Test VMware Tools Features: Fit Guest Now, Drag-Drop File and Clipboard Sharing
  6. MX Linux 16 (Metamorphosis) Review

Installing MX Linux 16 and Review on VMware


What is MXLinux

MX Linux is a mid-weight Linux operating system based on Debian stable and using core antiX components, with additional software created and/or packaged by the MX community. It is developed as a cooperative venture between the antiX and former MEPIS communities, aiming to use the best tools and talents from each of these distributions. Using Xfce as the default desktop, it is a mid-weight operating system designed to combine an elegant and efficient desktop with simple configuration, high stability, solid performance and medium-sized footprint.
MX Linux Website: https://mxlinux.org/

MX Linux 16 New Features and Improvements

MX Linux 16 (Metamorphosis) is built on the reliable and stable Debian Jessie (8.6) base with extra enhancements from the antiX live system, it also comes with numerous up to date applications provided by the MX Linux packagers. Just like previous versions of MX, this release defaults to sysVinit. It's available in 32 and 64 bit. Both iso files weigh in at around 1.2GB in size.  While based on Debian's Stable branch, MX Linux uses the SysVInit software rather than the newer systemd init technology. It also comes with numerous up-to-date applications provided by the MX Linux packagers. Key default applications are Firefox 50.0.2, VLC 2.2.4, Clementine 1.3.1, Thunderbird 45.5.1, LibreOffice 5.2.2.

Hope you found this MX Linux 16 installation and review tutorial helpful and informative. Please consider sharing it. Your feedback and questions are welcome!

How to install Kernel 4.10 released on Ubuntu and Linux Mint

Harry
Linus Torvalds announced the final release of Kernel 4.10 . He wrote on lkml.org:

    So there it is, the final 4.10 release. It’s been quiet since rc8, but we did end up fixing several small issues, so the extra week was all
    good.

    On the whole, 4.10 didn’t end up as small as it initially looked. After the huge release that was 4.9, I expected things to be pretty quiet, but it ended up very much a fairly average release by modern kernel standards. So we have about 13,000 commits (not counting merges – that would be another 1200+ commits if you count those). The work is all over, obviously – the shortlog below is just the changes in the  last week, since rc8.


Linux Kernel 4.10 Hightlights
  • Fix missing sanity check in /dev/sg
  • bpf: introduce BPF_F_ALLOW_OVERRIDE flag
  • NTB: ntb_transport: fix debugfs_remove_recursive
  • dccp: fix freeing skb too early for IPV6_RECVPKTINFO
  • ARM: multi_v7_defconfig: enable Qualcomm RPMCC
  • packet: Do not call fanout_release from atomic contexts
  • mmc: core: fix multi-bit bus width without high-speed mode
  • net: xilinx_emaclite: fix receive buffer overflow
  • net: xilinx_emaclite: fix freezes due to unordered I/O
  • MAINTAINERS: Remove old e-mail address
  • dpaa_eth: small leak on error
  • ntb: ntb_perf missing dmaengine_unmap_put
  • ntb: ntb_hw_intel: link_poll isn't clearing the pending status properly
  • rhashtable: Revert nested table changes.
  • irda: Fix lockdep annotations in hashbin_delete().
  • uapi: fix linux/if_pppol2tp.h userspace compilation errors
  • net/llc: avoid BUG_ON() in skb_orphan()
  • packet: fix races in fanout_add()
  • tcp: tcp_probe: use spin_lock_bh()
  • [media] videodev2.h: go back to limited range Y'CbCr for SRGB
  • [media] cec: initiator should be the same as the destination for, poll
  • gfs2: Use rhashtable walk interface in glock_hash_walk
  • tipc: Fix tipc_sk_reinit race conditions
  • rhashtable: Add nested tables 
See announcement for full details

Installation instructions:

Because it is very difficult to compile a Linux kernel, Canonical has packed all the kernel releases as deb packages and made them available for everybody that uses Ubuntu or Ubuntu-based systems, via its kernel.ubuntu.com repository.

How to install Kernel 4.10 on 32 bit Ubuntu and derivative systems:

Download the needed packages:

$ cd /tmp

$ wget http://kernel.ubuntu.com/~kernel-ppa/mainline/v4.10/linux-headers-4.10.0-041000_4.10.0-041000.201702191831_all.deb

$ wget http://kernel.ubuntu.com/~kernel-ppa/mainline/v4.10/linux-headers-4.10.0-041000-generic_4.10.0-041000.201702191831_i386.deb

$ wget http://kernel.ubuntu.com/~kernel-ppa/mainline/v4.10/linux-image-4.10.0-041000-generic_4.10.0-041000.201702191831_i386.deb

Install the Kernel:

$ sudo dpkg -i linux-headers-4.10*.deb linux-image-4.10*.deb

$ sudo reboot

How to install Kernel 4.10 on 64 bit Ubuntu and derivative systems:
Download the needed packages:

Download the needed packages:

$ cd /tmp

$ wget http://kernel.ubuntu.com/~kernel-ppa/mainline/v4.10/linux-headers-4.10.0-041000_4.10.0-041000.201702191831_all.deb

$ wget http://kernel.ubuntu.com/~kernel-ppa/mainline/v4.10/linux-headers-4.10.0-041000-generic_4.10.0-041000.201702191831_amd64.deb

$ wget http://kernel.ubuntu.com/~kernel-ppa/mainline/v4.10/linux-image-4.10.0-041000-generic_4.10.0-041000.201702191831_amd64.deb

Install the Kernel:

$ sudo dpkg -i linux-headers-4.10*.deb linux-image-4.10*.deb

$ sudo reboot

Check Kernel version:

$ uname -r

Optional, remove the kernel:

$ sudo apt-get remove linux-headers-4.10* linux-image-4.10*


How to Install MKVToolNix 9.9.0 on Ubuntu 16.04, 16.10

Harry
     MKVtoolnix is a set of tools to create, alter, split, join and inspect Matroska files(mkv). With these tools one can get information about (mkvinfo) Matroska files, extract tracks/data from (mkvextract) Matroska files and create (mkvmerge) Matroska files from other media files. Matroska is a multimedia file format aiming to become THE new container format for the future. Use MKVCleaver or gMKVExtractGUI to extract/demultiplex mkv video and audio files.


MKVToolNix 9.9.0 changelog
  • GUI: chapter editor: added a character set selection in the preferences for text files. If a character set is selected there, it will be used instead of asking the user when opening text chapter files.
  • GUI: multiplexer: added a column "character set" to the "tracks, chapters and tags" list view showing the currently selected character set for that track.
  • mkvmerge: added an --engage option "all_i_slices_are_key_frames" for treating all I slices of an h.264/AVC stream as key frames in pathological streams that lack real key frames.
  • GUI: running programs after jobs: added a new variable <MTX_INSTALLATION_DIRECTORY> for the directory the MKVToolNix GUI executable is located in.
  • mkvmerge: DVB subtitle tracks whose CodecPrivate data is only four bytes long will now be fixed up to the proper five bytes by adding the subtitling type byte.
  • mkvmerge: MP4 reader: "ctts" version 1 atoms are now supported.
  • See changelog for more details 

Installation instructions:

 Opening terminal (Ctrl+Alt+T) and running the command:

Ubuntu 16.04 xenial


$ sudo sh -c 'echo "deb http://archive.getdeb.net/ubuntu xenial-getdeb apps" >> /etc/apt/sources.list.d/getdeb.list'

$ wget -q -O- http://archive.getdeb.net/getdeb-archive.key | sudo apt-key add -

$ sudo apt-get update

$ sudo apt-get
install mkvtoolnix mkvtoolnix-gui

Ubuntu 16.10 yakkety

$ sudo sh -c 'echo "deb http://archive.getdeb.net/ubuntu yakkety-getdeb apps" >> /etc/apt/sources.list.d/getdeb.list'

$ wget -q -O- http://archive.getdeb.net/getdeb-archive.key | sudo apt-key add -

$ sudo apt-get update

$ sudo apt-get
install mkvtoolnix mkvtoolnix-gui