Sunday, 30 April 2017

Kali Linux 2017.1 Installation on VMware Workstation

Harry
Kali Linux 2017.1 Installation
Kali Linux 2017.1 Installation on VMware Workstation

This video tutorial shows Kali Linux 2017.1 installation on VMware Workstation/Player step by step. This tutorial is also helpful to install Kali Linux 2017 on physical computer or laptop hardware. We also install VMware Tools (Open VM Tools) on Kali Linux 2017 for better performance and usability features such as Fit Guest Now, Drag-Drop File and Clipboard Sharing.

Kali Linux 2017.1 Installation Steps:

  1. Download Kali Linux 2017.1 ISO
  2. Create Virtual Machine on VMware Workstation/Player
  3. Start Kali Linux Installation
  4. Install VMware Tools (Open VM Tools)
  5. Test VMware Tools Features: Fit Guest Now, Drag-Drop File and Clipboard Sharing

Installing Kali Linux 2017.1 on VMware Workstation


Kali Linux 2017.1 New Features and Improvements

Kali Linux is a Debian-based distribution which features several security and forensics tools. Kali Linux 2017.1 features drivers for RTL8812AU wireless chipsets, improved GPU support and there are now Azure and AWS images of Kali Linux for cloud instances. Kali Linux 2017.1 brings with it a bunch of exciting updates and features. As with all new releases, you have the common denominator of updated packages, an updated kernel that provides more and better hardware support, as well as a slew of updated tools.

Hope you found this Kali Linux 2017.1 installation tutorial helpful and informative. Please consider sharing it. Your feedback and questions are welcome!
CentOS Linux 6.9 Installation on VMware Workstation

Harry
CentOS 6.9 Installation
CentOS 6.9 Installation on VMware Workstation

This video tutorial shows CentOS 6.9 Installation on VMware Workstation/Player step by step. This tutorial is also helpful to install CentOS Linux 6.9 on physical computer or laptop hardware. We also install VMware Tools on CentOS for better performance and usability features such as Fit Guest Now, Drag-Drop File and Clipboard Sharing.

CentOS 6.9 Installation Steps:

  1. Download CentOS 6.9 ISO
  2. Create Virtual Machine on VMware Workstation/Player
  3. Start CentOS Linux Installation
  4. Install VMware Tools
  5. Test VMware Tools Features: Fit Guest Now, Drag-Drop File and Clipboard Sharing

Installing CentOS Linux 6.9 on VMware Workstation


What is CentOS Linux?

CentOS Linux is a community-supported distribution derived from sources freely provided to the public by Red Hat for Red Hat Enterprise Linux (RHEL). As such, CentOS Linux aims to be functionally compatible with RHEL. The CentOS Project mainly changes packages to remove upstream vendor branding and artwork. CentOS Linux is no-cost and free to redistribute. Each CentOS version is maintained for up to 10 years (by means of security updates -- the duration of the support interval by Red Hat has varied over time with respect to Sources released). A new CentOS version is released approximately every 2 years and each CentOS version is periodically updated (roughly every 6 months) to support newer hardware. This results in a secure, low-maintenance, reliable, predictable and reproducible Linux environment.
CentOS Website: https://www.centos.org/

CentOS 6.9 New Features and Improvements

CentOS Linux 6.9 is derived from source code released by Red Hat, Inc. for Red Hat Enterprise Linux 6.9. All upstream variants have been placed into one combined repository to make it easier for end users. Workstation, server and minimal installs can all be done from our combined repository. There are many fundamental changes in this release, compared with the past CentOS Linux 6 releases.

Hope you found this CentOS 6.9 installation tutorial helpful and informative. Please consider sharing it. Your feedback and questions are welcome!

NuTyX Linux 9.0 Installation with GNOME Desktop and Apps on VMware Workstation

Harry
NuTyX Linux 9.0 Installation with GNOME Desktop
NuTyX Linux 9.0 Installation with GNOME Desktop and Apps on VMware Workstation

This video tutorial shows NuTyX Linux 9.0 installation with GNOME Desktop on VMware Workstation step by step. We'll also install applications such as Firefox, VLC, GIMP, FileZilla and LibreOffice on NuTyX Linux 9.0. This tutorial is also helpful to install NuTyX 9.0 on physical computer or server. We'll also install and test VMware Tools on NuTyX Linux for better performance and usability features such as Fit Guest Now, Drag-Drop File, Clipboard Sharing and Mouse Integration.

NuTyX Linux 9.0 Installation Steps:

  1. Download NuTyX Linux 9.0 ISO
  2. Create Virtual Machine on VMware Workstation/Player
  3. Start NuTyX Linux Installation
  4. Installing Xorg and GNOME Desktop
  5. Installing Firefox, VLC, GIMP, FileZilla and LibreOffice Applications on NuTyX
  6. Installing and Configuring VMware Tools
  7. NuTyX Linux 9.0 Short Overview

Installing NuTyX  9.0 with GNOME and Apps on VMware Workstation


NuTyX 9.0 New Features and Improvements

NuTyX is based on Linux From Scratch (LFS) and features a custom software manager called "cards". The new release NuTyX 9.0 features some of the latest software (Linux 4.10, Plasma 5.9, GNOME 3.22, MATE 1.16 and Python 3.6) and now supports booting on UEFI-enabled hardware. Available graphical interfaces are: kde5, gnome, mate, xfce4, lxde, flwm, jwm, ratpoison, blackbox, fluxbox, openbox, bspwm, icewm, twm, etc. The new ISOs can be launch on UEFI machines If you have a UEFI compatible computer, you can now install NuTyX in UEFI mode. If it's your case, the installer will guide the user to make the right choices during installation and the UEFI will take care of booting the machine, no other boot managers are needed by default.
NuTyX Linux Website: https://www.nutyx.org/

What is GNOME Desktop?

GNOME is a desktop environment that is composed entirely of free and open-source software. GNOME was originally an acronym for GNU Network Object Model Environment. Its target operating system is Linux, but it is also supported on most derivatives of BSD. GNOME is developed by the GNOME Project, which is composed of both volunteers and paid contributors.
GNOME Website: https://www.gnome.org/

GNOME 3 Desktop Minimum System Requirements

  1. 1 GHz processor
  2. 1 GB RAM
  3. 7 GB of hard-drive space
  4. VGA capable of 1024x768 screen resolution
Hope you found this NuTyX Linux 9.0 installation with GNOME Desktop tutorial helpful and informative. Please consider sharing it. Your feedback and questions are welcome!
Saturday, 29 April 2017

Oracle Linux 6.9 Installation on VMware Workstation

Harry
Oracle Linux 6.9 Installation
Oracle Linux 6.9 Installation on VMware Workstation

This video tutorial shows Oracle Linux 6.9 Installation on VMware Workstation/Player step by step. This tutorial is also helpful to install Oracle Enterprise Linux 6.9 (OEL 6.9) on physical computer or laptop hardware or server. We also install VMware Tools on Oracle Linux for better performance and usability features such as Fit Guest Now, Drag-Drop File and Clipboard Sharing.

Oracle Linux 6.9 Installation Steps:

  1. Download Oracle Linux 6.9 ISO
  2. Create Virtual Machine on VMware Workstation/Player
  3. Start Oracle Linux Installation
  4. Install VMware Tools
  5. Test VMware Tools Features: Fit Guest Now, Drag-Drop File and Clipboard Sharing

Installing Oracle Linux 6.9 on VMware Workstation


What is Oracle Linux?

Oracle Linux is an enterprise-class Linux distribution supported by Oracle and built from source packages for Red Hat Enterprise Linux (RHEL). Some of the special features of Oracle Linux include a custom-build and rigorously-tested Linux kernel called "Oracle Unbreakable Kernel", tight integration with Oracle's hardware and software products including most database applications, and "zero downtime patching" which is feature that enables administrators to update the kernel without a reboot.
Oracle Linux Website: https://www.oracle.com/linux/

Oracle Linux 6.9 New Features and Improvements

Oracle Linux 6 Update 9 includes multiple updated kernels, including two new "Unbreakable Enterprise Kernel" packages and a "Red Hat Compatible Kernel" package. The new update to the 6.x series also includes a number of significant bug fixes. Oracle Linux 6 Update 9 fixes a regression introduced in glibc in the upstream release that could cause Oracle Database to fail to start in certain circumstances. This regression was found and fixed during Oracle's extensive testing of Oracle Linux with Oracle products. Customers using other Linux distributions with Oracle Database are encouraged to talk to their Linux provider about whether they also have a patch available. Notable features in this release include: TLS 1.2 support for all system components; the cpuid utility is now available; improved support when running as a Hyper-V guest; enhanced SSSD support for Active Directory.

Oracle Linux 6.x Minimum System Requirements

You can install Oracle Linux 6 on systems with a 32 or 64-bit x86 architecture (x86 or x86_64), a minimum of 1 GB of memory, a minimum of 1 GB of disk space, and an unlimited number of CPU cores. The maximum supported memory size is 64 GB for x86 and 4 TB for x86_64.

Hope you found this Oracle Linux 6.9 installation tutorial helpful and informative. Please consider sharing it. Your feedback and questions are welcome!

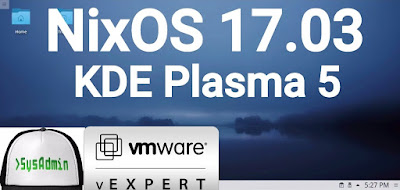
NixOS Linux 17.03 Installation with KDE Plasma 5 on VMware Workstation

Harry
NixOS Linux 17.03 Installation
NixOS Linux 17.03 Installation with KDE Plasma 5 on VMware Workstation

This video tutorial shows NixOS Linux 17.03 with KDE Plasma 5 Desktop Installation and Review on VMware Workstation step by step. We'll also install applications such as Firefox, VLC, GIMP, FileZilla, Kate and LibreOffice on NixOS Linux. This tutorial is also helpful to install NixOS 17.03 on physical computer or server. We'll also install and test VMware Tools (Open VM Tools) on NixOS for better performance and usability features such as Fit Guest Now, Drag-Drop File, Clipboard Sharing and Mouse Integration.

NixOS Linux 17.03 Intallation Steps:

  1. Download NixOS 17.03 ISO
  2. Create Virtual Machine on VMware Workstation/Player
  3. Start NixOS Linux Installation with KDE Plasma 5
  4. Installing and Configuring VMware Tools (Open VM Tools)
  5. Installing Firefox, VLC, GIMP, FileZilla, Kate and LibreOffice Applications on NixOS Linux
  6. Installing and Configuring VMware Tools (Open VM Tools)
  7. NixOS 17.03 Review

Installing NixOS 17.03 with KDE Plasma 5 on VMware Workstation


NixOS 17.03 New Features and Improvements

NixOS is an independently developed Linux distribution which uses the Nix package manager to handle packages and system configuration. NixOS offers many advanced package management features, including roll backs and atomic package operations. NixOS 17.03 ships with the KDE Plasma 5 desktop environment which replaces KDE 4. The PHP packages have been updated to version 7 and the Nix package manager includes a number of new features. In addition to numerous new and upgraded packages, this release has the following highlights: Nixpkgs is now extensible through overlays; this release is based on glibc 2.25, GCC 5.4.0 and systemd 232; the default Linux kernel is 4.9.

What is KDE Desktop?

The KDE Community is an international technology team dedicated to creating a free and user-friendly computing experience, offering an advanced graphical desktop, a wide variety of applications for communication, work, education and entertainment and a platform to easily build new applications upon.  In this regard, the resources provided by KDE make it a central development hub and home for many popular applications and projects like Calligra Suite, Krita, digiKam, and many others.
KDE Website: https://www.kde.org/

What is KDE Plasma 5?

KDE Plasma 5 is the fifth and current generation of the desktop environment created by KDE primarily for Linux systems. KDE Plasma 5 is the successor of KDE Plasma 4 and was initially released on 15 July 2014. It includes a new default theme, known as "Breeze", as well as increased convergence across different devices. The graphical interface was fully migrated to QML, which uses OpenGL for hardware acceleration resulting in better performance and reduced power consumption. Plasma 5.0 improves support for HiDPI displays and ships a converged graphical shell, able to modify the graphical shell according to the device in use. It also includes a new default theme, dubbed Breeze.

Hope you found this NixOS Linux 17.03 installation with KDE Plasma 5 tutorial helpful and informative. Please consider sharing it. Your feedback and questions are welcome!

Battlefield 3

Harry


Minimum System Requirements


OS: Windows Vista (SP2) 32-bit
Processor: 2 GHz Dual Core (Core 2 Duo 2.4 GHz or Athlon X2 2.7 GHz)
Memory: 2 GB
Hard Drive: 20 GB
Graphics Card (NVIDIA): DirectX 10.0 graphics card with 512 MB RAM (NVIDIA GeForce 8, 9, 200, 300, 400 or 500 series with NVIDIA GeForce 8800 GT or higher performance)
Graphics Card (ATI): DirectX 10.0 graphics card with 512 MB RAM (AMD ATI Radeon 3000, 4000, 5000 or 6000 series with AMD ATI Radeon 3870 or higher performance)
Sound Card: DirectX Compatible

Recommended System Requirements


OS: Windows 7 64-bit
Processor: Quad-core CPU
Memory: 4 GB
Hard Drive: 20 GB
Graphics Card: DirectX 11 graphics card with 1024 MB RAM (NVIDIA GeForce GTX 560
or AMD ATI Radeon 6950)
Sound Card: DirectX Compatible


Download UTorrent


Download Winrar


Download Power ISO


Download The Game Here


Friday, 28 April 2017

Ubuntu Studio 17.04 Installation on VMware Workstation

Harry
Ubuntu Studio 17.04 Installation
Ubuntu Studio 17.04 Installation on VMware Workstation

This video tutorial shows Ubuntu Studio 17.04 installation on VMware Workstation/Player step by step. This tutorial is also helpful to install Ubuntu Studio on physical computer or laptop hardware. We also install VMware Tools (Open VM Tools) on Ubuntu Studio 17.04 for better performance and usability features such as Fit Guest Now, Drag-Drop File and Clipboard Sharing.

Ubuntu Studio 17.04 Installation Steps:

  1. Download Ubuntu Studio 17.04 ISO
  2. Create Virtual Machine on VMware Workstation/Player
  3. Start Ubuntu Studio 17.04 Installation
  4. Install VMware Tools (Open VM Tools)
  5. Test VMware Tools Features: Fit Guest Now, Drag-Drop File and Clipboard Sharing

Installing Ubuntu Studio 17.04 on VMware Workstation


Ubuntu Studio 17.04 New Features and Improvements

The Ubuntu Studio team has announced the release of Ubuntu Studio 17.04. The new release of this Linux distribution for audio, video and graphic artists offers the same package base as Ubuntu 17.04 and includes nine months of security updates. There are a few small changes in this new version, including swapping the system-config-printer-gnome utility with system-config-printer and the Krita drawing program has been added to the default installation.
Ubuntu Studio Website: https://ubuntustudio.org/

Ubuntu Studio 17.04 Minimum System Requirements

The minimum of RAM required for Ubuntu Studio is 1 GB, but it is highly recommended that you have at least 4 GB, as some applications use up a lot of RAM. The minimum of disk space required is around 10 GB, but that is just for installing the system.

Hope you found this Ubuntu Studio 17.04 installation tutorial helpful and informative. Please consider sharing it. Your feedback and questions are welcome!

Lubuntu 17.04 Installation on VMware Workstation

Harry
Lubuntu 17.04 Installation
Lubuntu 17.04 Installation on VMware Workstation

This video tutorial shows Lubuntu 17.04 Installation on VMware Workstation/Player step by step. This tutorial is also helpful to install Lubuntu 17.04 on physical computer or laptop hardware. We also install VMware Tools (Open VM Tools) on Lubuntu 17.04 (Zesty Zapus) for better performance and usability features such as Fit Guest Now, Drag-Drop File and Clipboard Sharing.

Lubuntu 17.04 Installation Steps:

  1. Download Lubuntu 17.04 ISO
  2. Create Virtual Machine on VMware Workstation/Player
  3. Start Lubuntu 17.04 Installation
  4. Install VMware Tools (Open VM Tools)
  5. Test VMware Tools Features: Fit Guest Now, Drag-Drop File and Clipboard Sharing

Installing Lubuntu 17.04 on VMware Workstation


Lubuntu 17.04 New Features and Improvements

Lubuntu 17.04 was released on 13 April 2017. Like previous releases it uses LXDE and not LXQt as the implementation of LXQt in Lubuntu has been delayed once again, this time until 17.10. This release incorporated Linux Kernel 4.8, updated LXDE components, general bug fixes and new artwork. Lubuntu 17.04 features mainly of bug fixes and core app and system updates rather than screenshot-able new features.
Lubuntu Website: http://lubuntu.net/

Lubuntu 17.04 Minimum System Requirements

Lubuntu is a good operating system for many old computers, but not for all of them. Some computers have too little horsepower or memory. A rule of thumb is that the computer should not be more than 10 years old.
  1. For advanced internet services like Google+, YouTube, Google Drive, and Facebook, your computer needs at least 1 GB of RAM.
  2. For local programs like LibreOffice and simple browsing habits, your computer needs at least 512 MB of RAM.
  3. The minimum specification for CPU is Pentium 4 or Pentium M or AMD K8. Older processors are too slow and the AMD K7 has problems with Flash video.
Hope you found this Lubuntu 17.04 installation tutorial helpful and informative. Please consider sharing it. Your feedback and questions are welcome!

Thursday, 27 April 2017

How to install Avidemux 2.6.19 better support for HEVC in mpeg TS

Harry
   Avidemux is a free video editor designed for simple cutting, filtering and encoding tasks. It supports many file types, including AVI, DVD compatible MPEG files, MP4 and ASF, using a variety of codecs. Tasks can be automated using projects, job queue and powerful scripting capabilities.


Avidemux is available for Linux, BSD, Mac OS X and Microsoft Windows under the GNU GPL license.

Avidemux 2.6.19 Changelog:
  • Filter : All filters with preview have better navigation dialogs
  • Filter : Delogo filter UI redone
  • Filter : Fixed changeFps/resampleFps seeking
  • TS/Demux : HEVC support improved
  • Flv/Demux : Support large files (rcdrone)
  • Audio : Allow EAC3 as external audio track
  • UI : General usability cleanup (euma)
  • UI : Allow using the last read folder as default save folder (euma)
  • UI : 2 pass encoding dialog cleanup (euma)
  • UI : Dynamically enable/disable menu (euma)
  • UI : Customizable keyboard shortcut (euma)
  • UI : Allow reverting page up/down (euma)
  • Codec : Better support for 10bits
  • i18n : Russian translation updated (TotalCaesar659)
  • i18n : Greek translation updated (nikoss)
  • i18n : General cleanup (euma)
  • Updated ffmpeg libs to 3.0.7

Installation instructions:

   The GetDeb repository contains the latest packages of Avidemux, available for Ubuntu 16.04, Ubuntu 16.10, Ubuntu 17.04 and derivatives.

Opening terminal (Ctrl+Alt+T) and running the command:

Ubuntu 16.04 xenial


$ sudo sh -c 'echo "deb http://archive.getdeb.net/ubuntu xenial-getdeb apps" >> /etc/apt/sources.list.d/getdeb.list'

$ wget -q -O- http://archive.getdeb.net/getdeb-archive.key | sudo apt-key add -

$ sudo apt-get update

$ sudo apt-get install avidemux

Ubuntu 16.10 yakkety

$ sudo sh -c 'echo "deb http://archive.getdeb.net/ubuntu yakkety-getdeb apps" >> /etc/apt/sources.list.d/getdeb.list'

$ wget -q -O- http://archive.getdeb.net/getdeb-archive.key | sudo apt-key add -

$ sudo apt-get update

$ sudo apt-get install avidemux

Ubuntu 17.04 zesty

$ sudo sh -c 'echo "deb http://archive.getdeb.net/ubuntu zesty-getdeb apps" >> /etc/apt/sources.list.d/getdeb.list'

$ wget -q -O- http://archive.getdeb.net/getdeb-archive.key | sudo apt-key add -

$ sudo apt-get update

$ sudo apt-get install avidemux

(Optional) To remove Avidemux, use command:

$ sudo apt-get remove avidemux

$ sudo apt-get autoremove

How to install oStorybook 5.00.03 on Ubuntu 16.04 & Higher

Harry
   Storybook is an open source software for writers, essayists, authors. Used from the draft to the final work, with oStorybook you can never lose the history of the field of view. oStorybook helps you to maintain control over the various developments of your story.


Except for the usual schedule, version 5.00.02 is available. The version of April 2017 presented some serious anomalies which justified this publication of urgency.

The new version 5.00.03 is now available. You will find the following changes:
  • resolution of the order in the ComboBox (characters in particular)
  • simplification of messages for internationalization
  • revision of the "Quick Info" view
  • fixed the bug on the number of scenes
  • add the "position" option in the "Memos" view
  • adding the option "hide unassigned genes" in the "Manage chapters and scenes" view
  • addition of the secondary wires in the scene table
  • added multi-screen management option
  • addition of the possibility of access to information if the publisher is open
  • creation of the import module, with revision of the export module
  • rewriting the user interface

Installation instructions:

   The GetDeb repository contains the latest packages of oStorybook, available for Ubuntu 16.04, Ubuntu 16.10, Ubuntu 17.04 and derivatives.

Opening terminal (Ctrl+Alt+T) and running the command:

Ubuntu 16.04 xenial


$ sudo sh -c 'echo "deb http://archive.getdeb.net/ubuntu xenial-getdeb apps" >> /etc/apt/sources.list.d/getdeb.list'

$ wget -q -O- http://archive.getdeb.net/getdeb-archive.key | sudo apt-key add -

$ sudo apt-get update

$ sudo apt-get install ostorybook

Ubuntu 16.10 yakkety

$ sudo sh -c 'echo "deb http://archive.getdeb.net/ubuntu yakkety-getdeb apps" >> /etc/apt/sources.list.d/getdeb.list'

$ wget -q -O- http://archive.getdeb.net/getdeb-archive.key | sudo apt-key add -

$ sudo apt-get update

$ sudo apt-get install ostorybook

Ubuntu 17.04 zesty

$ sudo sh -c 'echo "deb http://archive.getdeb.net/ubuntu zesty-getdeb apps" >> /etc/apt/sources.list.d/getdeb.list'

$ wget -q -O- http://archive.getdeb.net/getdeb-archive.key | sudo apt-key add -

$ sudo apt-get update

$ sudo apt-get install ostorybook

(Optional) To remove oStorybook, use command:

$ sudo apt-get remove ostorybook

$ sudo apt-get autoremove

How to Install Shotcut Video Editor 17.04.03 on Ubuntu 16.04 & Higher

Harry
    Shotcut is a free, open source, cross-platform video editor for Windows, Mac and Linux. Major features include support for a wide range of formats; no import required meaning native timeline editing; Blackmagic Design support for input and preview monitoring; and resolution support to 4k.


Shotcut  17.01.02 Changelog:
  •     Fix crashing on launch on the new macOS 10.12.4.
  •     Added Japanese translation.
  •     Added Turkish translation.

Installation instructions:

   The GetDeb repository contains the latest packages of Shotcut, available for Ubuntu 16.04, Ubuntu 16.10, Ubuntu 17.04 and derivatives.

Opening terminal (Ctrl+Alt+T) and running the command:

Ubuntu 16.04 xenial

$ sudo sh -c 'echo "deb http://archive.getdeb.net/ubuntu xenial-getdeb apps" >> /etc/apt/sources.list.d/getdeb.list'

$ wget -q -O- http://archive.getdeb.net/getdeb-archive.key | sudo apt-key add -

$ sudo apt-get update

$ sudo apt-get install shotcut

Ubuntu 16.10 yakkety

$ sudo sh -c 'echo "deb http://archive.getdeb.net/ubuntu yakkety-getdeb apps" >> /etc/apt/sources.list.d/getdeb.list'

$ wget -q -O- http://archive.getdeb.net/getdeb-archive.key | sudo apt-key add -

$ sudo apt-get update

$ sudo apt-get install shotcut

Ubuntu 17.04 zesty


$ sudo sh -c 'echo "deb http://archive.getdeb.net/ubuntu zesty-getdeb apps" >> /etc/apt/sources.list.d/getdeb.list'

$ wget -q -O- http://archive.getdeb.net/getdeb-archive.key | sudo apt-key add -

$ sudo apt-get update

$ sudo apt-get install shotcut

(Optional) To remove Shotcut, use command:


$ sudo apt-get remove shotcut

$ sudo apt-get autoremove


Watch Dogs 2

Harry


Minimum System Requirements


OS: Windows 7 SP1, Windows 8.1, Windows 10 (64-bit versions only)
Processor: Intel Core i5 2400S @ 2.5 GHz, AMD FX 6120 @ 3.5 GHz
RAM: 6GB
Video Card: Nvidia GeForce GTX 660 (2GB), AMD Radeon HD 7870 (2GB) or better
Hard Disk Space: 50 GB

Recommended System Requirements


OS: Windows 7 SP1, Windows 8.1, Windows 10 (64-bit versions only)
Processor: Intel Core i5 3470 @ 3.2GHz, AMD FX 8120 @ 3.9 GHz
RAM: 8GB
Video Card: NVIDIA GeForce GTX 780 (3GB), NVIDIA GeForce GTX 970 (4GB), NVIDIA GeForce GTX 1060 (3GB) or better, AMD Radeon R9 290 (4GB) or better
Hard Disk Space: 50 GB

Download UTorrent


Download Winrar


Download Power ISO


Download The Game Here


Download Crack For The Game Here


Password:- www.blackboxrepack.com


Wednesday, 26 April 2017

How to Install Luminance HDR 2.5.0 on Ubuntu 16.04 & Higher

Harry
Luminance HDR is a graphical user interface (based on the Qt5 toolkit) that provides a complete workflow for HDR imaging. Supported HDR formats:  OpenEXR (extension: exr), Radiance RGBE (extension: hdr), Tiff formats: 16bit, 32bit (float) and LogLuv (extension: tiff), Raw image formats (extension: various), PFS native format (extension: pfs) , Supported LDR formats:  JPEG, PNG, PPM, PBM, TIFF, FITS

Luminance HDR 2.5.0  Changelog:
  • NEW: New tonemapping operator ferradans11
  • NEW: New tonemapping operator mai11
  • NEW: Better HiDPI support
  • NEW: Better CLI interface, also for Windows
  • NEW: "Fast Export", which renders current image in full size
  • NEW: Export to HTML (Create a webpage with embedded HDR viewer)
  • NEW: Optional automatic adjustment of LDRs levels
  • NEW: List version of supported cameras for RAW files (and some libraw info)
  • NEW: New UI "Dark Theme"
  • NEW: Switch UI Full Screen (F11), show LDRs and HDRs Full Screen (F10)
  • NEW: Portuguese (Brazil) translation
  • more robust hugin align
  • Fix various crashes
  • greater EV values range in HdrWizard
  • better printing support and print preview in HelpBrowser
  • restore load/save curves in HdrWizard

Installation instructions:

    We can add this PPA to Ubuntu Operating  Systems and install Luminance HDR with few easy commands.

Open terminal and insert command line...

$ sudo add-apt-repository ppa:dhor/myway

$ sudo apt-get update

$ sudo apt-get install luminance-hdr

     Optional, to remove Luminance HDR, do:

$ sudo apt-get remove --autoremove luminance-hdr


How to Install Wireshark 2.2.6 on Ubuntu 16.04 & Higher

Harry
  Wireshark is the world’s most popular network protocol analyzer. It is used for troubleshooting, analysis, development and education.


Wireshark 2.2.6 Changelog:
  •     T30 FCF byte decoding masks DTC, CIG and NCS.
  •     Wireshark gives decoding error during rnsap message dissection(SCCP reassembly).
  •     Added IEEE 802.15.4-2003 AES-CCM security modes (packet-ieee802154).
  •     Payload in 2 SCCP DT1 messages in the same frame isn’t (sub)dissected.
  •     IEEE 802.15.4: an area of Payload IEs is dissected twice.
  •     Qt UI: Wireshark crash when deleting IO graph string while it’s in editing mode.
  •     Crash on exit due to an invalid frame data sequence state.
  •     Access Violation using Lua dissector.
  •     Some bytes ignored in every packet in NetScaler packet trace when vmnames are included in packet headers.
  •     VOIP RTP stream Find Reverse button doesn’t work.
  •     Lua dissector: ProtoField int&42; do not allow FT_HEX or FT_OCT, crash when set to FT_HEX_DEC or FT_DEC_HEX.
  •     GIOP LocateRequest v1.0 is improperly indicated as "malformed".
  •     Bug in ZigBee - Zone Status Change Notification.
  •     Packet exception in packet-ua3g and incomplete strings in packet-noe.
  •     Wrong BGP capability dissect.
  •     Endpoint statistics column labels seem incorrect.
  •     Strange automatic jump in packet details for a certain DNS response packet.
  •     When a Lua enum or bool preference is changed via context menu, prefs_changed isn’t called with Qt Wireshark.
  •     IO Graph selects wrong packet or displays "Packet number x isn’t displayed".
  •     tshark’s -z endpoints,ip ignores optional filter.
  •     SSL: Handshake type in Info column not always separated by comma.
  •     libfuzzer: PEEKREMOTE dissector bug.
  •     libfuzzer: packetBB dissector bug (packetbb.msg.addr.valuecustom).
  •     libfuzzer: WSP dissector bug (wsp.header.x_wap_tod).
  •     libfuzzer: MIH dissector bug.
  •     libfuzzer: DNS dissector bug.
  •     libfuzzer: WLCCP dissector bug. (Bug 13549)
  •     libfuzzer: TAPA dissector bug. (Bug 13553)
  •     libfuzzer: lapsat dissector bug. (Bug 13554)
  •     libfuzzer: wassp dissector bug. (Bug 13555)
  •     Illegal reassembly of GSM SMS packets. (Bug 13572)
  •     SSH Dissector uses incorrect length for protocol field (ssh.protocol). (Bug 13574)
  •     NBAP malformed packet for short Binding ID. (Bug 13577)
  •     libfuzzer: WSP dissector bug (wsp.header.x_up_1.x_up_proxy_tod). (Bug 13579)
  •     libfuzzer: asterix dissector bug (asterix.021_230_RA). (Bug 13580)
  •     RTPproxy dissector adds multi lines to info column. (Bug 13582)  
 See release notes for complete changes

Installation instructions:

    We can add this PPA to Ubuntu Operating  Systems and install Darktable with few easy commands.

Open terminal and insert command line...


$ sudo add-apt-repository ppa:wireshark-dev/stable

$ sudo apt-get update

$ sudo apt-get install wireshark

     Optional, to remove wireshark, do:

$ sudo apt-get remove wireshark


Tuesday, 25 April 2017

Install MPV Player 0.25 Released on Ubuntu 17.04

Harry
   MPV is a free and open-source media player forked from MPlayer2. It was started to modernize MPlayer by adding modern features, and removing unmaintainable code and dropping support for very old systems.


MPV 0.25 changelog
Added
  •     --demuxer-lavf-probe-info
  •     --sub-filter-sdh, --sub-filter-sdh-harder
  •     add automatic libavfilter bridges to option parsing
  •     command: add better runtime filter toggling method
  •     command: add demux-start-time property
  •     command: add property notifications for hwdec properties (#4289)
  •     input: add "async" flag
  •     osc: add user_opts.boxmaxchars for box layout title limit
  •     player: add --keep-open-pause=no option
  •     va_vavpp: reversal-bug=no
  •     vo_opengl: --opengl-es=force2
  •     vo_opengl: add --opengl-shader-cache-dir option for caching shaders on disk (mostly for ANGLE)
  •     vo_opengl: angle: add --angle-flip to set the ANGLE present model
Changed
  •     command: update sub-fps etc. options on runtime changes
  •     vo_opengl: prefer X11 backends over Wayland backends
  •     options: change --audio-file-auto default to not to load any files
Deprecated
  •     audio: deprecate most non-lavfi audio filters
  •     (channels, equalizer, pan, volume)
  •     video: deprecate almost all non-lavfi video filters
  •     (buffer, crop, dlopen, dsize, eq, expand, flip, gradfun, mirror, noformat,
  •     pullup, rotate, scale, stereo3d, sub, yadif)
  •     options: deprecate --loop semantics (planned alias to --loop-file)
Fixes and Minor Enhancements
  •     Windows: demux_cue: fix UTF-8 paths
  •     Windows: fix mismatched free/talloc_free (#4315)
  •     Windows: fix undefined behaviour when toggling fullscreen
  •     ao_alsa: close lost audio devices (#4189)
  •     ao_alsa: filter fewer devices
  •     ao_alsa: fix an error check (#4188)
  •     ao_jack: update latency on buffer_size/graph change
  •     ao_wasapi: do not pass nonsense to drivers with double precision formats
  •     ass_mp: reallocate cached subtitle image data on format changes (#4325)
  •     build: decouple dvdnav check from dvdread (#4290)
  •     build: encode_lavc: fix build failure after libavcodec major bump
  •     build: fix build with HAVE_GL==0
  •     build: replace android-gl check with a standard GLES3 check
  •     build: update bundled waf to 1.9.8
  •     build: vd_lavc: fix potential build failure with vaapi
  •     demux_lavf: disable half-working mp4 edit list support in libavcodec
  •     demux_lavf: skip avformat_find_stream_info() for some formats (hls, mp4, mkv by default)
  •     etc/encoding_profiles.conf: update and remove deprecated stuff
 See release notes for full details


Installation instructions: 
 
    We can add this PPA to Ubuntu Operating  Systems and install MPV Media Player with few easy commands.

Open terminal and insert command line...

$ sudo add-apt-repository ppa:mc3man/mpv-tests

$ sudo apt-get update

$ sudo apt-get install mpv

 (Optional) To remove the PPA And remove mpv via command:

$ sudo apt-get remove mpv && sudo apt-get autoremove


Monday, 24 April 2017

How to Install Arduino IDE 1.8.2 on Ubuntu 17.04

Harry
   Arduino is an open-source prototyping platform based on easy-to-use hardware and software. Arduino boards are able to read inputs - light on a sensor, a finger on a button, or a Twitter message - and turn it into an output - activating a motor, turning on an LED, publishing something online. You can tell your board what to do by sending a set of instructions to the microcontroller on the board.


Arduino IDE 1.8.2 Changelog
[ide]
  • Fix command line: works again with relative paths (regression)
  • Fix command line: "--save-prefs" works again (regression)
  • AVR toolchain has been updated with a tentative fix for the ld-returned-5-exit-status bug
  • Update arduino-builder to 1.3.25
    •  avoid name clashing for libraries
    •  cache core archives to speedup compilation consistently
  • Allow BoardManager to fetch FreeBSD tools (thanks @kevans91)
  • Serial monitor: the input string box is automatically focused when window is selected
  • Serial monitor: now can not be opened during upload
  • Serial monitor: now properly decodes UTF8 characters (thanks @aknrdureegaesr)
  • Serial monitor: added 500k, 1M and 2M baudrates (thanks @dsstutts)
  • Updated RSyntaxTextArea to 2.6.1 (textarea component)
  • Updated jmdsn (mDNS discovery)
  • Allow plugins to attach a listener to compile progress (thanks @tomneutens)
[core]
  • Add Atmel-ICE and JTAGICE3 programmers for AVR chips (thanks @matthijskooijman)
  • AVR: Set unused bits of extended fuse to 1, should remove some avrdude warning during burn bootloader (thanks @descampsa)
  • AVR: USB: send ZLP when needed (allows full 64 bytes packets)
  • AVR: USB: use IAD descriptors instead than Generic (thanks @cuitoldfish)
[other]
  • SAM platform source code has been moved to its own repository (https://github.com/arduino/ArduinoCore-sam) - all PRs and issues have been moved as well
  • Update Wifi101 Firmware Updater plugin
 Installation instructions:

1. Download the latest packages, Linux 32-bit or Linux 64-bit, from the official link below:  www.arduino.cc/en/Main/Software

2. Open terminal from Unity Dash, App Launcher, or via Ctrl+Alt+T keys. When it opens, run below commands one by one:


$ cd ~/Downloads

$ tar -xvf arduino-1.8.2-*.tar.xz

$ sudo mv arduino-1.8.2 /opt

$ cd /opt/arduino-1.8.2/


3. Insert RESOURCE_NAME=arduino-arduinoide on line:10 on install.sh file run below commands


$ gedit install.sh


4. Change mode install.sh and run install.


$ chmod +x install.sh

$ ./install.sh

Finally, launch Arduino IDE from Unity Dash, Application Launcher, or via Desktop shortcut.


You Might Like to Have These Offline Books 

Explore Offline Book Here


Xubuntu 17.04 Installation on VMware Workstation

Harry
Xubuntu 17.04 Installation
Xubuntu 17.04 Installation on VMware Workstation

This video tutorial shows Xubuntu 17.04 Installation on VMware Workstation/Player step by step. This tutorial is also helpful to install Xubuntu 17.04 on physical computer or laptop hardware. We also install VMware Tools (Open VM Tools) on Xubuntu 17.04 (Zesty Zapus) for better performance and usability features such as Fit Guest Now, Drag-Drop File and Clipboard Sharing.

Xubuntu 17.04 Installation Steps:

  1. Download Xubuntu 17.04 (Zesty Zapus) ISO
  2. Create Virtual Machine on VMware Workstation/Player
  3. Start Xubuntu 17.04 Installation
  4. Install VMware Tools (Open VM Tools)
  5. Test VMware Tools Features: Fit Guest Now, Drag-Drop File and Clipboard Sharing

Installing Xubuntu 17.04 on VMware Workstation


Xubuntu 17.04 New Features and Improvements

Xubuntu 17.04 will be supported for 9 months until January 2018. Several Xfce panel plugins and applications have been ported to GTK+ 3, paving the way for improved theming and further development. Core Xfce libraries exo and libxfce4ui have also been updated with full GTK+ 3 support, the latter adding support for Glade development in Xubuntu with the installation of libxfce4ui-glade. The Greybird and Numix themes have also been refreshed with improved support for the toolkit.

Camera functionality has been restored in Mugshot, Parole introduced a new mini mode and improvements for network streams, and a number of welcome fixes have made their way into Thunar and Ristretto. This release is based on the 4.10.x Linux release series. LibreOffice 5.3 includes a number of fixes and introduces new experimental interface options. Firefox 52 and Thunderbird 45 are included. For new installs a swap file will be used instead of a swap partition. Upgrades from earlier versions are not affected.
Xubuntu Website: http://www.xubuntu.org/

Xubuntu 17.04 Minimum System Requirements

To install and use Xubuntu, you need at least 512 MB of memory. You can also try Xubuntu within the Desktop DVD with the same amount of memory. Keep in mind that running the system from a DVD will be slower than an installed system. When you install Xubuntu from the Desktop DVD, you need about 7.5 GB of free space on your hard disk. Your processor needs to support PAE in order to run Xubuntu.


Xubuntu 17.04 Recommended System Requirements

To get a smooth experience when running multiple applications parallel on the desktop, it is recommended to have at least 1 GB of memory. It is recommended to have at least 20 GB of free space on your hard disk. This allows new application installations as well as saving your personal data on the hard disk in addition to the core system.

Hope you found this Xubuntu 17.04 installation tutorial helpful and informative. Please consider sharing it. Your feedback and questions are welcome!

Sunday, 23 April 2017

How to Install Wine 2.0.1 Stable on Ubuntu 16.04, 16.10, 17.04

Harry
   Wine (originally an acronym for "Wine Is Not an Emulator") is a compatibility layer capable of running Windows applications on several POSIX-compliant operating systems, such as Linux, Mac OSX, & BSD. Instead of simulating internal Windows logic like a virtual machine or emulator, Wine translates Windows API calls into POSIX calls on-the-fly, eliminating the performance and memory penalties of other methods and allowing you to cleanly integrate Windows applications into your desktop.

Wine 2.0.1 changelog:
  • DirectDraw games (Jojo's Fashion Show 2: Las Cruces demo, The Chosen: Well of Souls) try to lock surface with invalid dwSize
  • Black & White: DXTC to ARGB converter not implemented
  • Open dialog crashes if the desktop folder is at a Unicode path that cannot be represented in the current locale
  • Need For Speed Most Wanted crashes after accepting video settings changes
  • Venom Codename: Outbreak - initial menu screen is black (no menu items)
  • MessageBox does not display last word if string contains '&' (ampersand)
  • iMesh 10 crashes at startup (needs wmvcore.dll.WMCreateReaderPriv)
  • Wine Notepad command line parser eats the first 2 letters when the path starts with / (it should only do this for valid command line options)
  • Property sheet fails to display Page Title
  • Graphical Glitches in Agarest Generations of War
  • Multiple games and applications need msvcr120.dll._except1 (Audacity 2.1.0, Tera Online)
  • New Marvel Heroes 2015 Launcher crashes on unimplemented function dhcpcsvc.dll.DhcpRequestParams
  • MIDI Clock Messages are Corrupted Between Wine and ALSA
  • Nanocad 5.: file open/import dialog does not open
  • ComicRack 0.9.x (.NET 4.5 app) hangs/crashes on startup when executing WMI query
  • UE4 games (Ether One Redux, Into the Stars) crash while loading with "BackBuffer->GetResource() has 3 refs, expected 1" error
  • improper escaping of quotes in command line
  • Civilization II Unhandled page fault on read access
  • Rush for Berlin Gold crashes after the intro videos
  • Odallus The Dark Call crashes while starting if a force feedback enabled controller is plugged in
  • AmiBroker 6.00 fails, when run, with raise_exception Unhandled exception
  • Unimplemented function api-ms-win-crt-math-l1-1-0.dll._except1 (Starcraft 2 main menu, Firefox)
  • Updating group box text causes garbage
  • Zafehouse demo crashes with Call from 0x7b43c14c to unimplemented function ddraw.dll.GetSurfaceFromDC, aborting
  • SC2 unimplemented function ucrtbase.dll._except1
  • The Magic School Bus Explores The Solar System needs msvideo.dll16.DRAWDIBPROFILEDISPLAY
  • The Magic School Bus Explores The Solar System crashes on launch; appears to be missing some files
  • Dungeons & Dragons: Chronicles of Mystara needs d3dx11_43.dll.D3DX11CreateShaderResourceViewFromMemory
  • Git for Windows 2.7.0 needs unimplemented function rstrtmgr.dll.RmShutdown
  • winamp needs unimplemented function ntoskrnl.exe.IoStopTimer
  • Steam -> RPGMaker 2003 needs unimplemented function KERNEL32.dll.BaseFlushAppcompatCache
  • Sega Bug crashes immediately
  • WOLF RPG Editor: Division by zero when winegstreamer is enabled
  • mshtml/tests/dom crashes in xul while running test_doc_elem
  • QQ 2013 needs ntoskrnl.exe.IoCreateFile
  • QQ 2013 needs ntoskrnl.exe.KeClearEvent
  • Warpath 21st Century does not have sound
  • Magic: The Gathering Online 4.0 crashes when entering the battle
  • One Note Free Retail installer crashes in xmllite
  • Piriform Speccy 1.3 needs setupapi.dll.CM_Get_Child_Ex
  • DX Library: PlaySoundFile() doesn't play MP3 files with specific extra headers
  • Unimplemented function msvcr120.dll.fesetenv
  • KiriKiri Z based games: main screen doesn't update.
  • GetOpenFileName should expand environment variables in lpstrInitialDir
  • Build for Ubuntu Precise fails because MPG123_IGNORE_INFOFRAME is undeclared
  • NVIDIA GeForce GT 525M detected as GeForce GTX 470
  • Acid Pro Trial 7.0e  fails to install

Installation instructions:
 
Open terminal and insert command line...

$ wget https://dl.winehq.org/wine-builds/Release.key

$ sudo apt-key add Release.key

$ sudo apt-add-repository 'https://dl.winehq.org/wine-builds/ubuntu/'

$ sudo apt-get update

$sudo apt-get install winehq-stable

 Check version wine:

$ wine --version


How to install Brackets 1.9 on Ubuntu 16.04, 16.10, 17.04 via PAA

Harry
   Brackets is a lightweight, yet powerful, modern text editor. We blend visual tools into the editor so you get the right amount of help when you want it without getting in the way of your creative process.


What's New in Release 1.9
  •     Reverse inspect in Live Preview : Brackets 1.9 ships with Reverse-inspect in Live Preview. Now clicking on an element in Live Preview highlights the corresponding tag in the source code.
  •     Support for “Replace All” action in Find & Replace : Brackets now supports “Replace All” in Find & Replace along with batch operation.
  •     Download count display and extension sorting based on download count : Extension Manager now displays download count for listed extensions. Extensions can be sorted based on download count or published date in ‘Available’ and ‘Themes’ tab.
  •     Mode toggle in Untitled document : Language mode can be toggled for Untitled documents. Code coloring and Code Hints for the selected mode are also supported for Untitled documents.
  •     Document toggle in split view : Focus can be swapped between panes using keyboard shortcut.
  •     Github organization support for Brackets extensions : Github organizations can now own brackets extensions. All public owners of organization can update extensions.
Full change logs: brackets and brackets-shell

See release notes for full details


Installation instructions: 

    To add the Brackets PPA and install the application in Ubuntu (and derivatives), use the following commands:


$ sudo add-apt-repository ppa:webupd8team/brackets

$ sudo apt-get update

$ sudo apt-get install brackets


Spiderman Web Of Shadows

Harry


Minimum System Requirements


OS: Windows XP/Vista
Processor: Intel Pentium 4 @ 1.8 GHz / AMD Athlon XP 2000+
Memory: 1 GB RAM
Hard Drive: 3.5 Gb+ free
Video Memory: 128 Mb Dedicated
Video Card: nVidia GeForce 6600 / ATI Radeon X1300
Sound Card: DirectX 9 Compatible
DirectX: 9.0c

Recommended System Requirements


OS: Windows XP/Vista
Processor: Intel Core 2 DUO @ 2.2 GHz / AMD Athlon 64 X2 4400+
Memory: 2 GB
Hard Drive: 3.5 GB or more free
Video Memory: 256 MB Dedicated video memory
Video Card: nVidia GeForce 7800 / ATI Radeon x1900 or higher
Sound Card: DirectX 9 Compatible
DirectX: 9.0c


Download Utorrent


Download Winrar


Download Power ISO


Download The Game Here