 Recycling is one of those things that is good for the planet, and
it’s an common sense way to make
Recycling is one of those things that is good for the planet, and
it’s an common sense way to make A few Android engineers thought about the benefits of recycling and realized that an OS can also run more efficiently if it recycles. The result of this inspiration was millions of eco-Warriors and recycling enthusiasts rejoicing when the
RecyclerView widget was introduced into Android Lollipop — or something like that. :]There was even more celebration when Google announced a support library to make this clean, green, recycling machine backwards compatible all the way to Android Eclair (2.2), which was released back in 2010!
In this tutorial, you’re going to experience the power of RecyclerView in action and learn:
- The purpose of a RecyclerView
- The components that make up a RecyclerView
- How to change the layout of a RecyclerView
- How to add some nice animations to your RecyclerView
Prerequisites: You should have a working knowledge of
developing for Android before working through this tutorial. If you need
a refresher, take a look at some of our introductory tutorials!
Heading to Cape Canaveral: Getting Started
Download the starter project and open it up in Android Studio. There isn’t much to it yet, nor is the almighty RecyclerView anywhere to be seen.Click the Run app button at the top and you’ll see something that resembles outer space in all the wrong ways:
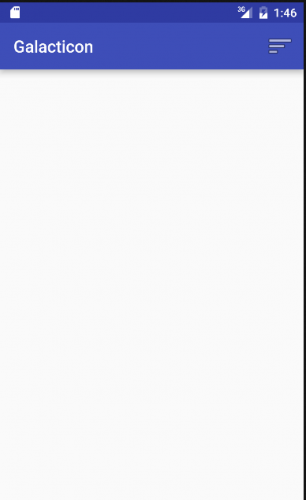
It’s empty, but that’s ok. You wouldn’t learn much if all the work was done for you! Before you can add that amazing astrophotography from NASA, you’ll need to do some set up work.
Obtaining The (API) Keys to the Shuttle
You’ll use the Astronomy Picture of the Day API, one of the most popular web services provided by NASA. To ensure it doesn’t fall victim to unsolicited traffic, the service requires you to have an API key to use it in an application.Fortunately, getting a key is as simple as putting your name and email address into api.nasa.gov and copying the API key that appears on the screen or in the email you receive a few moments later:

Once you’ve acquired your API key, copy it and open the strings.xml file in your project. Paste your API key into the
api_key string resource, replacing INSERT API KEY HERE: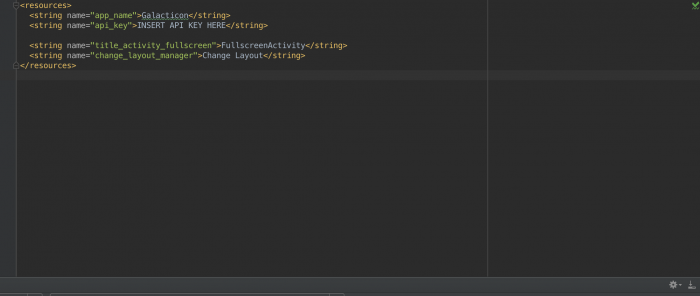
Space Oddity: Learning About RecyclerView
You’re about to blast off into outer space to explore the vastness of RecyclerViews, but no competent commander heads into the unknown without preparation. You have questions, and you need answers before you go any further. Consider this section as your mission brief.A RecyclerView can be thought of as a combination of a ListView and a GridView. However, there are extra features that separate your code into maintainable components even as they enforce memory-efficient design patterns.
But how could it be better than the tried and tested ListView and GridView you’re used to? Could it be some kind of alien technology? The answers, as always, are in the details.
Why You Need RecyclerView
Imagine you’re creating a ListView where the custom items you want to show are quite complicated. You take time to lovingly create a row layout for these items, and then use that layout inside your adapter.Inside your
getView() method, you inflate your new item
layout. You then reference every view within by using the unique ids
you provided in your XML to customize and add some view logic. Once
finished, you pass that view to the ListView, ready to be drawn on the
screen. All is well…or is it?The truth is that ListViews and GridViews only do half the job of achieving true memory efficiency. They recycle the item layout, but don’t keep references to the layout children, forcing you to call
findViewById() for every child of your item layout every time you call getView().All this calling around can become very processor-intensive, especially for complicated layouts. Furthermore, the situation can cause your ListView scrolling to become jerky or non-responsive as it frantically tries to grab references to the views you need.

Android engineers initially provided a solution to this problem on the Android Developers with smooth scrolling, via the power of the
View Holder pattern. When you use this pattern, you create a class that becomes an in-memory reference to all the views needed to fill your layout. The benefit is you set the references once and reuse them, effectively working around the performance hit that comes with repeatedly calling
findViewById().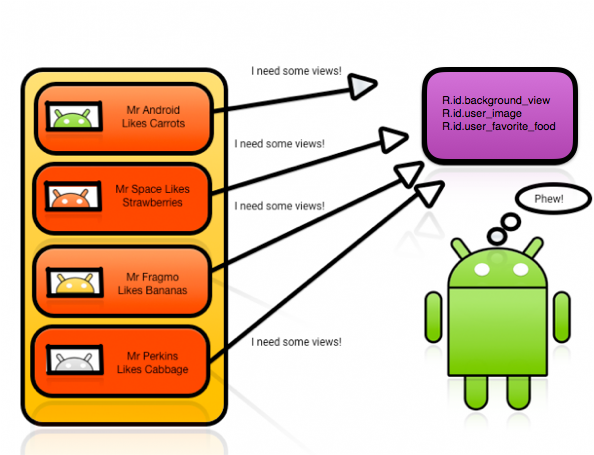
The problem is that it’s an optional pattern for a ListView or GridView. If you’re unaware of this detail, then you may wonder why your precious ListViews and GridViews are so slow.
First Contact: RecyclerView and Layouts
The arrival of the RecyclerView changed everything. It still uses an Adapter to act as a data source; however, you have to create ViewHolders to keep references in memory.When you need a new view, it either creates a new ViewHolder object to inflate the layout and hold those references, or it recycles one from the existing stack.
Now you know why it’s called a RecyclerView!
Another perk of using RecyclerViews is that they come with default animations that you don’t have to create or add yourself — they just work.
Thanks to the requirement for a ViewHolder, the RecyclerView knows exactly which animation to apply to which item. Best of all, it just does it as required. You can even create your own animations and apply them as needed.
The last and most interesting component of a RecyclerView is its LayoutManager. This object positions the RecyclerView’s items and tells it when to recycle items that have transitioned off-screen.
Layout Managers come in three default flavors:
- LinearLayoutManager positions your items to look like a standard ListView
- GridLayoutManager positions your items in a grid format similar to a GridView
- StaggerGridLayoutManager positions your items in a staggered grid format.
LayoutManagers to use with a RecyclerView if you want an extra bit of customization.Hopefully that answers all your questions, commander. Now, onto the mission!
Preparing for Launch: Creating the RecyclerView
To create the RecyclerView, you’ll break the work into four parts:- Declare the RecyclerView in an activity layout and reference it in your activity Java file.
- Create a custom item XML layout for your RecyclerView to use for its items.
- Create the view holder for your view items, hook up the data source of the RecyclerView and handle the view logic by creating a RecyclerView Adapter.
- Attach the adapter to the RecyclerView.
<android.support.v7.widget.RecyclerView android:id="@+id/recyclerView" android:layout_width="match_parent" android:layout_height="match_parent" android:scrollbars="vertical"/> |
Note: You’re using the v7 support library for backwards
compatibility with older devices. The sample project already adds the
RecyclerView Support Library as a dependency in your app’s build.gradle file. If you want more information on how to do it yourself, check out the Android developer website.
Open MainActivity.java and declare the following member variables at the top of the class:private RecyclerView mRecyclerView; private LinearLayoutManager mLinearLayoutManager; |
onCreate(), add the following lines after setContentView:mRecyclerView = (RecyclerView) findViewById(R.id.recyclerView); mLinearLayoutManager = new LinearLayoutManager(this); mRecyclerView.setLayoutManager(mLinearLayoutManager); |
Ignition Phase 2: Laying out the RecyclerView Items
Phase two of ignition involves creating a custom layout for the item you want your RecyclerView to use. It works exactly the same as it does when you create a custom layout for a ListView or Gridview.Head over to your layout folder and create a new layout with the name
recyclerview_item_row and set the root element as a LinearLayout. In your new layout, add the following XML elements as children of your LinearLayout:<ImageView android:id="@+id/item_image" android:layout_width="wrap_content" android:layout_height="wrap_content" android:layout_gravity="center" android:layout_marginTop="8dp" android:adjustViewBounds="true" android:layout_weight="3"/> <TextView android:id="@+id/item_date" android:layout_width="wrap_content" android:layout_height="wrap_content" android:layout_marginTop="8dp" android:layout_gravity="top|start" android:layout_weight="1" android:text="Some date"/> <TextView android:id="@+id/item_description" android:layout_width="wrap_content" android:layout_height="wrap_content" android:layout_gravity="center|start" android:layout_weight="1" android:ellipsize="end" android:maxLines="5"/> |
Adapters: Rocket Fuel for Your RecyclerView
Right-click on the com.raywenderlich.galacticon folder, select New \ Java Class, and name it RecyclerAdapter. At the top of the file below thepackage declaration, import the support library’s version of RecyclerView:import android.support.v7.widget.RecyclerView; |
public class RecyclerAdapter extends RecyclerView.Adapter<RecyclerAdapter.PhotoHolder> { } |
To resolve this, click on the line of code to insert your cursor, then press alt + return (or option + return) to bring up a context menu. Select Implement Methods:

Confirm you want to implement the suggested methods by clicking OK:
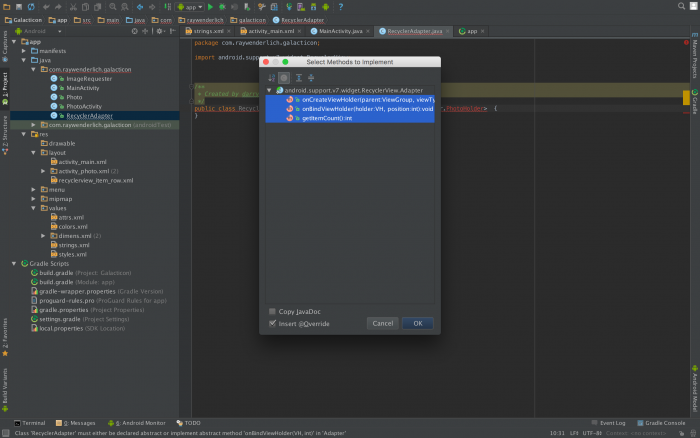
These methods are the driving force behind your RecyclerView adapter. Note how there is still a compiler error for the moment– this is because your adapter and the required methods are actually defined using your ViewHolder class,
PhotoHolder, which doesn’t exist
just yet. You’ll get to define your ViewHolder and see what each
required method does shortly, so just hang tight, Commander!As with every adapter, you need to provide the corresponding view a means of populating items and deciding how many items there should be.
Item clicks were previously managed by a ListView’s or GridView’s
onItemClickListener.
A RecyclerView doesn’t provide methods like this because it has one
focus: ensuring the items inside are positioned properly and managed
efficiently. The job of listening for actions is now the responsibility of the RecyclerView item and its children. This may seem like more overhead, but in return, you get fine-grained control over how your item’s children can act.
At the top of your RecyclerAdapter class, add a variable to hold your photos:
private ArrayList<Photo> mPhotos; |
public RecyclerAdapter(ArrayList<Photo> photos) { mPhotos = photos; } |
Next, you’ll populate the stubbed methods that were added by Android Studio.
The first method,
getItemCount(), is pretty simple and should be familiar from your work with ListViews or GridViews. The adapter will work out how many items to display. In this case, you want the adapter to show every photo you’ve downloaded from NASA’s API. To do that, add the following line between the method braces:
return mPhotos.size(); |
ViewHolder pattern to make an object that holds all your view references.Velcro For All: Keeping Hold Of Your Views
To create a PhotoHolder for your view references, you’ll create a static inner class for your adapter. You’ll add it here rather than in a separate class because its behavior is tightly coupled with the adapter.It’s a static class, so regardless of how many instances you create, its values are shared amongst all of them — it’s pretty handy for holding references.
Add the following code underneath your adapter class member variables, but before any of the methods:
//1 public static class PhotoHolder extends RecyclerView.ViewHolder implements View.OnClickListener { //2 private ImageView mItemImage; private TextView mItemDate; private TextView mItemDescription; private Photo mPhoto; //3 private static final String PHOTO_KEY = "PHOTO"; //4 public PhotoHolder(View v) { super(v); mItemImage = (ImageView) v.findViewById(R.id.item_image); mItemDate = (TextView) v.findViewById(R.id.item_date); mItemDescription = (TextView) v.findViewById(R.id.item_description); v.setOnClickListener(this); } //5 @Override public void onClick(View v) { Log.d("RecyclerView", "CLICK!"); } } |
- Made the class extend RecyclerView.ViewHolder, allowing it to be used as a ViewHolder for the adapter.
- Added a list of references to the lifecycle of the object to allow the ViewHolder to hang on to your ImageView and TextView, so it doesn’t have to repeatedly query the same information.
- Added a key for easier reference to the particular item being used to launch your RecyclerView.
- Set up a constructor to handle grabbing references to various subviews of the photo layout.
- Implemented the required method for
View.OnClickListenersince ViewHolders are responsible for their own event handling.
Assembling The Pieces
Sometimes there are no ViewHolders available. In this scenario, RecylerView will askonCreateViewHolder() from RecyclerAdapter to make a new one. You’ll use the item layout — PhotoHolder — to create a view for the ViewHolder.
Replace the
return null line between the curly braces with the following:View inflatedView = LayoutInflater.from(parent.getContext()) .inflate(R.layout.recyclerview_item_row, parent, false); return new PhotoHolder(inflatedView); |
And with that, you’ve made it so the object holds onto those references while it’s recycled, but there are still more pieces to put together before you can launch your rocketship.
Start a new activity by replacing the log in ViewHolder’s
onClick with this code:Context context = itemView.getContext(); Intent showPhotoIntent = new Intent(context, PhotoActivity.class); showPhotoIntent.putExtra(PHOTO_KEY, mPhoto); context.startActivity(showPhotoIntent); |
Next thing to do is to add this method inside
PhotoHolder:public void bindPhoto(Photo photo) { mPhoto = photo; Picasso.with(mItemImage.getContext()).load(photo.getUrl()).into(mItemImage); mItemDate.setText(photo.getHumanDate()); mItemDescription.setText(photo.getExplanation()); } |
It also adds the suggested Picasso import, which is a library that makes it significantly simpler to get images from a given URL.
The last piece of the PhotoHolder assembly will tell it how to show the right photo at the right moment. It’s the RecyclerAdapter’s
onBindViewHolder, and it lets you know a new item will be available on screen and the holder needs some data.Add the following code inside the
onBindViewHolder() method:Photo itemPhoto = mPhotos.get(position); holder.bindPhoto(itemPhoto); |
And that’s all you needed to do here on the assembly — just use the position where your ViewHolder will appear to grab the photo out of your list, and then pass it to your ViewHolder.
Step three of your ignition check protocol is complete!
Countdown And Liftoff: Hooking up the Adapter And RecyclerView
This is the moment you’ve been waiting for, the final stage before blast off! All you need to do is hook your adapter up to your RecyclerView and make sure it retrieves photos when it’s created so you can explore space — in pictures.Open MainActivity.java, and add this variable at the top:
private RecyclerAdapter mAdapter; |
onCreate() add the following:mAdapter = new RecyclerAdapter(mPhotosList); mRecyclerView.setAdapter(mAdapter); |
Although the adapter is connected, there’s one more thing to do to make sure you don’t have an empty screen.
In
onStart(), underneath the call to super, add this code:if (mPhotosList.size() == 0) { requestPhoto(); } |

Next, in
receivedNewPhoto(), update the method so it looks like the following:@Override public void receivedNewPhoto(final Photo newPhoto) { runOnUiThread(new Runnable() { @Override public void run() { mPhotosList.add(newPhoto); mAdapter.notifyItemInserted(mPhotosList.size()); } }); } |
Now you’re ready to commence the ignition sequence, er…I mean run the app.
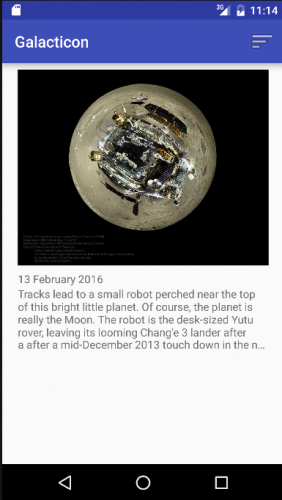
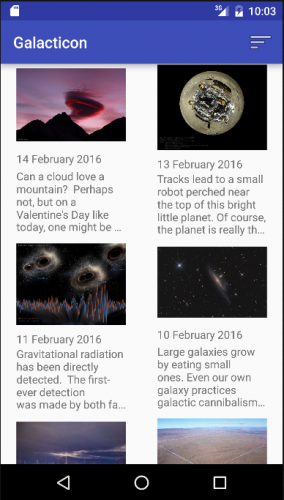
Run the app, load up the emulator and before long, Galacticon should look something like this:
That’s not all. Tap on the photo, and you should be greeted with a new activity that brings that item into focus:
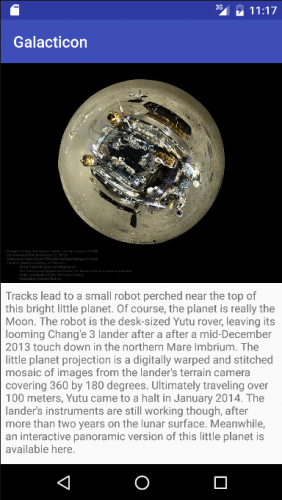
But that’s still not all! Try rotating your device or emulator (function + control + F11/F12) and you’ll see the image in full screen glory!

Depending on the size of the image and your device screen it may look a little distorted, but don’t worry about that.
Congratulations! You have a working RecyclerView and can take your journey amongst the stars.
Taking A Spacewalk: Adding Scrolling support
If you head back to MainActivity on your device and try to scroll down, you’ll notice something is amiss — your RecyclerView isn’t retrieving any new photos.
Your RecyclerView is doing exactly as it’s told by showing the contents of
mPhotosList.
The problem is that the app will only retrieve one photo when you load
the app. It has no idea when or how to grab more photos.So next, you’ll retrieve the number of the photos and the last visible photo index while scrolling. Then you’ll check to see if the last photo is visible and if there are no photos already on request. If these are both true, then your app goes away and downloads more pretty photos!
This patch will require a spacewalk, so break out your spacesuit and get ready for a zero gravity experience.
In MainActivity.java, add this method below
onStart:private int getLastVisibleItemPosition() { return mLinearLayoutManager.findLastVisibleItemPosition(); } |
Next, you add a method that inserts an
onScrollListener to your RecyclerView, so it can get a callback when the user scrolls:private void setRecyclerViewScrollListener() { mRecyclerView.addOnScrollListener(new RecyclerView.OnScrollListener() { @Override public void onScrollStateChanged(RecyclerView recyclerView, int newState) { super.onScrollStateChanged(recyclerView, newState); int totalItemCount = mRecyclerView.getLayoutManager().getItemCount(); if (!mImageRequester.isLoadingData() && totalItemCount == getLastVisibleItemPosition() + 1) { requestPhoto(); } } }); } |
Finally, hook everything to the RecyclerView by calling this method from
onCreate, just beneath where you set your RecyclerView Adapter:setRecyclerViewScrollListener(); |
Excellent work, your RecyclerView now updates to show the latest photo requested by your app. The great thing is that
receivedNewPhoto() handles most of the work because you told it to notify your adapter about new items. That earns an intergalactic thumbs up for upcycling code!
Layout Changes
Now that your RecyclerView is up and running, it’s time to trick out your spaceship.Wouldn’t it be cool if your RecyclerView could change its layout? Good news: RecyclerView’s item positioning is separated into a layout manager.
Add a variable for a GridLayoutManager to the top of MainActivity.java:
private GridLayoutManager mGridLayoutManager; |
In
onCreate(), initialize the LayoutManager below the existing Linear Layout Manager:mGridLayoutManager = new GridLayoutManager(this, 2); |
Add this method to MainActivity:
private void changeLayoutManager() { if (mRecyclerView.getLayoutManager().equals(mLinearLayoutManager)) { //1 mRecyclerView.setLayoutManager(mGridLayoutManager); //2 if (mPhotosList.size() == 1) { requestPhoto(); } } else { //3 mRecyclerView.setLayoutManager(mLinearLayoutManager); } } |
- If it’s using the LinearLayoutManager, it swaps in the GridLayoutManager
- It requests a new photo if your grid layout only has one photo to show
- If it’s using the GridLayoutManager, it swaps in the LinearLayoutManager
getLastVisibleItemPosition() to help it handle the new LayoutManager. Replace its current contents with the following:int itemCount; if (mRecyclerView.getLayoutManager().equals(mLinearLayoutManager)) { itemCount = mLinearLayoutManager.findLastVisibleItemPosition(); } else { itemCount = mGridLayoutManager.findLastVisibleItemPosition(); } return itemCount; |
To use the grid layout, make use of the Options menu button that is already available in the app. Add the following code underneath
onStart():@Override public boolean onOptionsItemSelected(MenuItem item) { if (item.getItemId() == R.id.action_change_recycler_manager) { changeLayoutManager(); return true; } return super.onOptionsItemSelected(item); } |
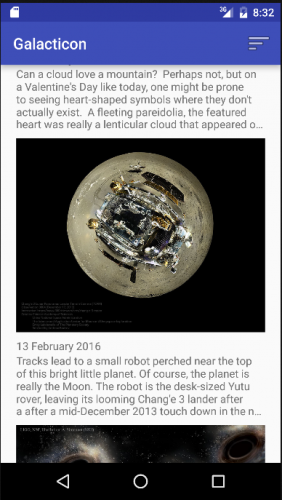
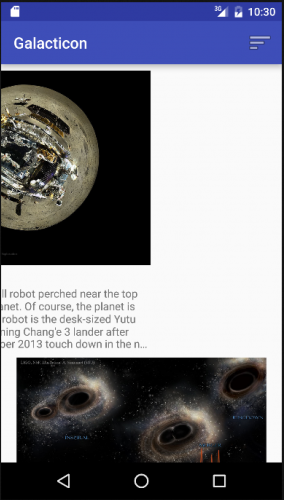
And just like that, you’re ready to go! Load up the app and tap the button at the top right of the screen, and you’ll begin to see the stars shift:
Star Killer
Sometimes you’ll see things you just don’t like the look of, perhaps a galaxy far, far away that has fallen to the dark side or a planet that is prime for destruction. How could you go about killing it with a swipe?Luckily, Android engineers have provided a useful class named
ItemTouchHelper that gives you easy swipe behavior. Creating and attaching this to a RecyclerView requires just a few lines of code.In MainActivity.java, underneath
setRecyclerViewScrollListener() add the following method:private void setRecyclerViewItemTouchListener() { //1 ItemTouchHelper.SimpleCallback itemTouchCallback = new ItemTouchHelper.SimpleCallback(0, ItemTouchHelper.LEFT | ItemTouchHelper.RIGHT) { @Override public boolean onMove(RecyclerView recyclerView, RecyclerView.ViewHolder viewHolder, RecyclerView.ViewHolder viewHolder1) { //2 return false; } @Override public void onSwiped(RecyclerView.ViewHolder viewHolder, int swipeDir) { //3 int position = viewHolder.getAdapterPosition(); mPhotosList.remove(position); mRecyclerView.getAdapter().notifyItemRemoved(position); } }; //4 ItemTouchHelper itemTouchHelper = new ItemTouchHelper(itemTouchCallback); itemTouchHelper.attachToRecyclerView(mRecyclerView); } |
- You create the callback and tell it what events to listen for. It takes two parameters, one for drag directions and one for swipe directions, but you’re only interested in swipe, so you pass 0 to inform the callback not to respond to drag events.
- You return false in
onMovebecause you don’t want to perform any special behavior here. onSwipedis called when you swipe an item in the direction specified in theItemTouchHelper. Here, you request theviewHolderparameter passed for the position of the item view, then you remove that item from your list of photos. Finally, you inform the RecyclerView adapter that an item has been removed at a specific position.- You initialize the
ItemTouchHelperwith the callback behavior you defined, and then attach it to the RecyclerView.
onCreate(), underneath setRecyclerViewScrollListener():setRecyclerViewItemTouchListener(); |
ItemTouchListener to the RecyclerView using the code you just wrote.Run the app once more and swipe across one of your items, you should see it begin to move. If you swipe the item far enough, you should see it animate and vanish. If other items are visible, then they will reorganize themselves to cover the hole. How cool is that?
Where To Go From Here?
Nice job! You’ve been on quite an adventure, but now it’s time to head back to Earth and think about what you’ve learned.- You’ve created a RecyclerView and all the components it needs, such as a LayoutManager, an adapter and a ViewHolder.
- You’ve updated and removed items from an Adapter.
- You’ve added some cool features like changing layouts and adding swipe functionality.
The final project for this tutorial is available here.
If you want to learn more about RecyclerViews then check out the Android documentation to see what it can do. Take a look at the support library for RecyclerViews to learn how to use it on older devices. If you want to make them fit with the material design spec then check out the list component design specification.
Join us in the forums to discuss this tutorial and your findings as you work with RecylerViews!
Until next time, space traveler!


0 comments:
Post a Comment
Note: only a member of this blog may post a comment.