 Ever since the first release of Android, the range of supported
devices has grown to represent a wide array of phones, smart watches and
more. Everything necessary to start developing Android Android SDK (software development kit).
Ever since the first release of Android, the range of supported
devices has grown to represent a wide array of phones, smart watches and
more. Everything necessary to start developing Android Android SDK (software development kit). applications for those devices falls under one specification called the
New versions of the SDK, which are released with each new version of Android, take advantage of the increased processing power available on the latest devices to provide great new features. Awesome, right? The flip side, of course, is that Android developers are faced with the challenge of making sure an application will work on a range of devices running different versions of the Android SDK.
Luckily, there are some best practice guidelines and tools to help get the work done without compromising on UX or deadlines.
In this Android SDK Versions tutorial you’ll learn about:
- Android SDK versions and API Levels
- Android Support Libraries and their importance
- How to use the Android Support Library to make an app backward-compatible
- How to use the CardView Support Library
Note: This Android SDK Versions tutorial
assumes you are already familiar with the basics of Android development.
If you are completely new to Android development, read the Android Tutorial for Beginners to familiarize yourself with the basics.
Getting Started
Download the starter project for this tutorial and extract the downloaded zip file to get the project.Open the starter project in Android Studio by selecting Open an existing Android Studio project from the Quick Start menu:

You can also select File \ Open. Navigate to and select the starter project folder.
Build and run the project on the emulator or device to make sure it compiles and runs correctly.
Emulating Different SDK Versions
We want to try running the sample app on different Android versions, but since it’s unlikely anyone has an Android device for every single API Level of the SDK, first let’s learn how to set up emulators with different SDK versions.To set up an emulator, locate the AVD (Android Virtual Device) Manager on the Android Studio Toolbar.

If the Toolbar is not showing, select View \ Toolbar to show it. You can also open the AVD Manager by selecting Tools \ Android \ AVD Manager.
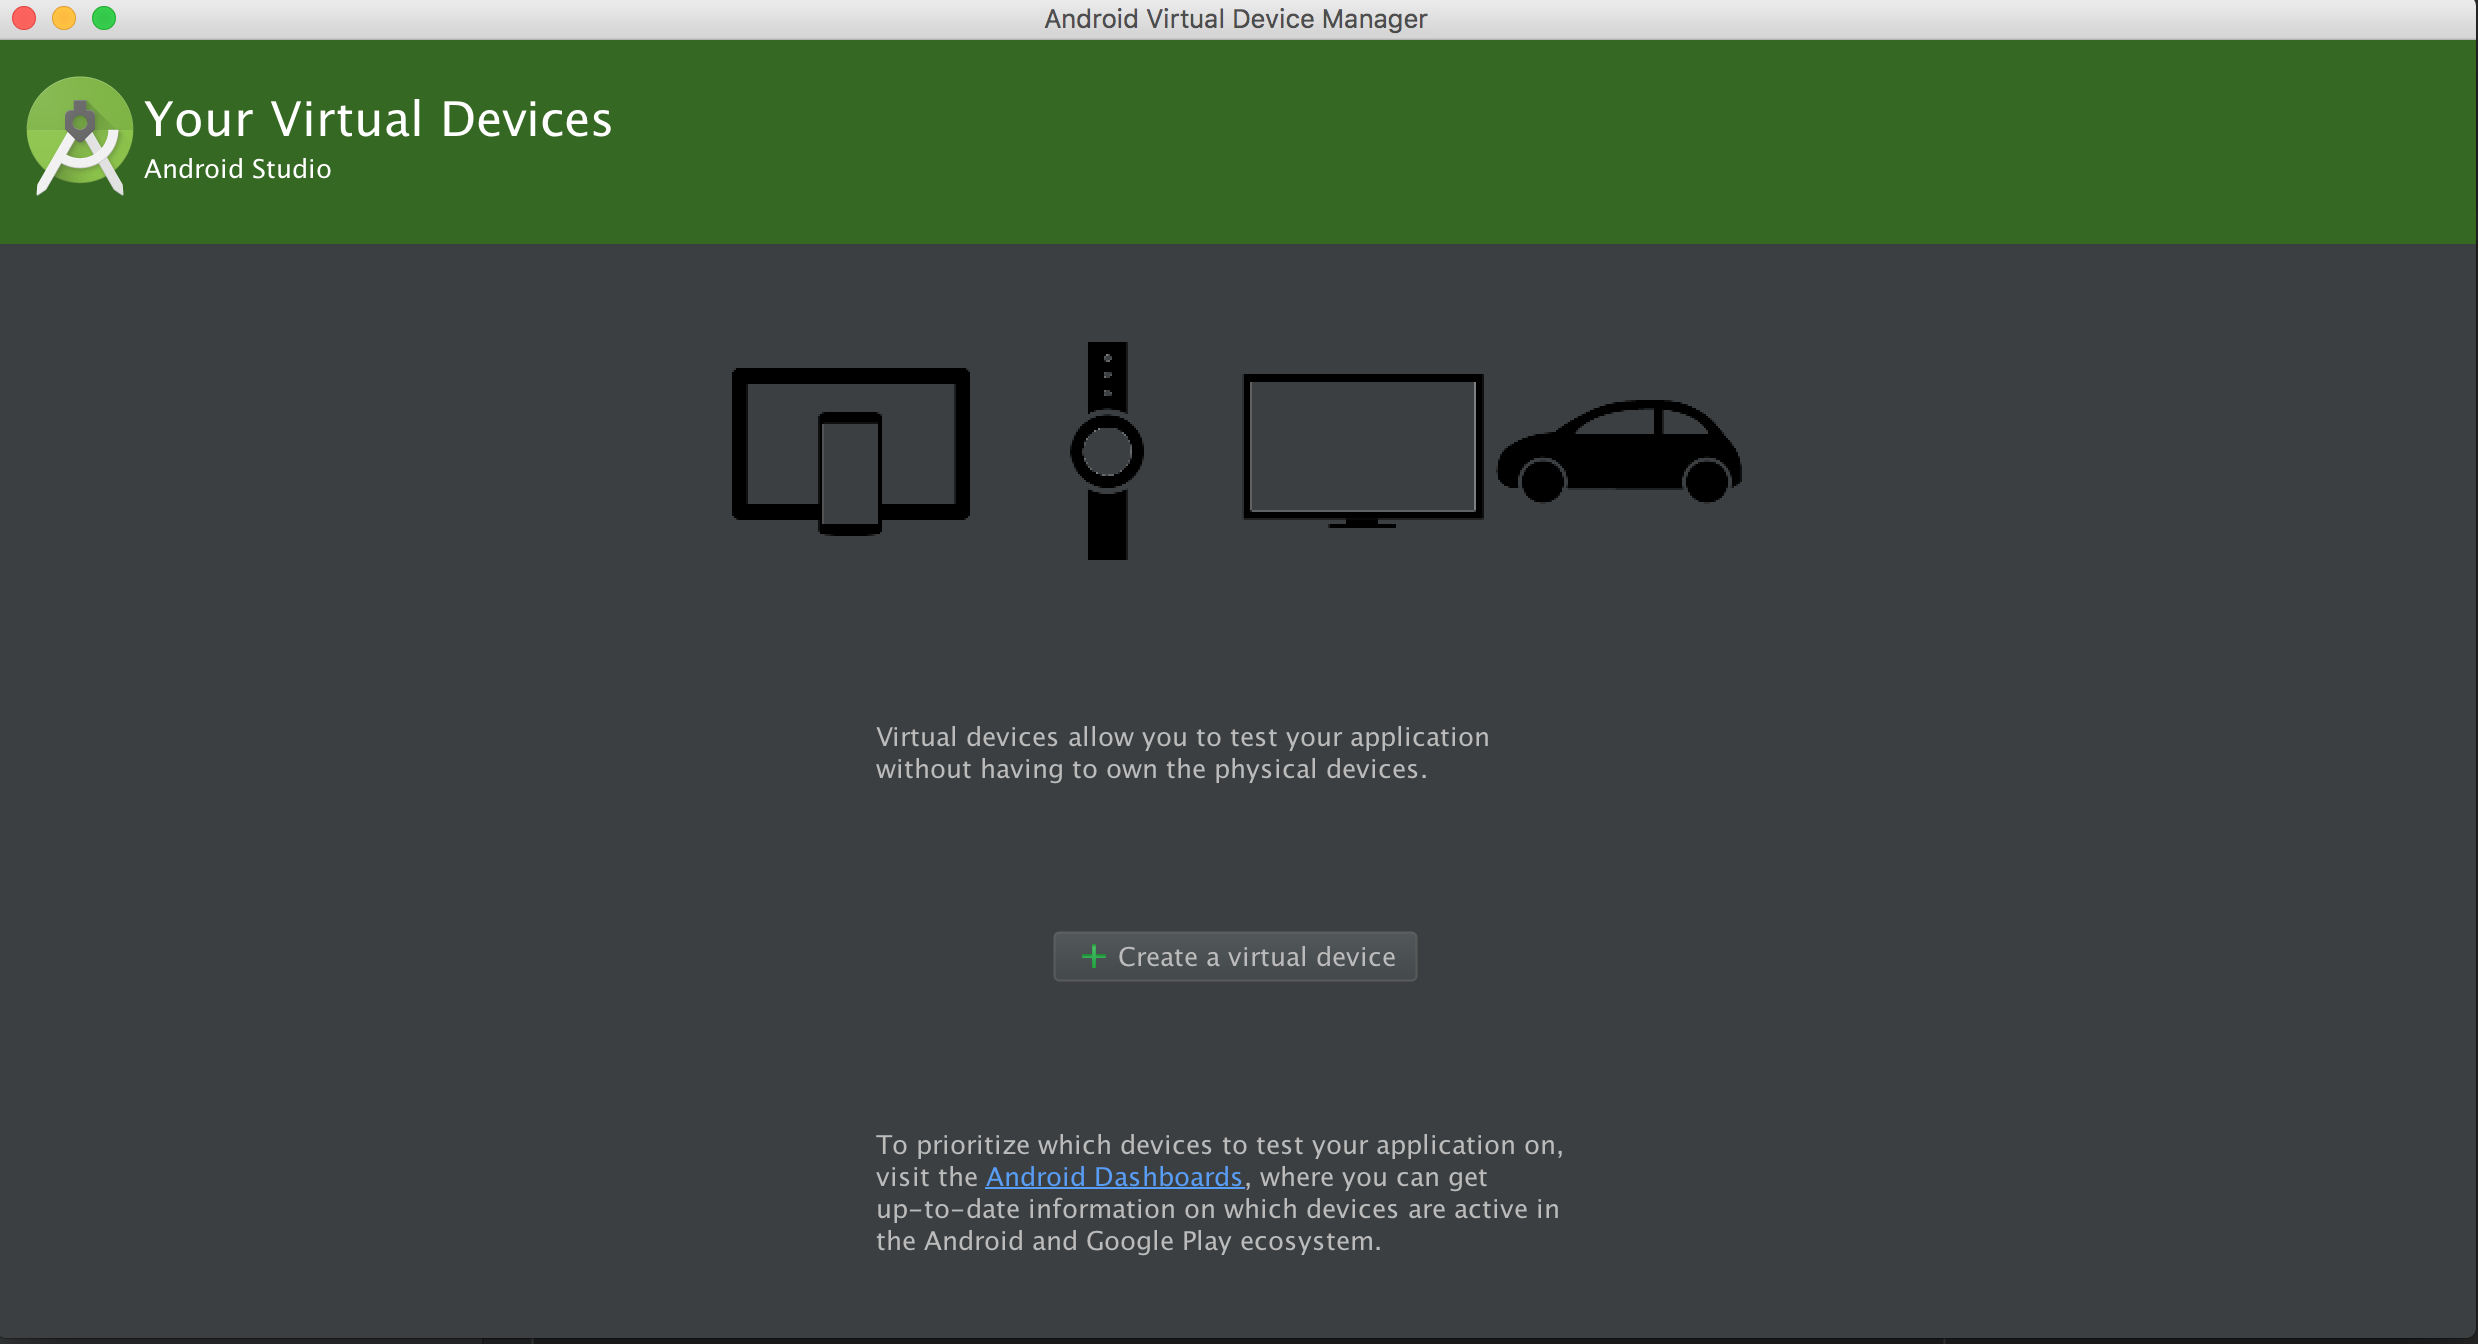
Click the Create a virtual device button. That will open the Select Hardware section of the Virtual Device Configuration window.
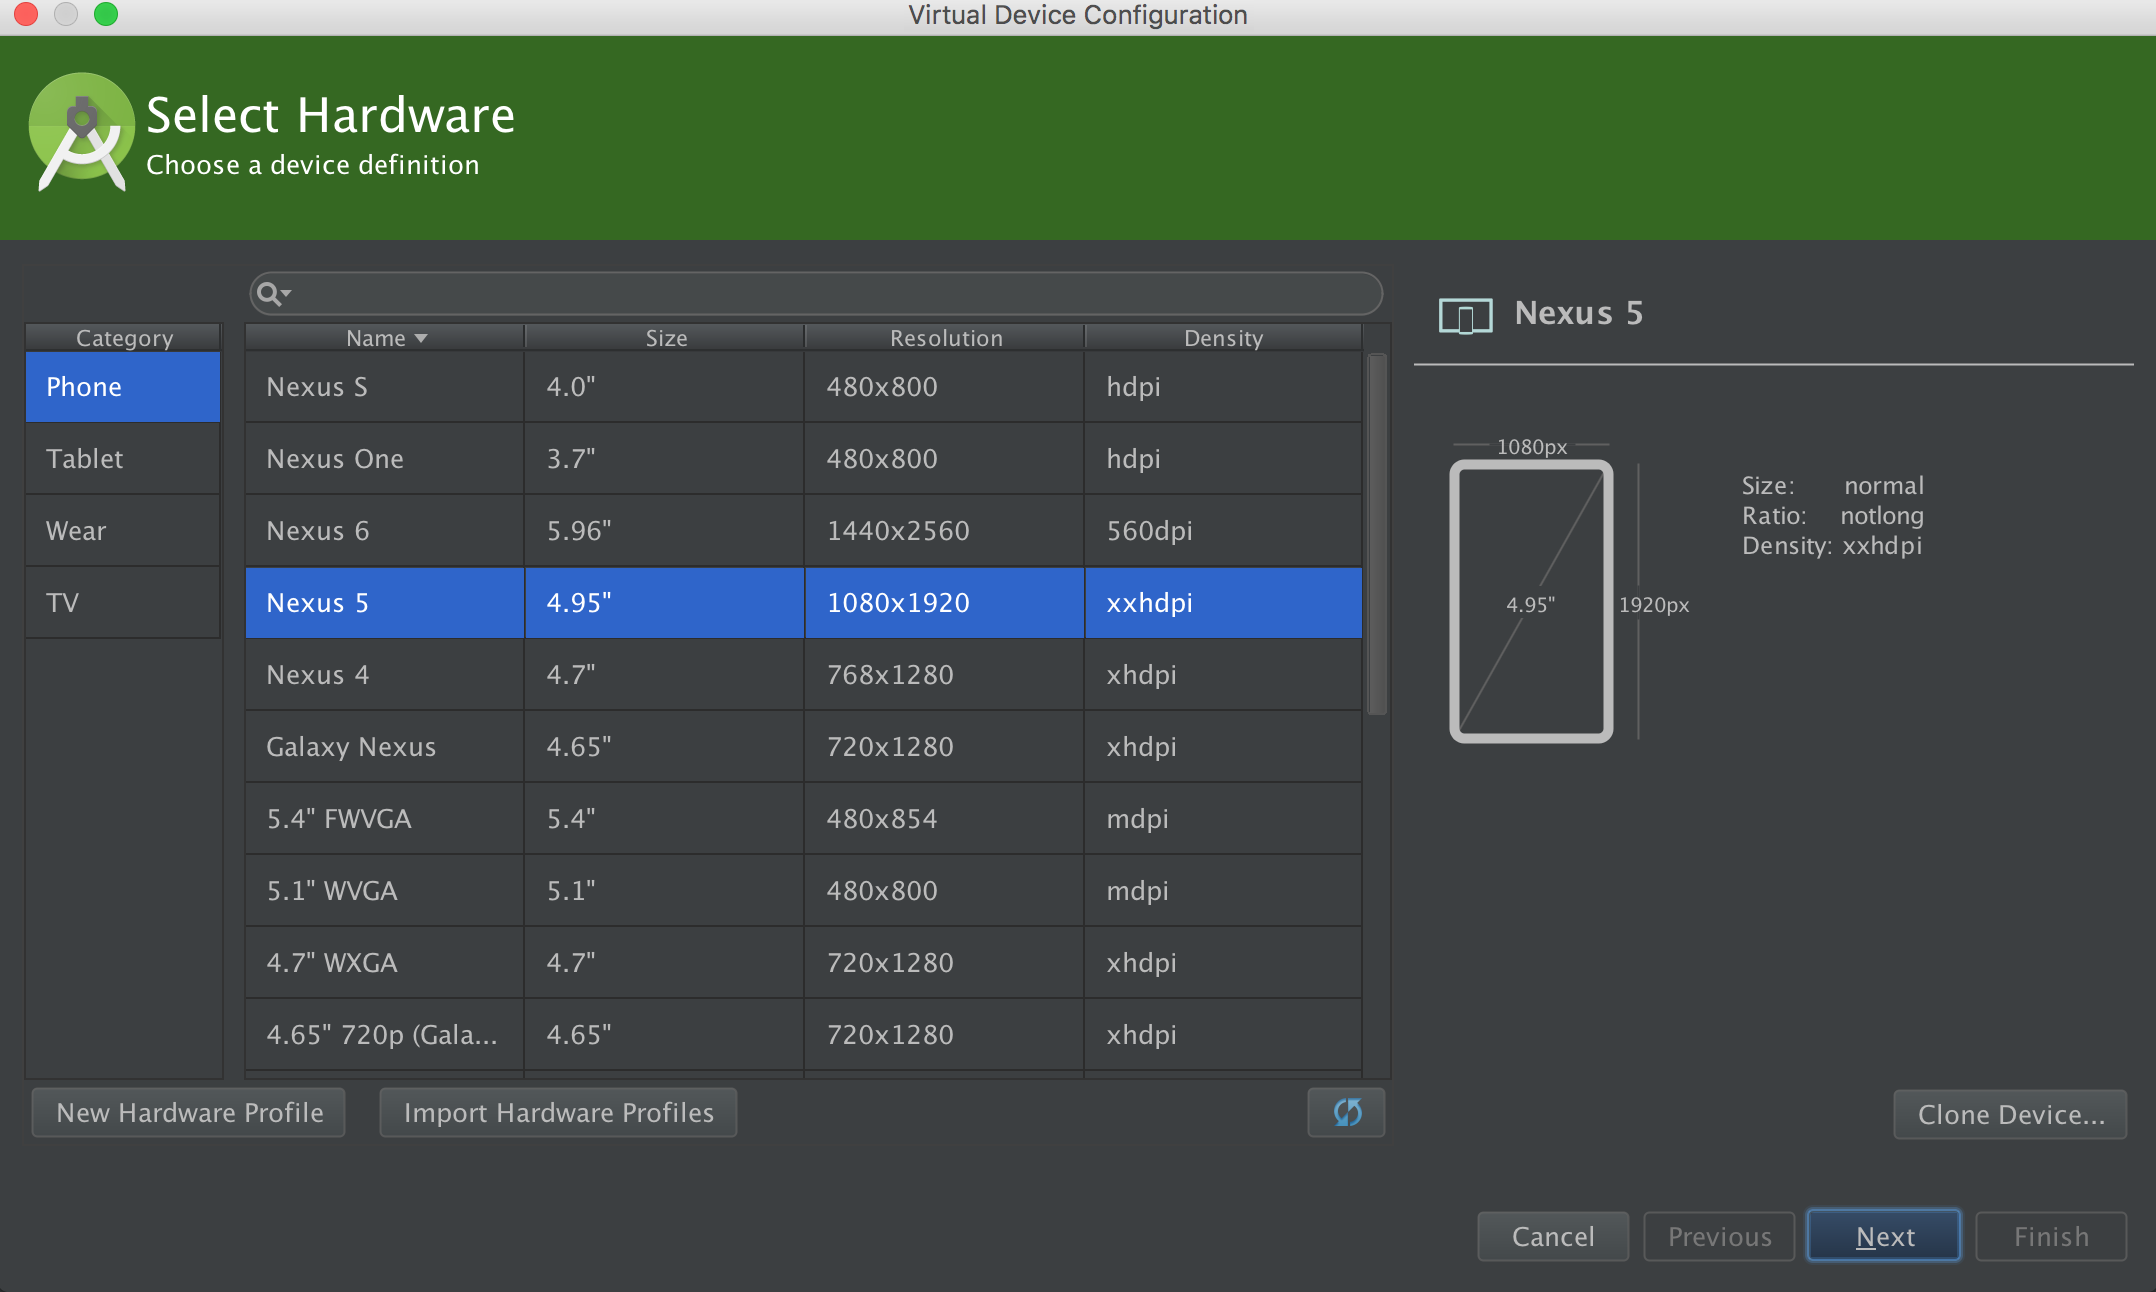
Select a device of your choice and click Next. That opens the System Image section, which currently shows all installed system images.
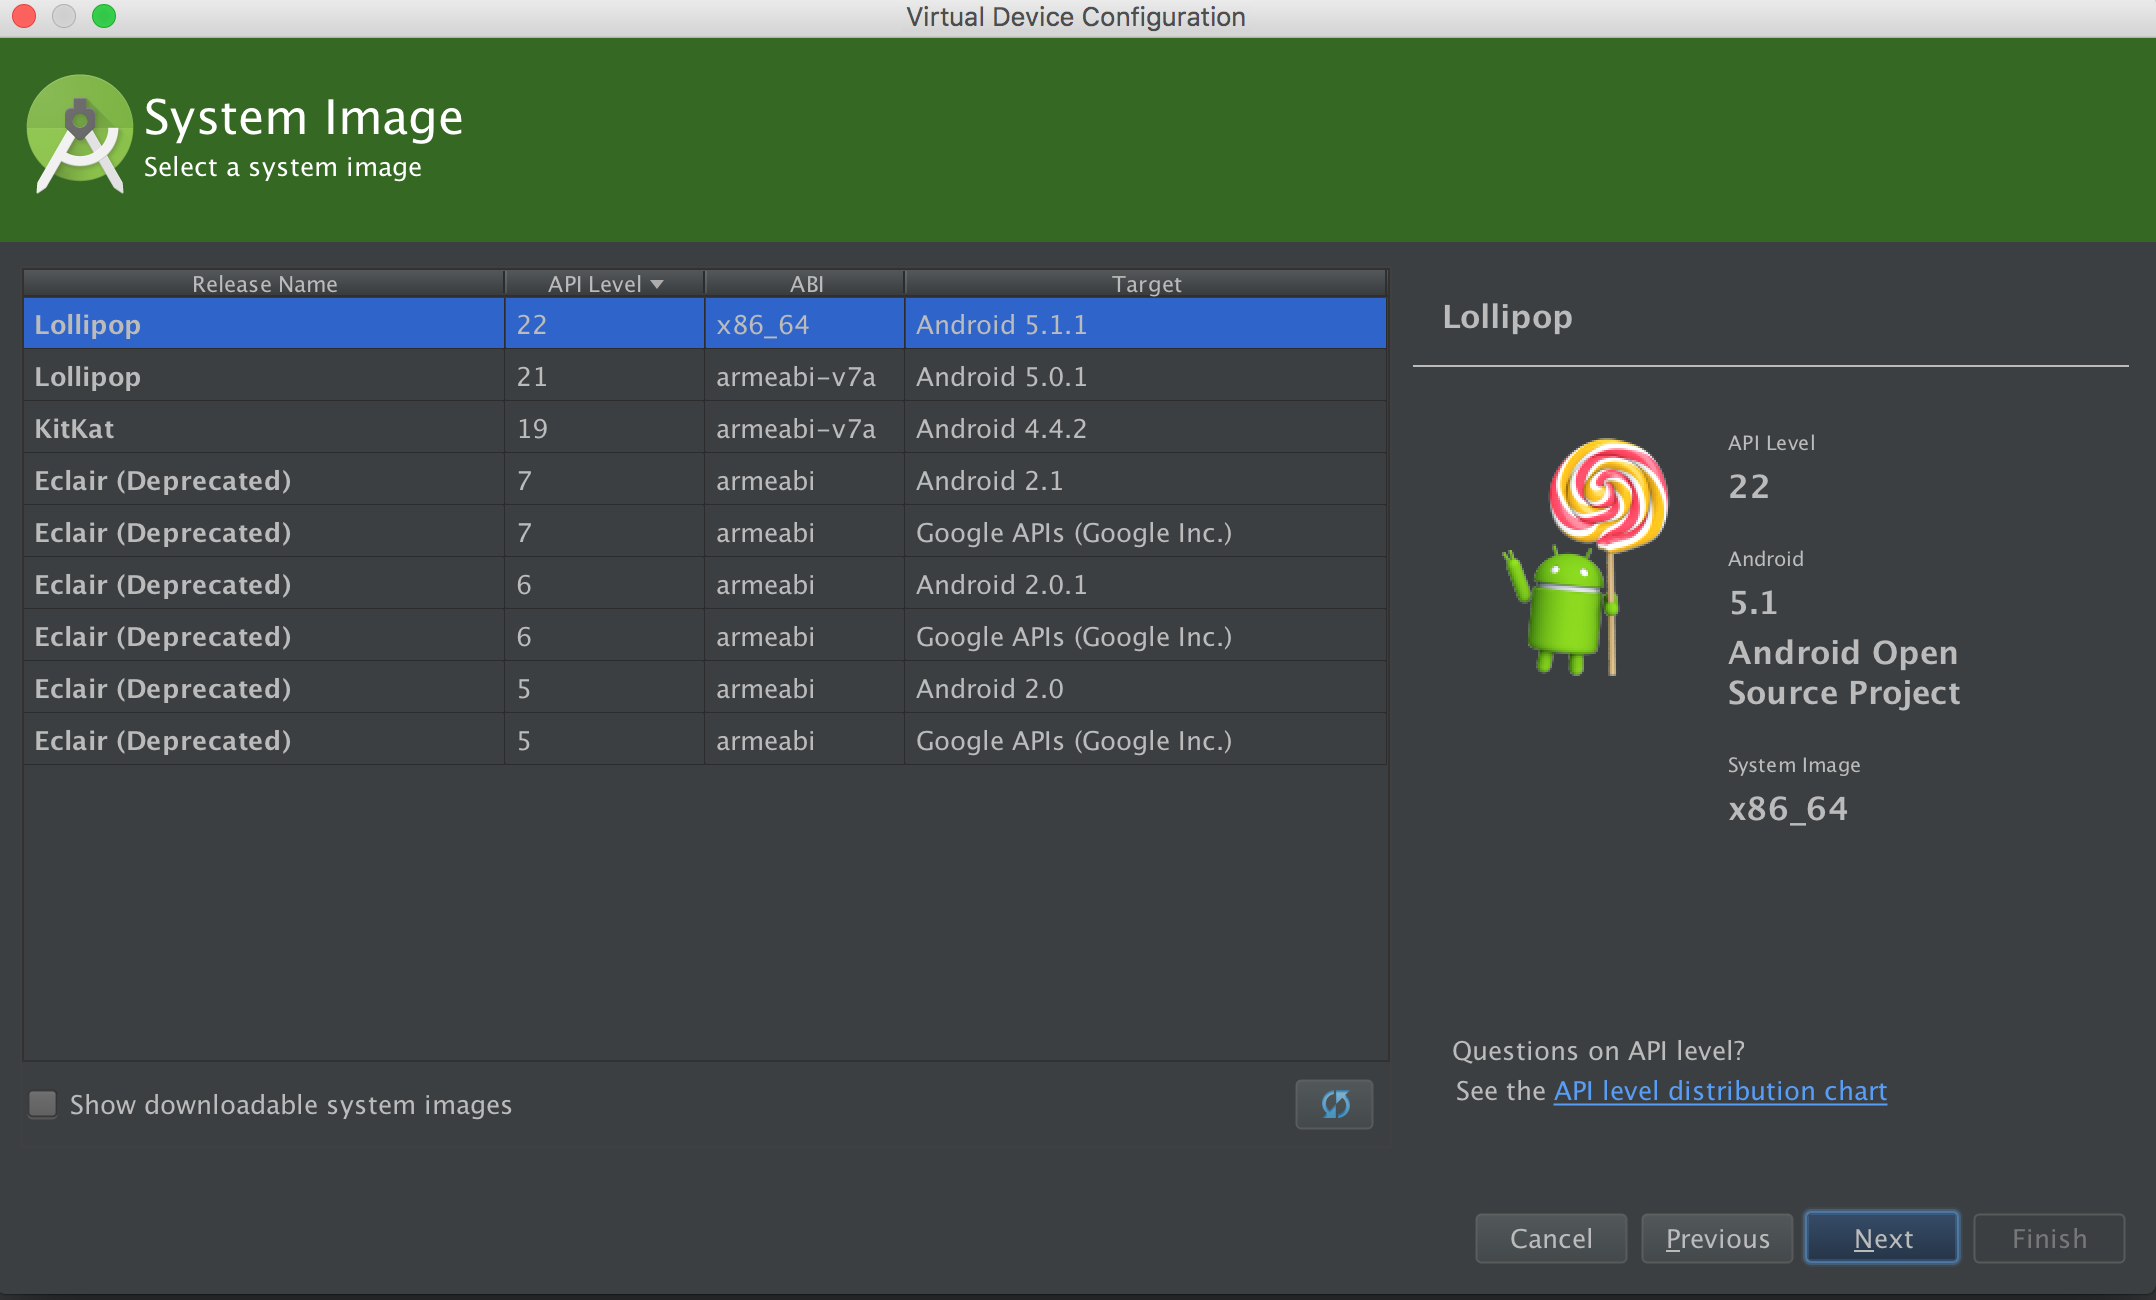
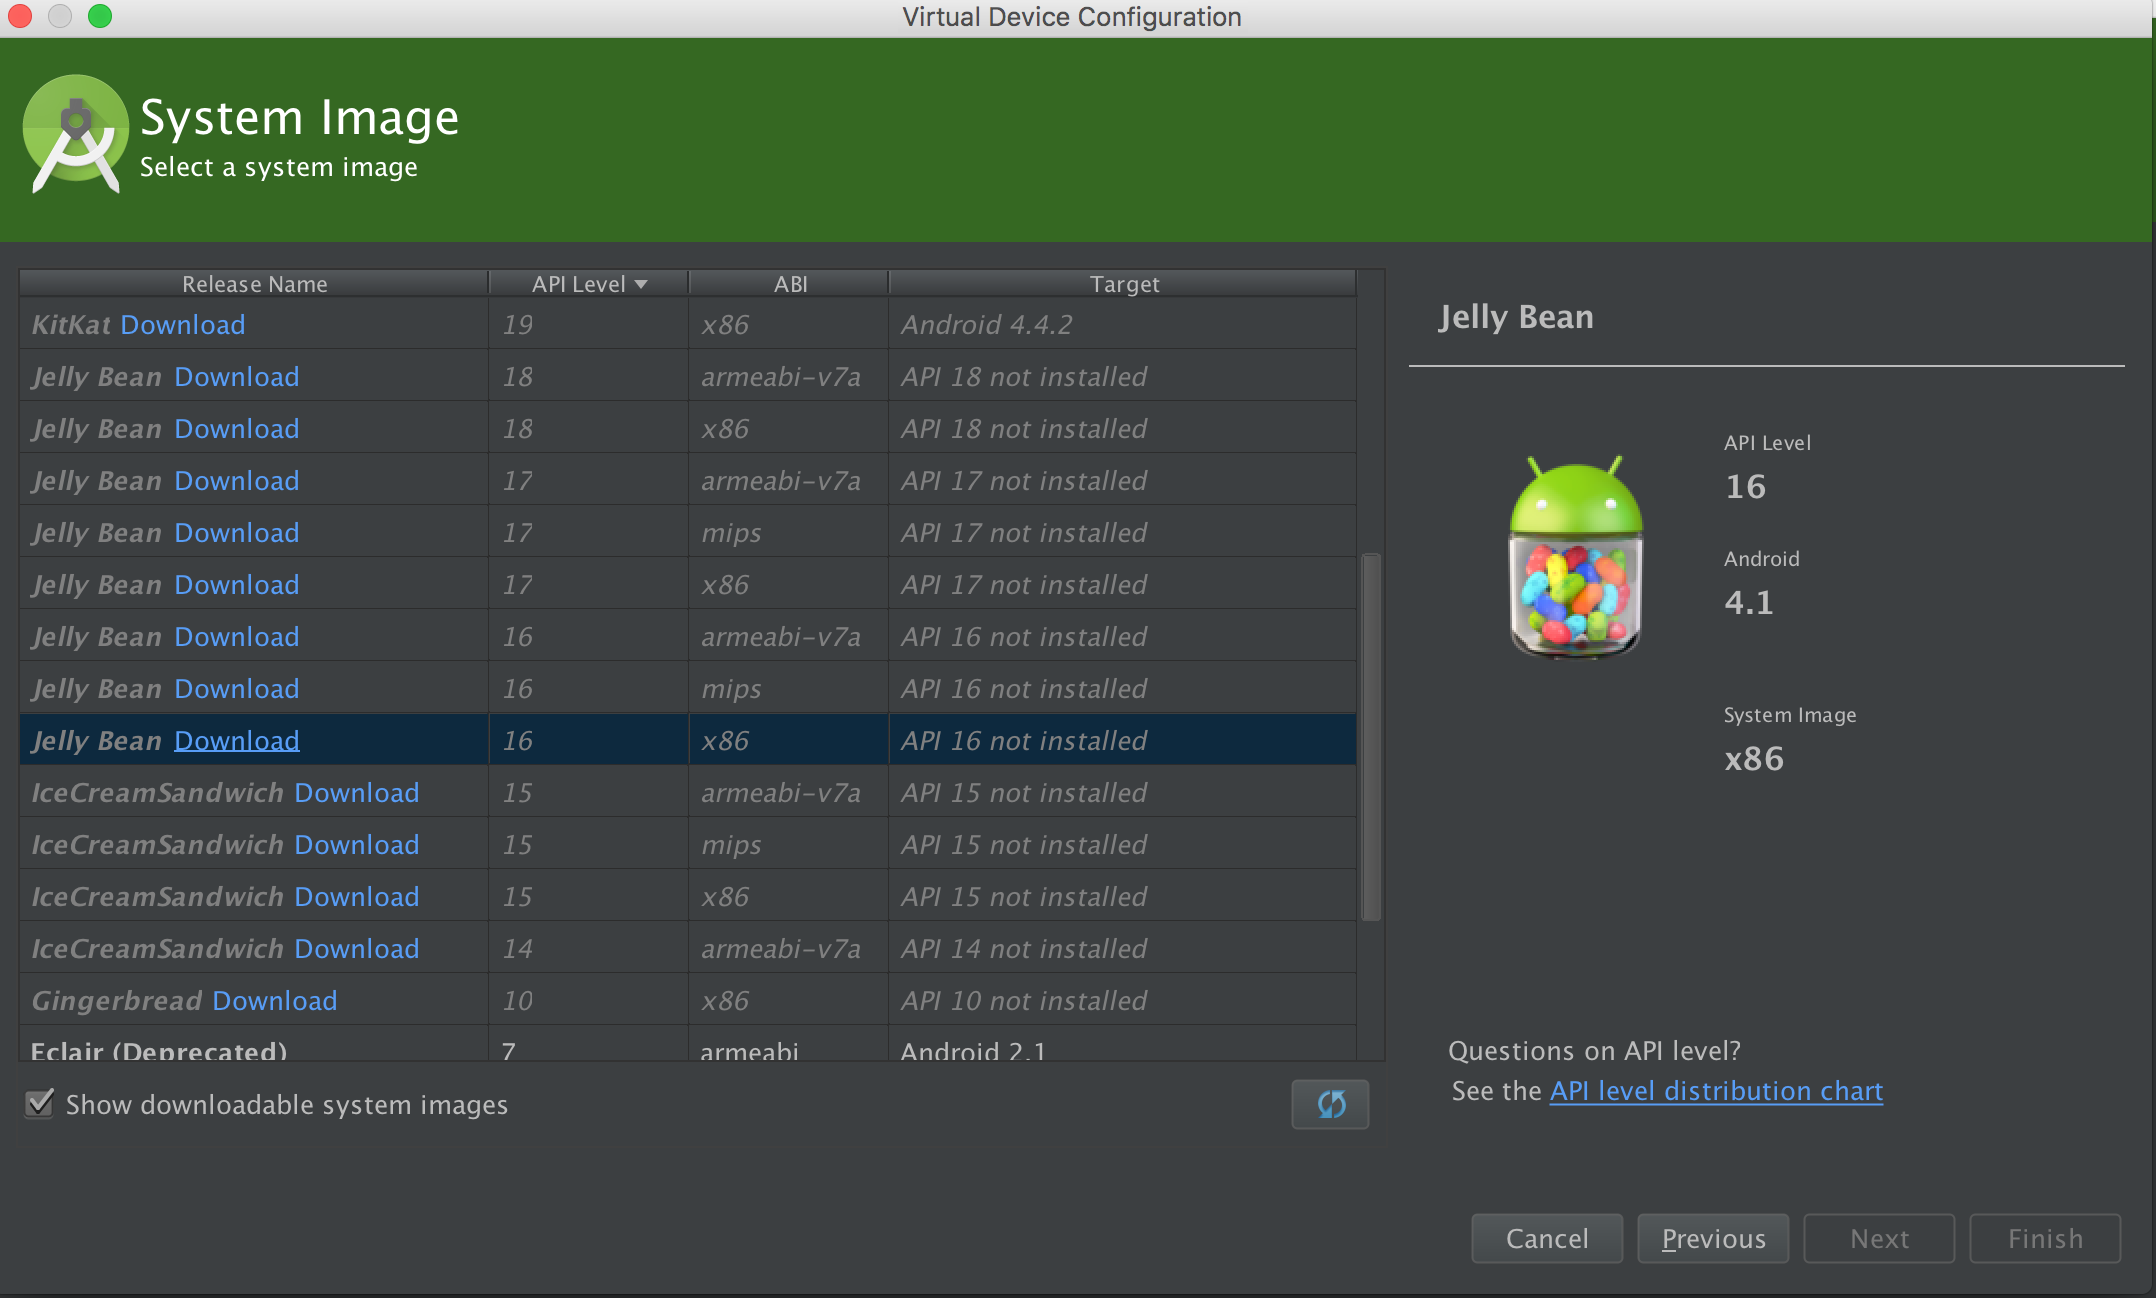
Checking the Show downloadable system images checkbox will show all system images including the ones not installed yet.
To download a system image, click the Download link by the release name.
Notice that the Android platform currently has thirteen major versions of the SDK. Starting with Android 1.5, major versions of the SDK have been developed under a confectionery-themed code name. Google has managed to choose these code names in an alphabetical order. They haven’t run out of names of sweets yet :]
Each version (minor or major) of the Android SDK has an integer value that uniquely identifies it. This unique identifier is referred to as the API Level. The higher the API Level, the later the version. For developers, API Level is important because it is what determines the range of devices an app can run on.
Let’s look at an example, the Android 6.0 release. We can see that:
- It is the most recent version of the Android SDK
- Its version number is 6.0
- Its code name is Marshmallow
- It has an API Level of 23
Going back to the System Image screen in Android Studio, click the Download button for each of the SDK versions you will need for this tutorial (Level 7 and Level 22). Then select the system image for Level 21 and click Next.
On the next screen, click Finish.
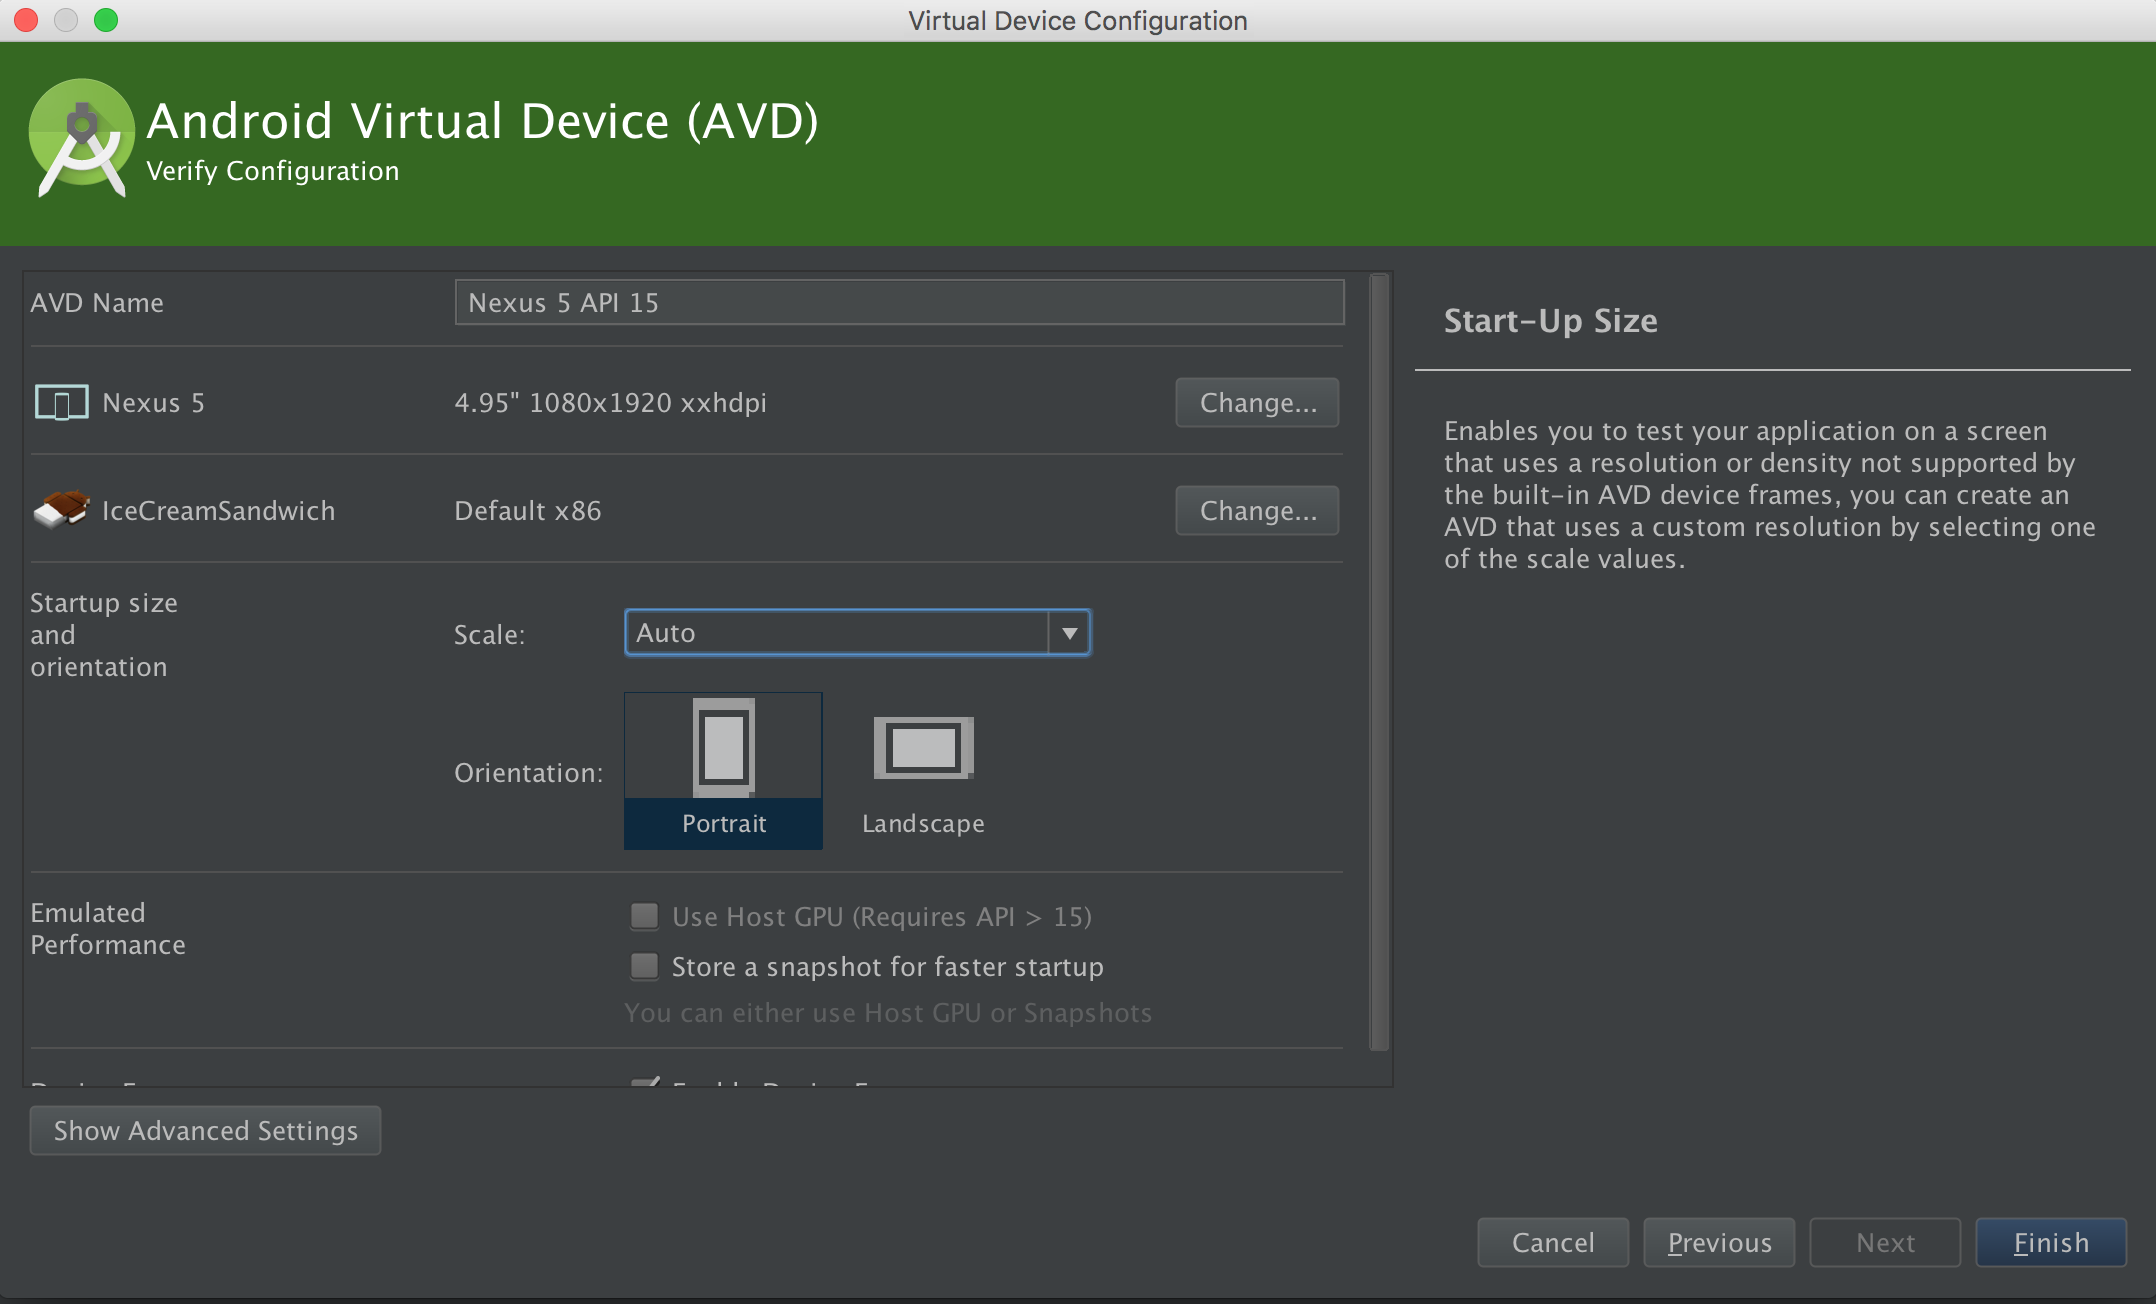
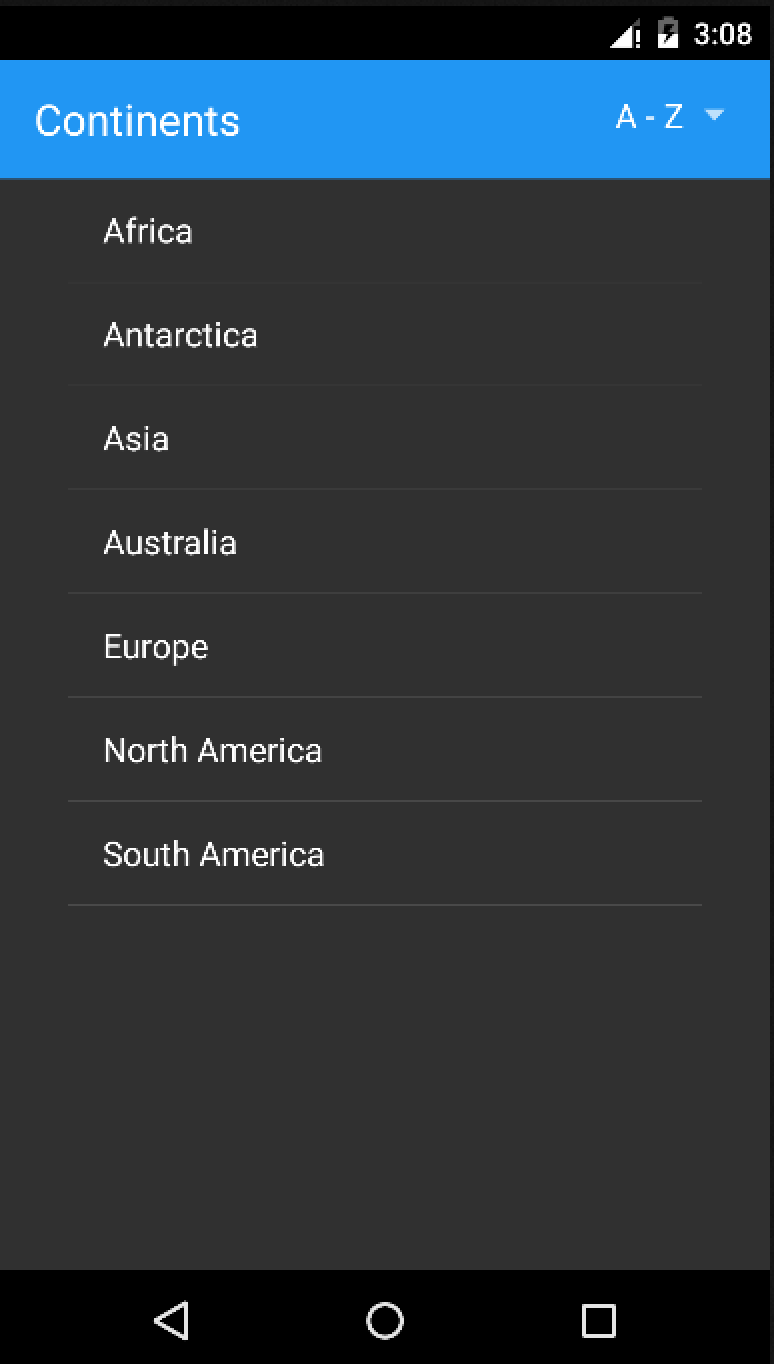
Try running the sample app on the emulator running API Level 22:
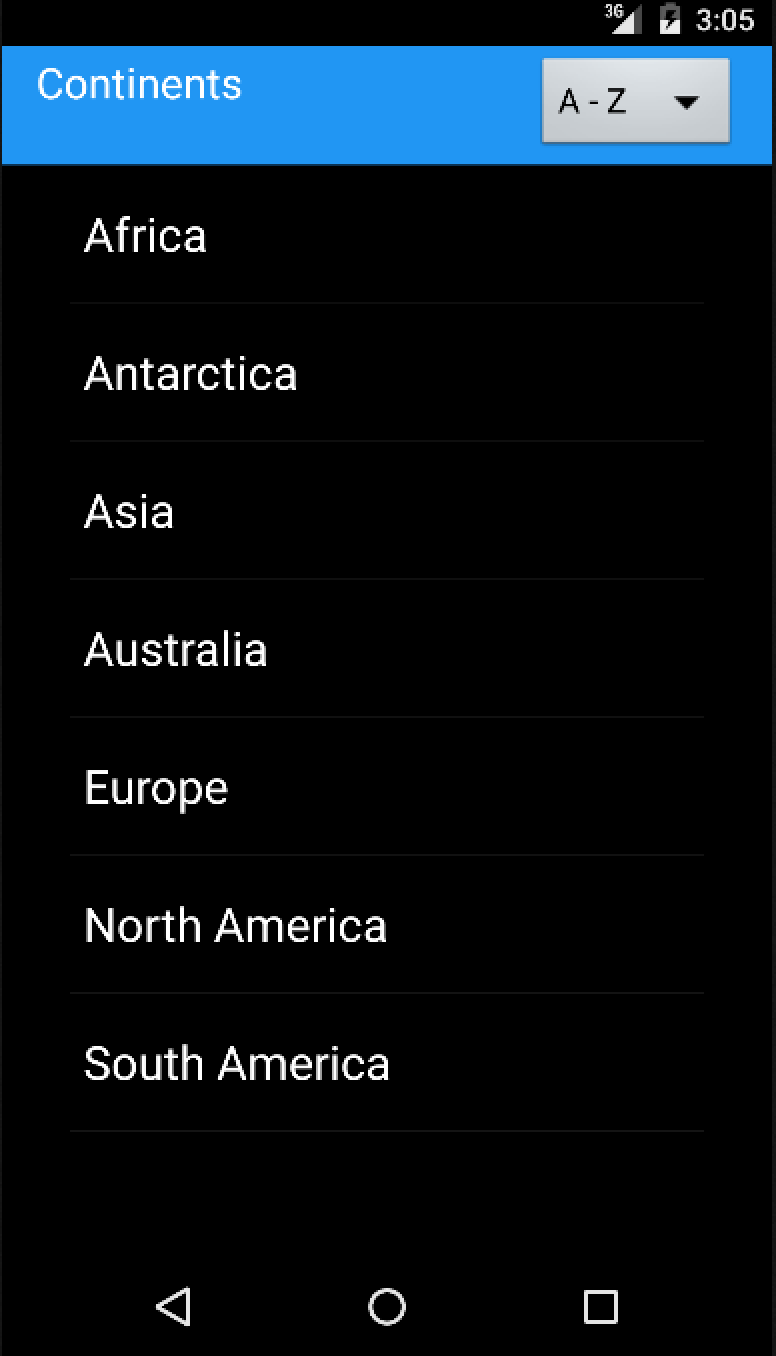
It all looks great, right? But if you were to try and run the app on a device with API Level lower than 21 it wouldn’t run. This is because the app only runs on devices that run Android API Level 21 and upwards, which isn’t great for older devices. Later on, you’ll learn how to extend the app’s support from Android API Level 21 to as low as Android API Level 7.
SDK Versions and API Levels
As mentioned earlier, the API Level is a unique integer that identifies a specific version of the Android SDK. Let’s take a look at how API Levels can be specified in Android Studio to compile and release an application.Open build.gradle for the app module:
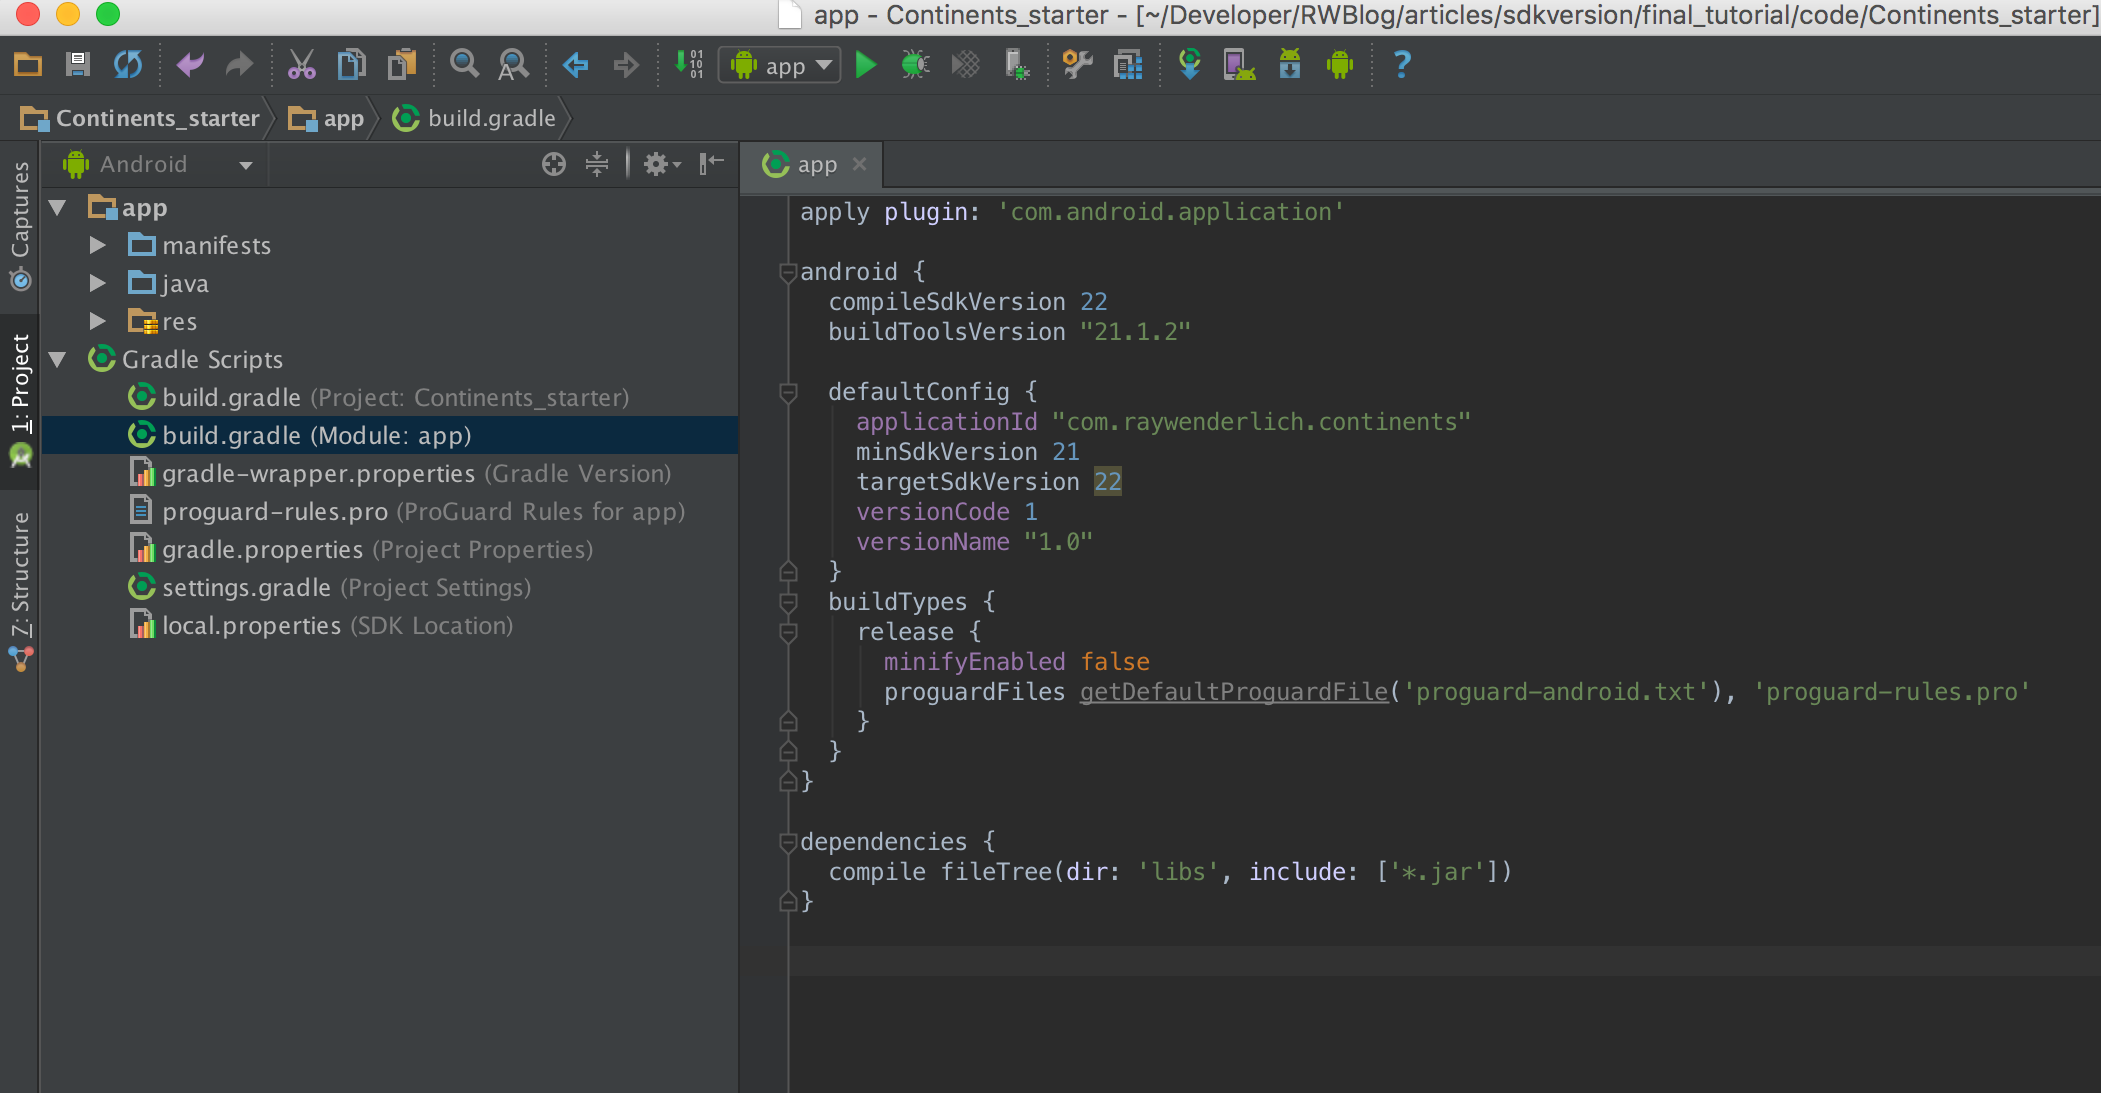
Here we can see three important attributes:
- minSdkVersion is the minimum API Level with which the app is compatible. The Android system will prevent a user from installing the application if the system’s API Level is lower than the value specified in this attribute. Android requires the minSdkVersion attribute to always be set.
- targetSdkVersion is the API Level that the application targets. This attribute informs the system that you have tested against the target version. The targetSdkVersion defaults to the minSdkVersion if not specified.
- compileSdkVersion specifies the API Level that the application should be compiled against.
Your build.gradle file should now look like this:
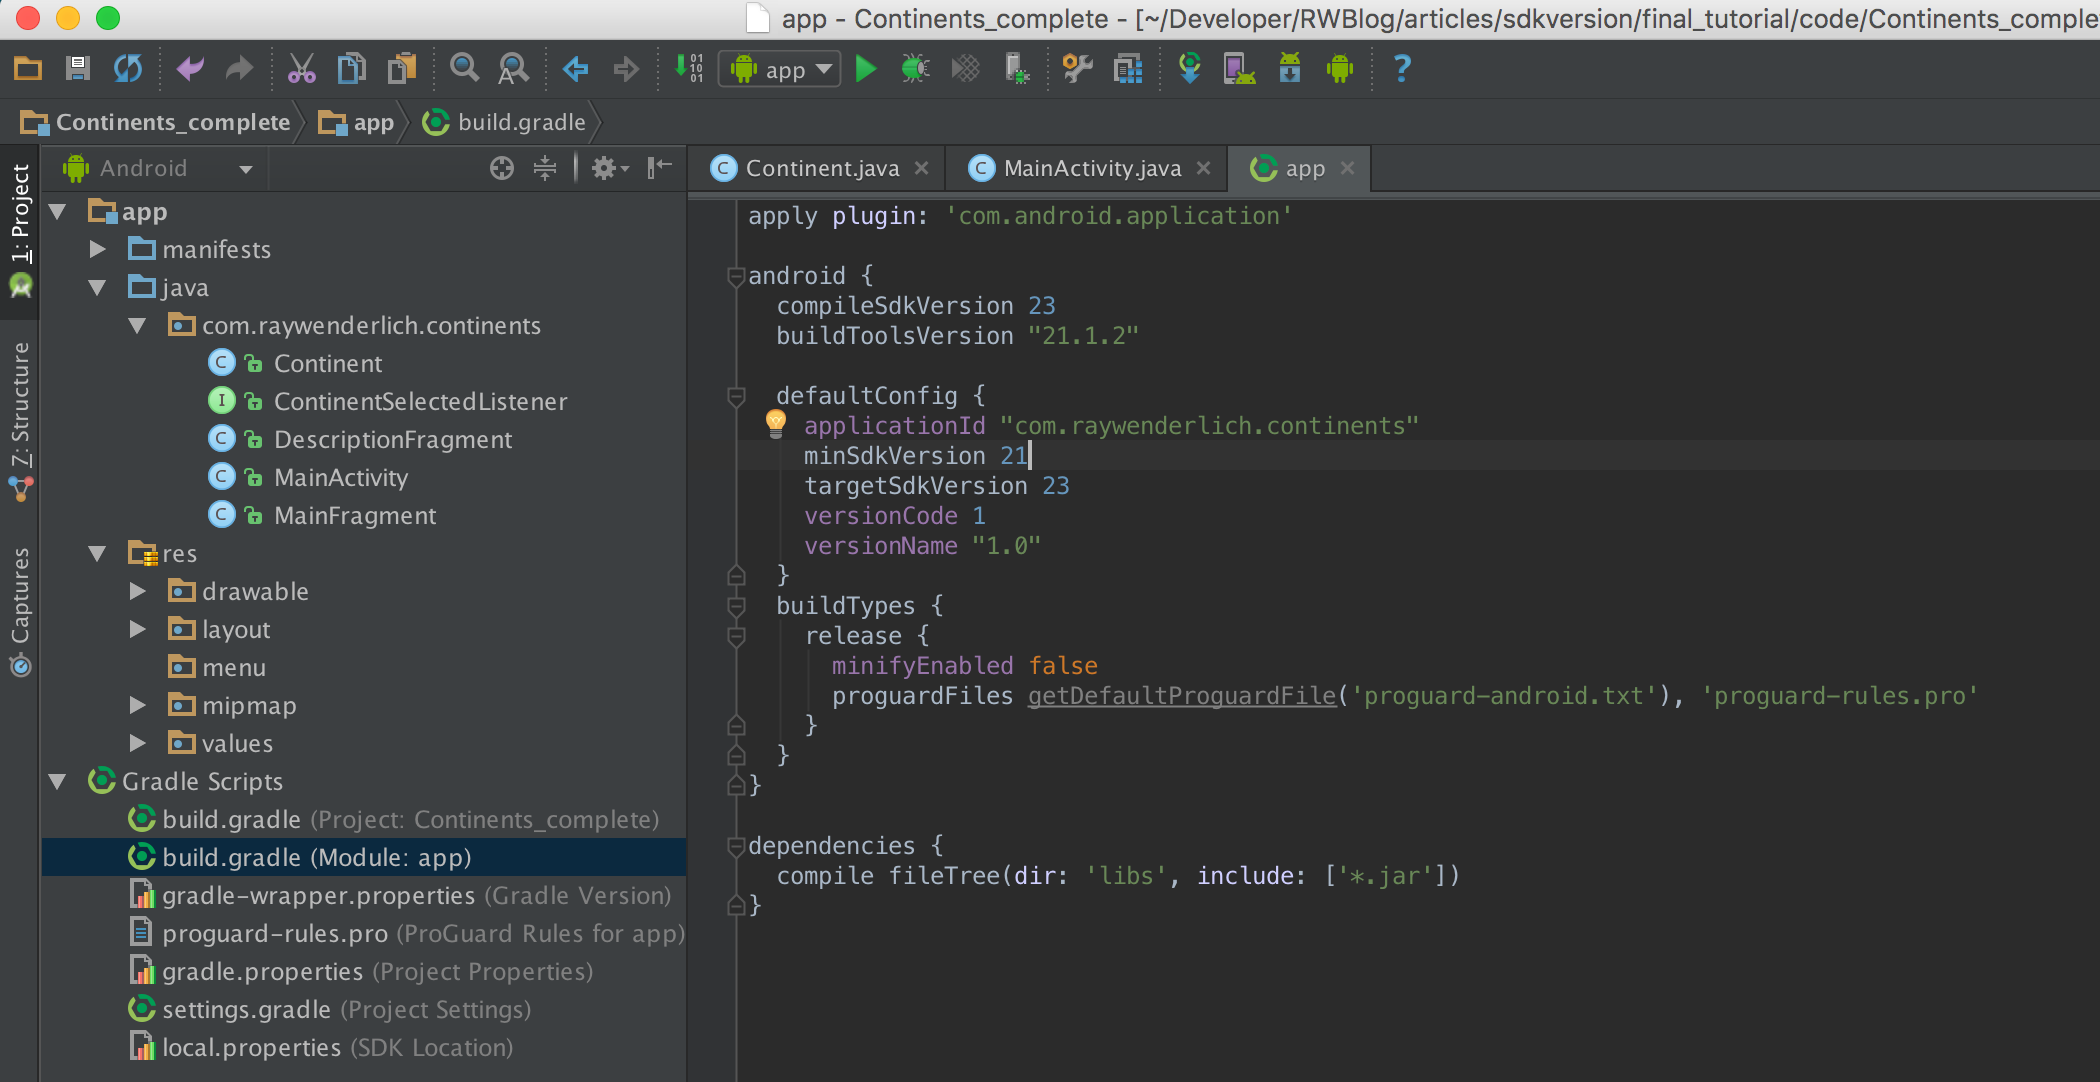
Build and run the app again. It still looks the same.
Note on SDK previews: It’s important to know that when you set the compileSdkVersion to a preview release of the Android framework, Android Studio will force the minSdkVersion and targetSdkVersion to equal the exact same string as compileSdkVersion.
This policy is necessary to prevent situations where you might upload
your app to the Google Play Store. As a result, you can only run
applications where compileSdkVersion is set to a preview release on emulators with that exact same preview and you won’t be able to run it on older devices.
The Android SDK is by default forward compatible but not backward
compatible — this means that an application that is built with and
supports a minimum SDK version of 3.0 can be installed on any device
running Android versions 3.0 and upwards, but cannot be installed on
devices running Android versions below 3.0.Since the Android SDK is not backward compatible, you have to choose the minimum SDK carefully. This means striking a balance between supporting a wide range of devices and designing an app that implements useful features in later SDK versions.
For example, when Android 3.0 was released in 2011, the Action Bar was unleashed on the Android Community. Since the Action Bar was only supported in Android 3.0 and later, using it in an app meant choosing either a cool user interface or supporting devices that ran older versions of the SDK. Sometimes you can’t have your honeycomb and eat it too :[
Or can you? To help with the Action Bar issue, the Android Support Library introduced a backward-compatible version in the v7-appcompat support library to let developers support older versions of the SDK and still use the latest Action Bar APIs in their apps. Sweet! Honeycomb for everyone!
Let’s take a deeper look at what the Support Library does and how it works.
Android Support Libraries
A wide range of components make up what is referred to as the “Support Library” or “Support Libraries,” and they can be categorized in two groups:- The AppCompat library: The intention here is to make sure all (or most) of the framework APIs for the latest API Level have been backported to earlier versions and can be found in this single library. The first version of AppCompat was released at Google IO 2013. The goal of this first release was to allow developers to backport the ActionBar to devices running IceScreamSandwich level, giving API parity to the framework across as many API Levels as possible. Since then, the AppCompat library has continued to evolve, and with Android L the support library is now at the point where the API is equivalent to the framework itself — the first time that has ever happened :]
- Others: The rest of the libraries that make up the Support Library essentially provide new functionality with the same consideration for backward compatibility (palette, gridview, gridlayout, recycler view, material design widgets).
You can find the full list of components that fall under the Support Library in the Android documentation.
How to Use an Android Support Library
Time to see an Android support library in action! Open MainActivity.java. As you may have noticed in the onCreate() method, the app uses a Toolbar (which is part of the material design patterns) instead of an Action Bar.The Toolbar was added in API 21 (Android Lollipop) as a flexible widget that can be used anywhere in layouts, be animated and change in size, unlike the Action Bar.
Thanks to AppCompat, that feature has been back-ported all the way to API 7, which is code-named Eclair (are you hungry yet?). You’re going to use the v7-appcompat support library to extend your app’s compatibility to a minSdkVersion of 7.
Open build.gradle for the app module and add the following to the dependencies section:
compile 'com.android.support:appcompat-v7:23.0.1' |
Next, change the minSdkVersion attribute to 7.
minSdkVersion 7 |
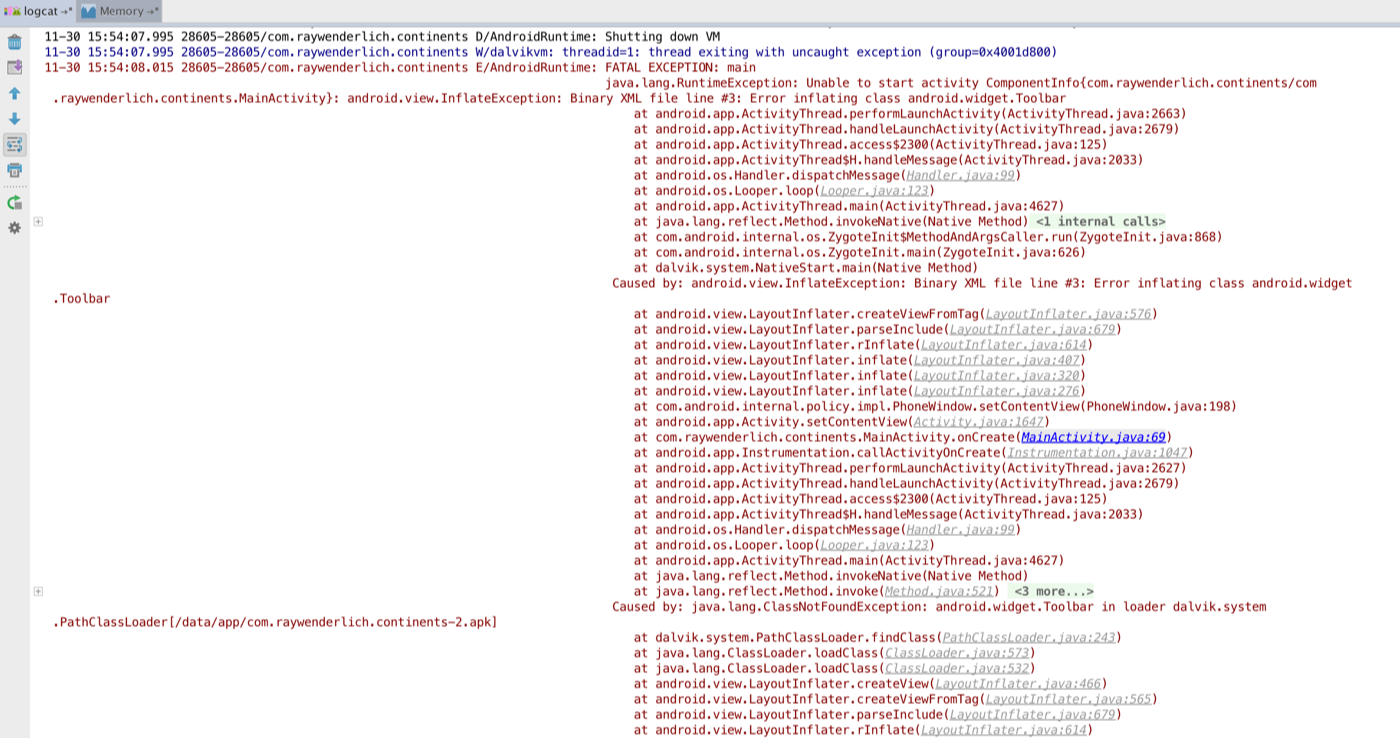
The important line to look for is:
Caused by: java.lang.ClassNotFoundException: android.widget.Toolbar in loader dalvik.system.PathClassLoader[/data/app/com.raywenderlich.continents.apk] |
ClassNotFoundException error indicates that there is
no such class in the SDK version you’re running the app against.
Indeed, it’s only available in API Level 21, while you’re currently
running API Level 7.You’re going to update the code to use the backward-compatible version of Toolbar. In MainActivity.java, replace
android.widget.Toolbar with android.support.v7.widget.Toolbar.Next do the same for the Fragment class. Open DescriptionFragment.java and find the following line:
import android.app.Fragment; |
import android.support.v4.app.Fragment; |
Fragment class instead of the one in the main SDK, which can only be used in apps with a minSdkVersion of 11.
Note: AppCompat v7 depends on the v4 Support Library. That’s why you can also use all the APIs in the
Open the MainFragment.java class, and update the android.support.v4.app package.
import android.app.Fragment; line to match the following:import android.support.v4.app.Fragment; |
android.widget.Toolbar import statement to match the following:import android.support.v7.widget.Toolbar; |
Now update the
MainActivity class definition line so that it inherits from android.support.v7.app.AppCompatActivity:public class MainActivity extends android.support.v7.app.AppCompatActivity |
You now need to work through the class and replace some method calls with their support library equivalents:
- Find the call to
setActionBar(toolbar)at the end of theonCreate()method body and update it tosetSupportActionBar(toolbar). - Find the calls to
getActionBar()inonContinentSelected()andgoToContinentList()and replace both of them withgetSupportActionBar(). - Replace the calls to
getFragmentManager()inonContinentSelected()andgoToContinentList()withgetSupportFragmentManager().
In the res / layout folder, open toolbar_custom.xml and do the following:
- Change
android.widget.Toolbartoandroid.support.v7.widget.Toolbar - Change
?android:attr/actionBarSizeto?attr/actionBarSize
Now that all of the compile-time errors have been checked and fixed, try to run the app again. You will now get the following run-time error:
java.lang.RuntimeException: Unable to start activity ComponentInfo{com.raywenderlich.continents/com.raywenderlich.continents.MainActivity}: java.lang.IllegalStateException: You need to use a Theme.AppCompat theme (or descendant) with this activity. |
In the res\values folder, open styles.xml, and change
android:Theme.Black.NoTitleBar to Theme.AppCompat.NoActionBar.Open styles.xml (v21) and repeat exactly the same change:
android:Theme.Black.NoTitleBar to Theme.AppCompat.NoActionBar.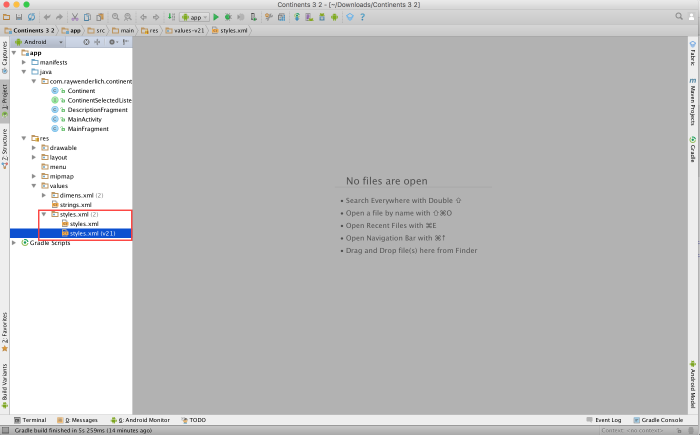
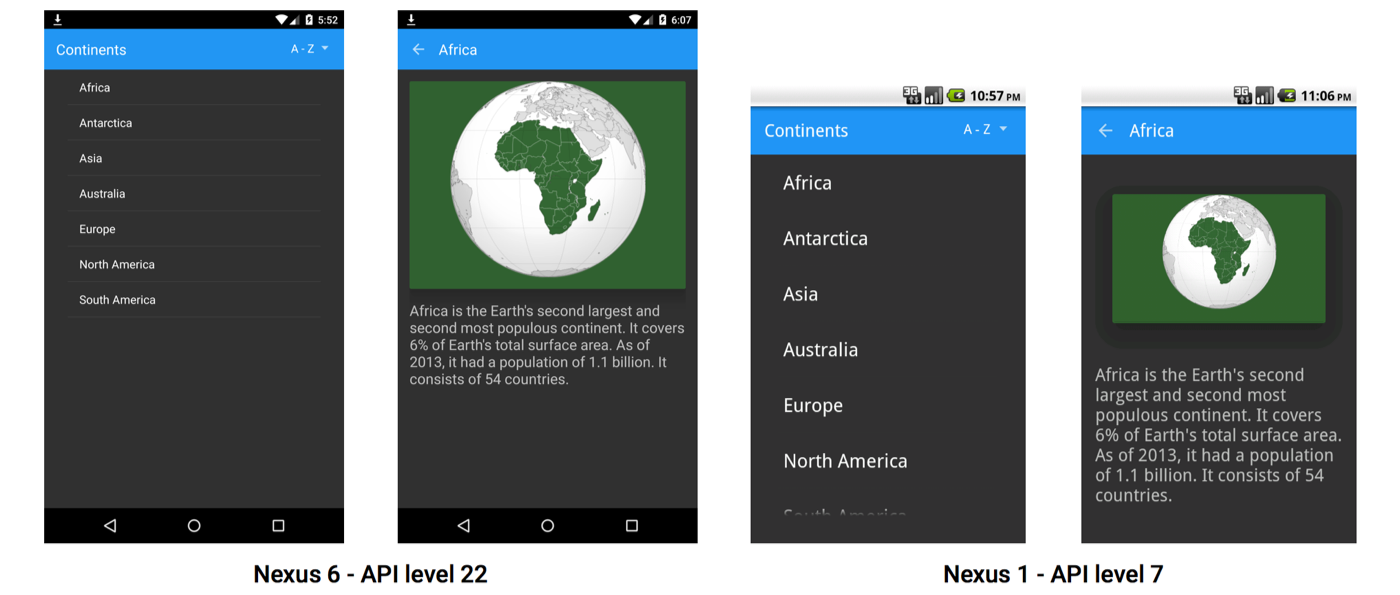
Now build and run. You can test the app on an API 7 device or emulator as well.

Well done! The sample app is now backward compatible. Gingerbread and lollipops and jelly beans for everyone!
Let’s throw in some cards to make the detail screen look nicer.
How to Use the Card View Support Library
Open build.gradle for the app module and add the following to the dependencies section:compile 'com.android.support:cardview-v7:23.1.1' |
Open the fragment_description.xml file and place the ImageView in a CardView:
<android.support.v7.widget.CardView xmlns:card_view="http://schemas.android.com/apk/res-auto" android:id="@+id/card_view" android:layout_gravity="center" android:layout_width="match_parent" android:layout_height="0dp" android:layout_weight="1" card_view:cardBackgroundColor="#316130" card_view:cardElevation="20dp"> <ImageView android:id="@+id/continentImage" android:layout_width="match_parent" android:layout_height="match_parent" android:src="@drawable/africa" android:paddingBottom="@dimen/activity_vertical_margin" android:contentDescription="@string/continent_image_description"/> </android.support.v7.widget.CardView> |
cardBackgroundColor and cardElevation
for the CardView) are not prefixed with “android.” That’s because they
come from the Support Library API as opposed to the Android framework.Now, build and run the project:
Cool, you’ve added this new-style cardview to your app and using the compatibility library it works from modern versions of Android, right back to ancient API-level 7.
Did You Say Material Design?
You’ve successfully used the AppCompat theming to give the app the Android Lollipop look and feel across a wide range of SDK versions. In addition to these elements, the Material Design specification includes many more patterns and widgets not contained by AppCompat. This is where the Design Library comes into play. It provides widgets such as navigation drawers, floating action buttons, snackbars and tabs. Let’s include it in the project and add a floating action button.In build.gradle add the following in the
dependencies section:compile 'com.android.support:design:23.1.1' |
<android.support.design.widget.FloatingActionButton android:id="@+id/search_button" android:layout_width="wrap_content" android:layout_height="wrap_content" android:layout_gravity="bottom|end" android:layout_margin="16dp" android:src="@drawable/ic_search_white_18dp" /> |

Backport All the Things?
Some features in the latest releases of the SDK are just too complex to backport. Ultimately, it’s your call to strike the right balance between performance and usability. If you find yourself in a situation where you want to use a framework API that isn’t available in the Support Libraries, you can check for the API Level at run-time. In theonContinentSelected method of MainActivity.java, add the following after the description fragment is instantiated but before the fragment transaction:if (Build.VERSION.SDK_INT >= Build.VERSION_CODES.LOLLIPOP) { descriptionFragment.setEnterTransition(new Fade()); mMainFragment.setExitTransition(new Fade()); descriptionFragment.setExitTransition(new Slide(Gravity.BOTTOM)); mMainFragment.setReenterTransition(new Fade()); descriptionFragment.setAllowReturnTransitionOverlap(true); } |
Where To Go From Here?
Congratulations! You’ve learned about Android SDK versions and their sweet code names, made an API Level 21 application backward-compatible to API Level 7, and used the cardview and design library to add additional components. You might also have a sugar craving :]
Blame Android.
If you are interested in Android SDK version history, check out this wikipedia page or the versions page on the Android developer site. You can also read further about the minSdkVersion and targetSdkVersion attributes from the manifest page on the developer site. Finally, check out the developer pages on Support libraries and its feature list.
We hope you enjoyed this Android SDK Versions tutorial, and if you have any questions or comments, please join the forum discussion below!


0 comments:
Post a Comment
Note: only a member of this blog may post a comment.