 How many times have you needed an app to display a group of related items in a list? How about all
 the time. :]
Displaying a specific list is essential to the function of almost any app that queries a set of data and returns a list of results, so many apps need to do this at one point or another. For instance, maybe you have a chat app that queries a certain social platform’s database to find your friends, and then want to display them in a list that lets you select which friends to connect with.
Any time you need to display a lot of data and make it easy to navigate, you’ve got a job for Android’s ListView, which handily creates scrollable lists.
By working through this tutorial, you’ll become familiar with a ListView, and you’ll do so by creating a recipe list app. Specifically, you’ll learn:
- How to construct and populate a ListView
- How to customize the layout
- How to style and beautify a ListView
- How to optimize a ListView’s performance
Note: If you’re new to Android Development, it’s highly recommended that you start with the Android Tutorial for Beginners to learn your way around the basic tools and concepts.
Getting Started
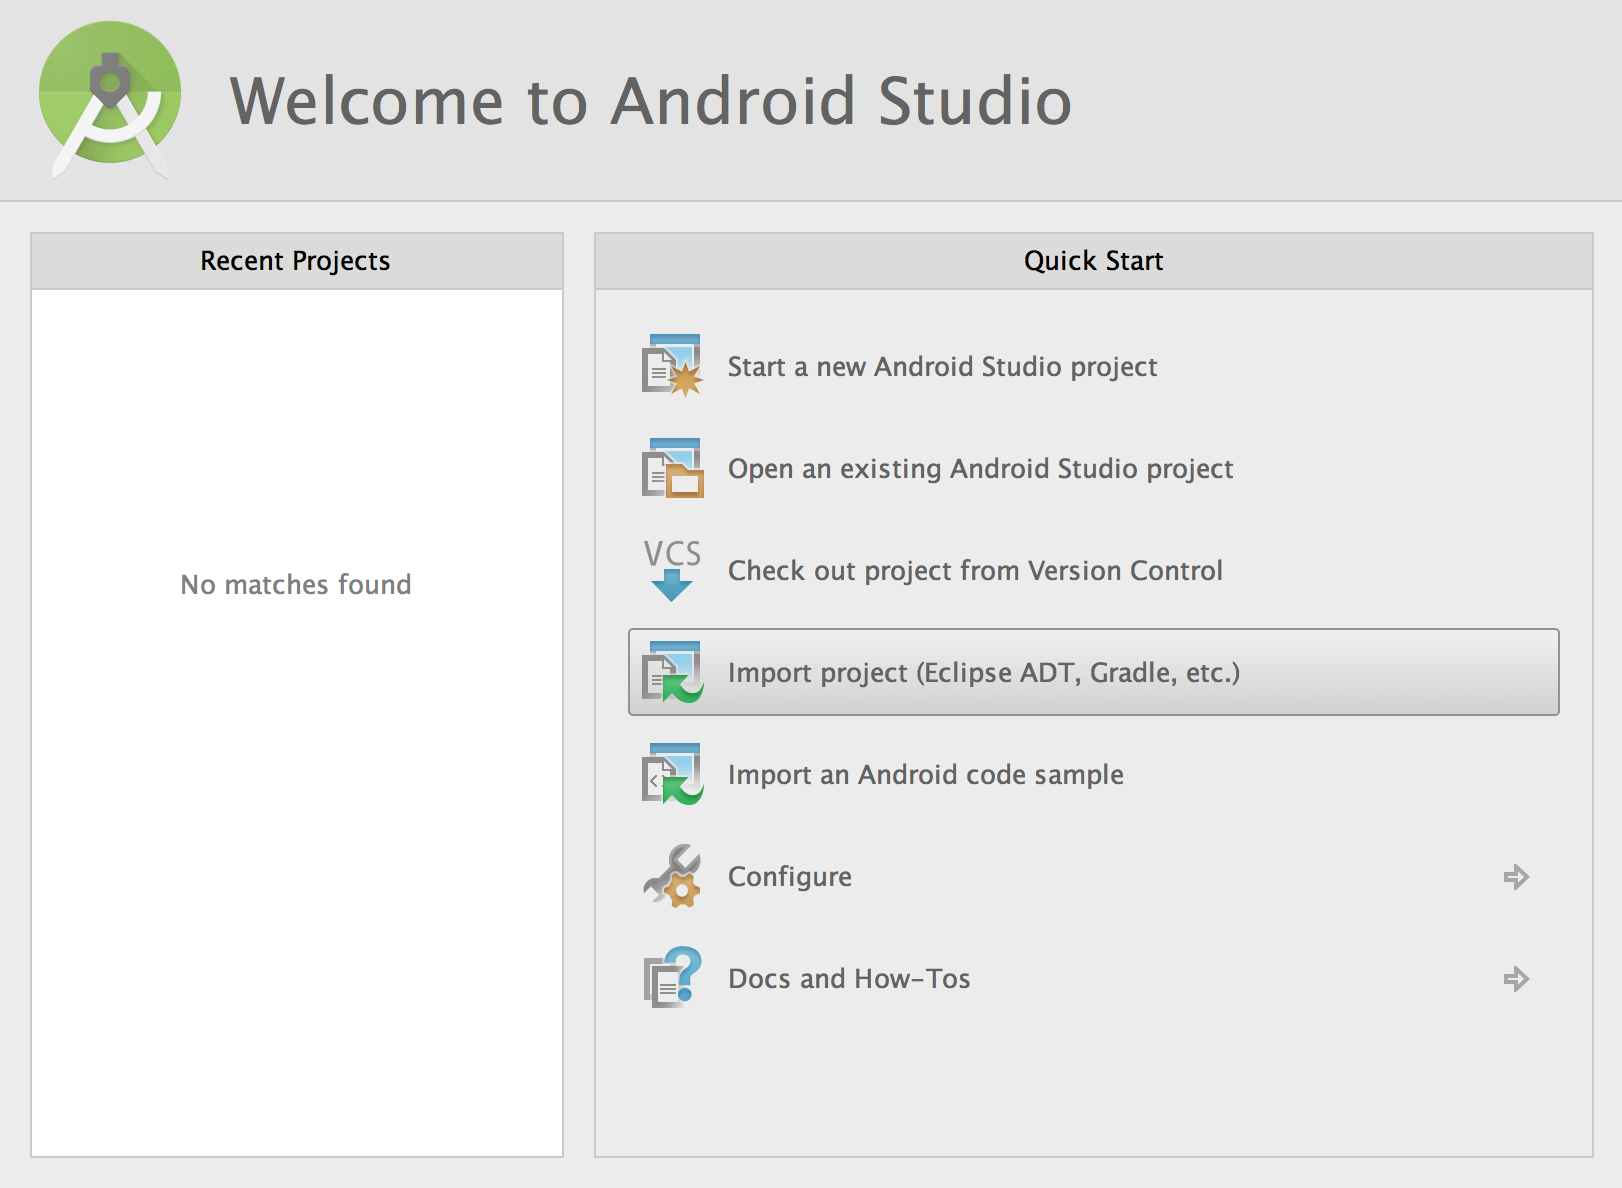
Download the starter project and open Android Studio.In the Welcome to Android Studio dialog, select Import project (Eclipse ADT, Gradle, etc.).
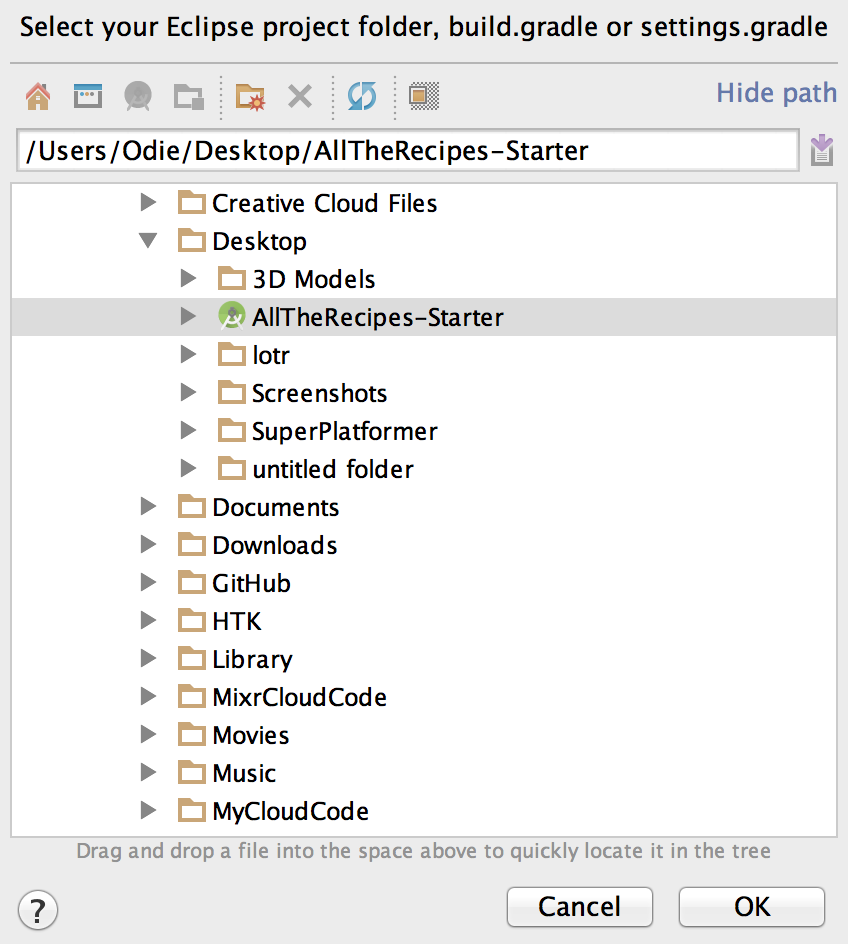
In the following dialog, select the top-level directory of the starter project AllTheRecipes-Starter and click OK.
Inside the imported project, you’ll find some assets and resources that you’ll use to create your app, such as strings, colors, XML layout files, and fonts. Additionally, there’s some boilerplate code modeling a
Recipe object and a bare bones MainActivity class.Build and run. You should see something like this:
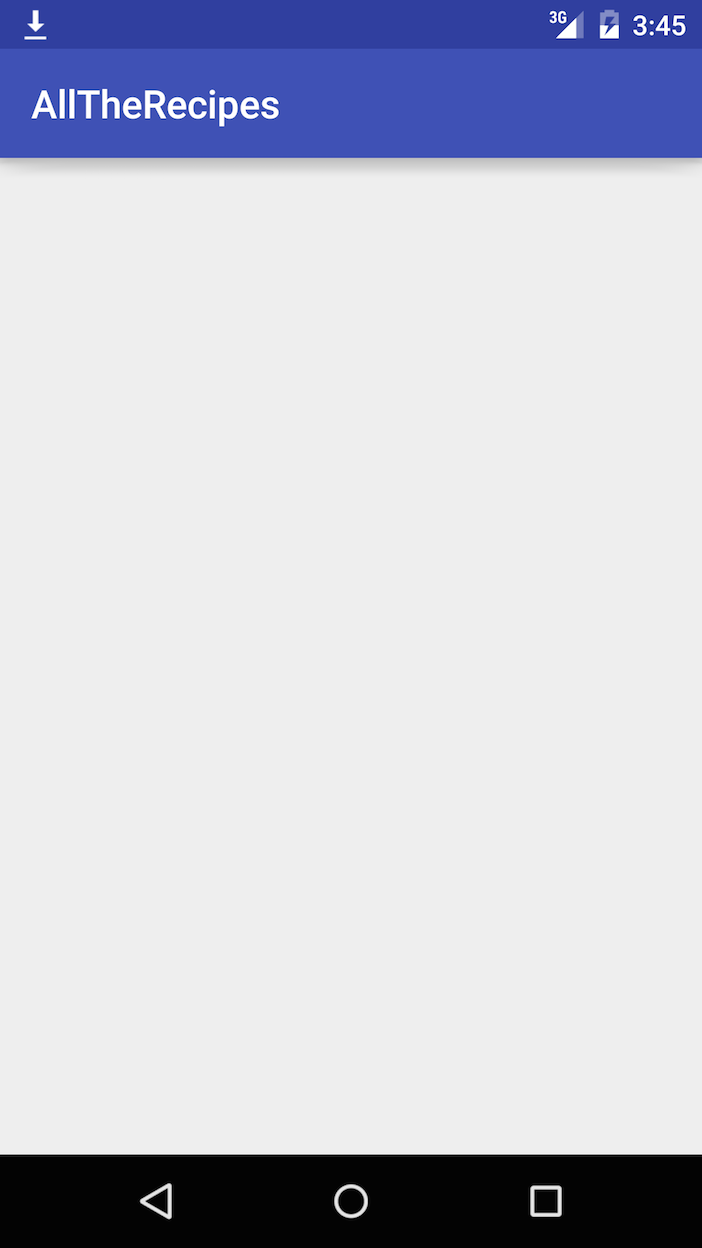
Are you ready to get cracking on this list thing? Awesome!
Add Your First ListView
The first order of business is to add a ListView toMainActivity. Open res/layout/activity_main.xml. As you may know, this is the file that describes the layout of
MainActivity. Add a ListView to MainActivity by inserting the following code snippet inside the RelativeLayout tag:<ListView android:id="@+id/recipe_list_view" android:layout_height="match_parent" android:layout_width="match_parent"> </ListView> |
private ListView mListView; |
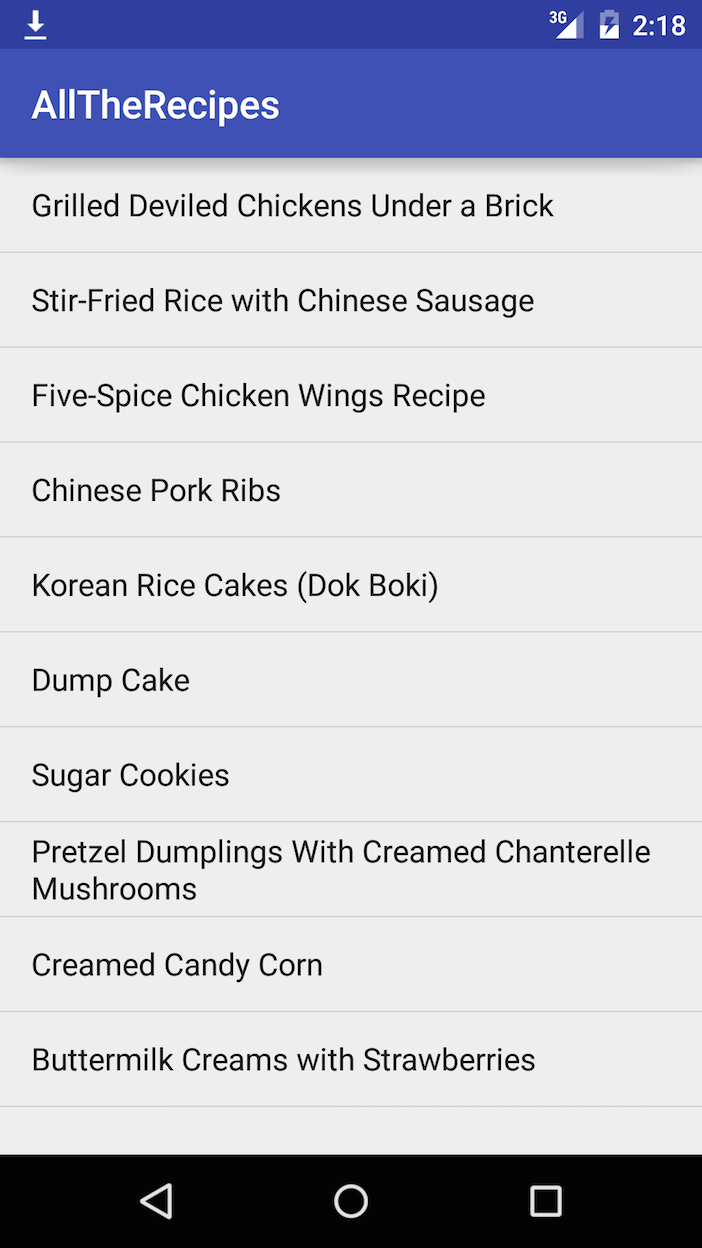
onCreate method:mListView = (ListView) findViewById(R.id.recipe_list_view); // 1 final ArrayList<Recipe> recipeList = Recipe.getRecipesFromFile("recipes.json", this); // 2 String[] listItems = new String[recipeList.size()]; // 3 for(int i = 0; i < recipeList.size(); i++){ Recipe recipe = recipeList.get(i); listItems[i] = recipe.title; } // 4 ArrayAdapter adapter = new ArrayAdapter(this, android.R.layout.simple_list_item_1, listItems); mListView.setAdapter(adapter); |
- This loads a list of
Recipeobjects from a JSON asset in the app. Notice that the starter project contains aRecipeclass that models and stores the information about the recipes that will be displayed. - This creates an array of strings that’ll contain the text to be displayed in the List View.
- This populates the ListView’s data source with the titles of the recipes loaded in section one.
- This creates and sets a simple adapter for the ListView. The
ArrayAdaptertakes in the current context, a layout file specifying what each row in the list should look like, and the data that will populate the list as arguments.
Adapters: Servants of the ListView
Your recipe app is starting to look functional, but not all that appetizing…yet.In the previous section, you successfully built a list of recipe titles. It works, but it’s nothing to get excited about. What if you needed to show more than just the titles? More than just text? Maybe even add some screen-licking worthy thumbnails?
For these cases, the simple
ArrayAdapter you just used
won’t cut it. You’ll have to take matters into your own hands and write
your own adapter. Well, you won’t actually write your own adapter, per
se; you’ll simply extend a regular adapter and make some tweaks.What Exactly is an Adapter?
An adapter loads the information to be displayed from a data source, such as an array or database query and creates a view for each item. Then it inserts the views into the ListView.Adapters not only exist for ListViews, but for other kinds of views as well; ListView is a subclass of AdapterView, so you can populate it by binding it to an adapter.
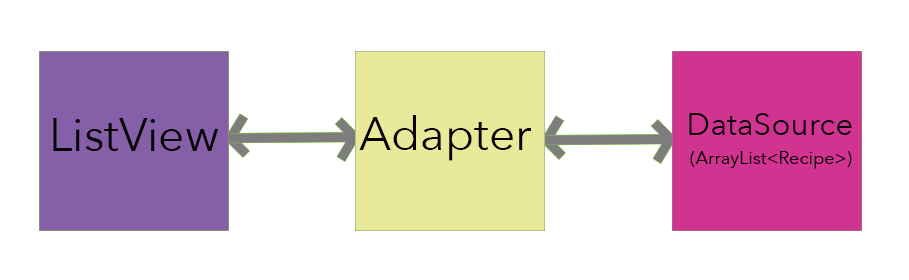
The adapter acts as the middle man between the ListView and data source, or its provider. It works kind of like this:
The ListView asks the adapter what it should display, and the adapter jumps into action:
Building Adapters
Okay, now that you’ve dabbled in theory, you can get on with building your very own adapter.Create a new class by Right-clicking on java/com.raywenderlich.alltherecipes and selecting New > Java Class. Name it RecipeAdapter and define it with the following:
public class RecipeAdapter extends BaseAdapter { } |
BaseAdapter class, which requires several inherited methods you’ll implement after taking care of one more detail. Add the following snippet inside the
RecipeAdapter class:private Context mContext; private LayoutInflater mInflater; private ArrayList<Recipe> mDataSource; public RecipeAdapter(Context context, ArrayList<Recipe> items) { mContext = context; mDataSource = items; mInflater = (LayoutInflater) mContext.getSystemService(Context.LAYOUT_INFLATER_SERVICE); } |
RecipeAdapter.Your next step is to implement the adapter methods. Kick it off by placing the following code at the bottom of
RecipeAdapter.//1 @Override public int getCount() { return mDataSource.size(); } //2 @Override public Object getItem(int position) { return mDataSource.get(position); } //3 @Override public long getItemId(int position) { return position; } //4 @Override public View getView(int position, View convertView, ViewGroup parent) { // Get view for row item View rowView = mInflater.inflate(R.layout.list_item_recipe, parent, false); return rowView; } |
getCount()lets ListView know how many items to display, or in other words, it returns the size of your data source.getItem()returns an item to be placed in a given position from the data source, specifically,Recipeobjects obtained frommDataSource.- This implements the
getItemId()method that defines a unique ID for each row in the list. For simplicity, you just use the position of the item as its ID. - Finally,
getView()creates a view to be used as a row in the list. Here you define what information shows and where it sits within the ListView. You also inflate a custom view from the XML layout defined inres/layout/list_item_recipe.xml— more on this in the next section.
Defining the Layout of the ListView’s Rows
You probably noticed that the starter project comes with the fileres/layout/list_item_recipe.xml that describes how each row in the ListView should look and be laid out.Below is an image that shows the layout of the row view and its elements:

Your task is to populate each element of the row view with the relevant recipe data, hence, you’ll define what text goes in the “title” element, the “subtitle” element and so on.
In the
getView() method, add the following code snippet just before the return statement:// Get title element TextView titleTextView = (TextView) rowView.findViewById(com.raywenderlich.alltherecipes.R.id.recipe_list_title); // Get subtitle element TextView subtitleTextView = (TextView) rowView.findViewById(com.raywenderlich.alltherecipes.R.id.recipe_list_subtitle); // Get detail element TextView detailTextView = (TextView) rowView.findViewById(com.raywenderlich.alltherecipes.R.id.recipe_list_detail); // Get thumbnail element ImageView thumbnailImageView = (ImageView) rowView.findViewById(com.raywenderlich.alltherecipes.R.id.recipe_list_thumbnail); |
Now that you’ve got the references sorted out, you need to populate each element with relevant data. To do this, add the following code snippet under the previous one but before the return statement:
// 1 Recipe recipe = (Recipe) getItem(position); // 2 titleTextView.setText(recipe.title); subtitleTextView.setText(recipe.description); detailTextView.setText(recipe.label); // 3 Picasso.with(mContext).load(recipe.imageUrl).placeholder(R.mipmap.ic_launcher).into(thumbnailImageView); |
- Getting the corresponding recipe for the current row.
- Updating the row view’s text views so they are displaying the recipe.
- Making use of the open-source Picasso
library for asynchronous image loading — it helps you download the
thumbnail images on a separate thread instead of the main thread. You’re
also assigning a temporary placeholder for the
ImageViewto handle slow loading of images.
Note: You should never perform long-running tasks on the main
thread. When you do, you expose yourself to the risk of blocking the UI,
and that would make scrolling your lists a nightmare!
Now open up MainActivity.java so that you can get rid of the old adapter. In onCreate, replace everything below (but not including) this line:final ArrayList<Recipe> recipeList = Recipe.getRecipesFromFile("recipes.json", this); |
RecipeAdapter adapter = new RecipeAdapter(this, recipeList); mListView.setAdapter(adapter); |
ArrayAdapter with your own RecipeAdapter to make the list more informative. Build and run and you should see something like this:
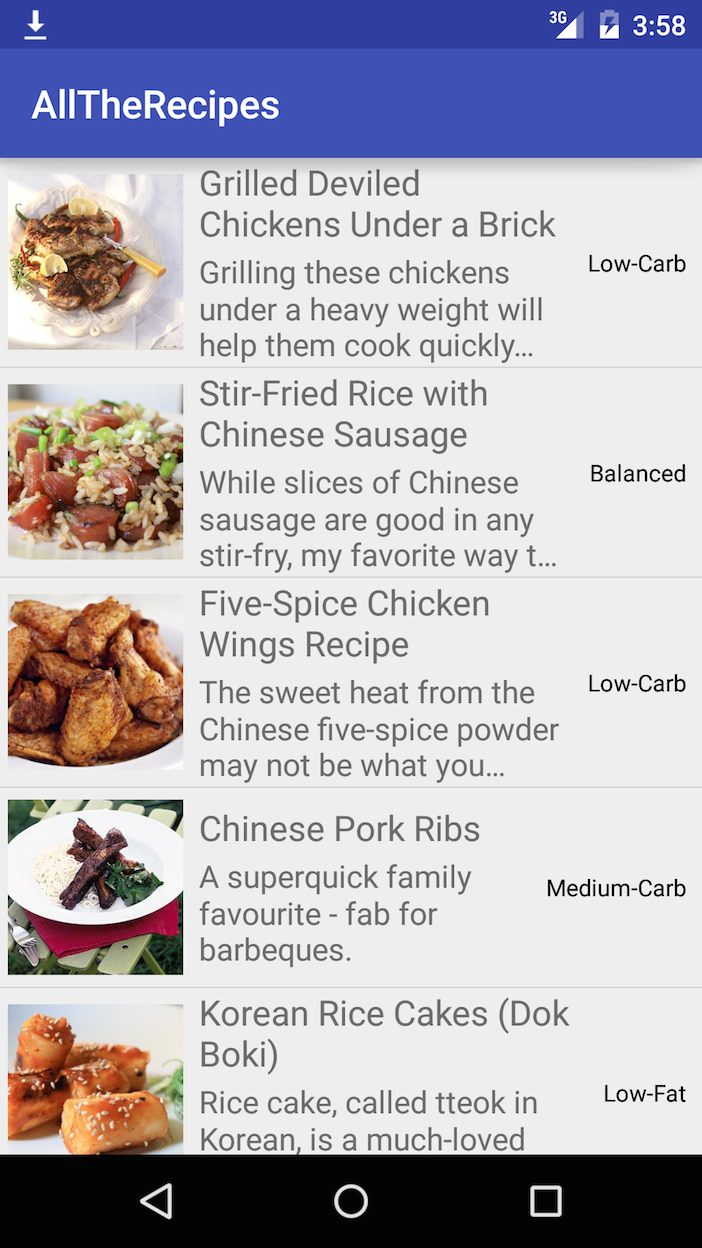
Now you’re cooking for real! Look at those recipes — thumbnails and descriptions sure make a big difference.
Styling
Now that you’ve got function under wraps, it’s time to turn your attention to the finer things in life. In this case, your finer things are elements that make your app more snazzy, such as compelling colors and fancy fonts.Start with the fonts. Look for some custom fonts under assets/fonts. You’ll find three font files: JosefinSans-Bold.ttf, JosefinSans-SemiBoldItalic.ttf and Quicksand-Bold.otf.
Open RecipeAdapter.java and go to the
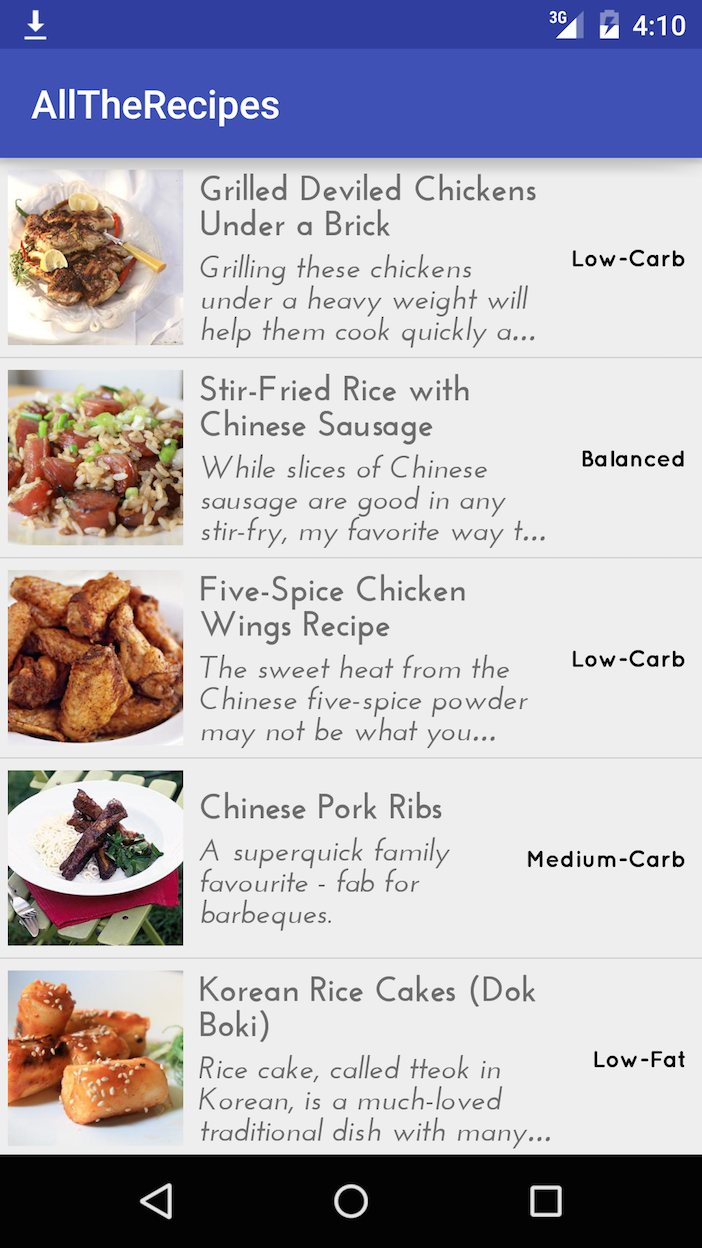
getView() method. Just before the return statement, add the following:Typeface titleTypeFace = Typeface.createFromAsset(mContext.getAssets(), "fonts/JosefinSans-Bold.ttf"); titleTextView.setTypeface(titleTypeFace); Typeface subtitleTypeFace = Typeface.createFromAsset(mContext.getAssets(), "fonts/JosefinSans-SemiBoldItalic.ttf"); subtitleTextView.setTypeface(subtitleTypeFace); Typeface detailTypeFace = Typeface.createFromAsset(mContext.getAssets(), "fonts/Quicksand-Bold.otf"); detailTextView.setTypeface(detailTypeFace); |
Typeface, which specifies the intrinsic style and typeface of the font, by using createFromAsset(). Next you call setTypeface() for the corresponding TextView to set the custom font.Now build and run. Your result should look like this:
On to sprucing up the colors, which are defined in res/values/colors.xml. Open up RecipeAdapter.java and add the following below the instance variable declarations and above the constructor:
private static final HashMap<String, Integer> LABEL_COLORS = new HashMap<String, Integer>() {{ put("Low-Carb", R.color.colorLowCarb); put("Low-Fat", R.color.colorLowFat); put("Low-Sodium", R.color.colorLowSodium); put("Medium-Carb", R.color.colorMediumCarb); put("Vegetarian", R.color.colorVegetarian); put("Balanced", R.color.colorBalanced); }}; |
Now go to the
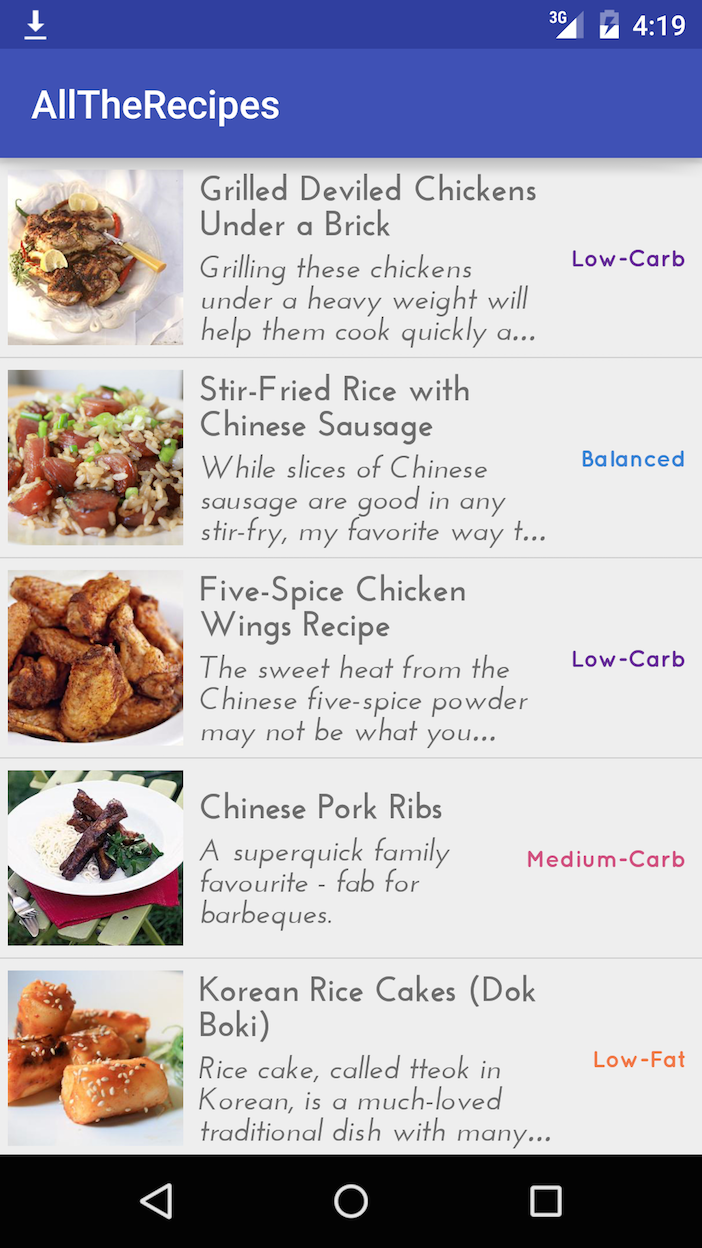
getView() method, and add this line just above the return statement:detailTextView.setTextColor(ContextCompat.getColor(mContext, LABEL_COLORS.get(recipe.label))); |
- Here you get the resource id for the color that corresponds to the
recipe.labelfrom theLABEL_COLORShash map. getColor()is used inside ofContextCompatto retrieve the hex color associated with that resource id.- Then you set the color property of the
detailTextViewto the hex color.
User Interaction
Now your list has function and style. What’s it missing now? Try tapping or long pressing it. There’s not much to thrill and delight the user.What could you add here to make the user experience that much more satisfying? Well, when a user taps on a row, don’t you think it’d be nice to show the full recipe, complete with instructions?
You’ll make use of AdapterView.onItemClickListener and a brand spanking new activity to do this with elegance.
Make a New Activity
This activity will display when the user selects an item in the list.Right-click on java/com.raywenderlich.alltherecipes then select New > Activity > EmptyActivity to bring up a dialog. Fill in the Activity Name with RecipeDetailActivity. Leave the automatically populated fields as-is. Check that your settings match these:
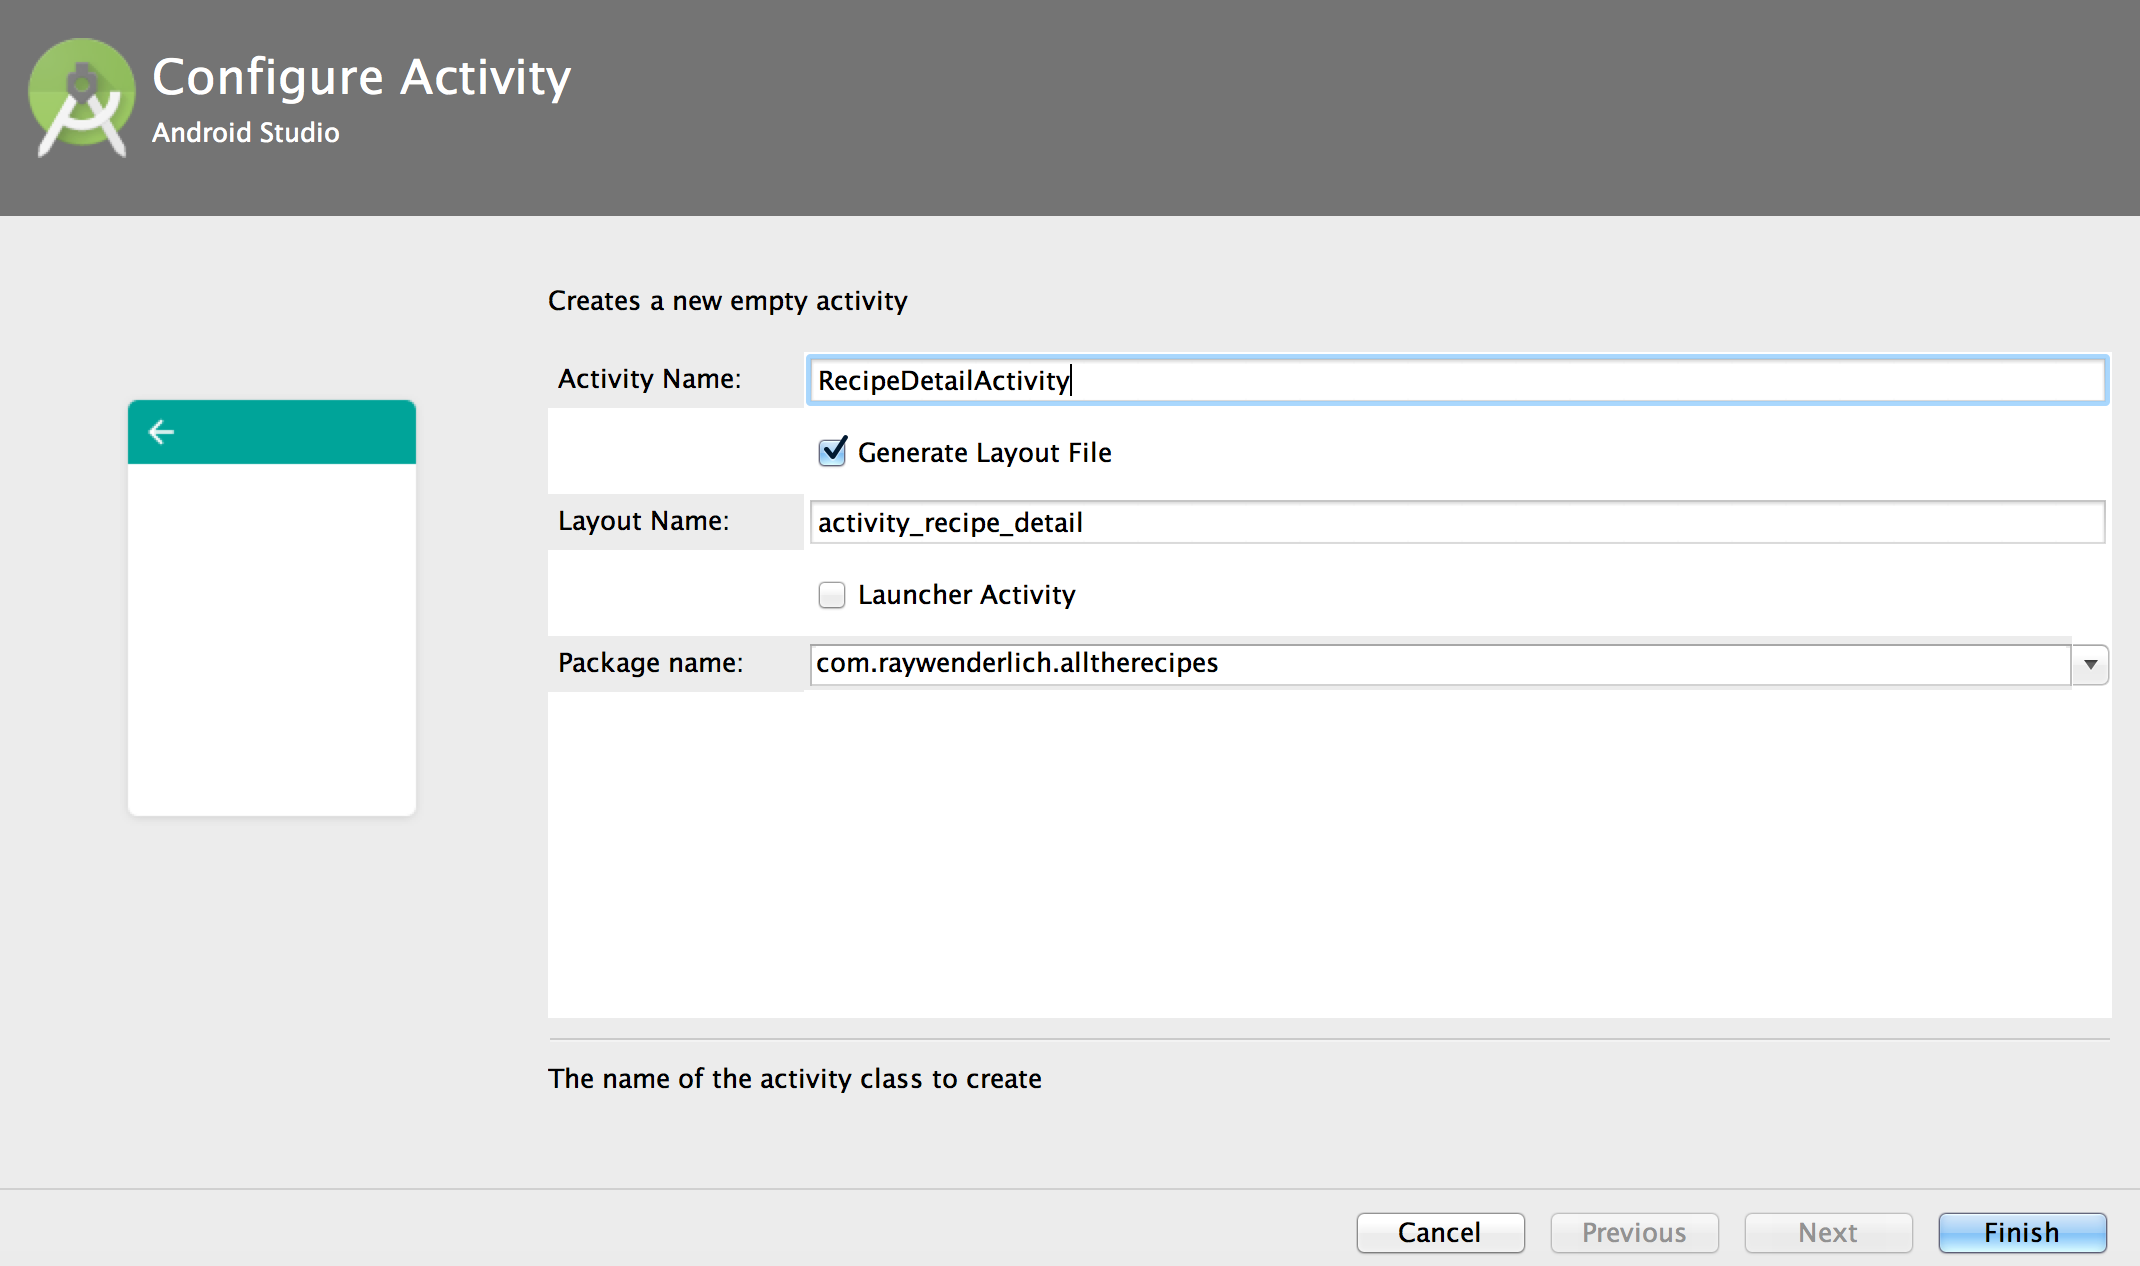
Click Finish.
Open res/layout/activity_recipe_detail.xml and add a
WebView by inserting the following snippet inside the RelativeLayout tag:<WebView android:id="@+id/detail_web_view" android:layout_width="match_parent" android:layout_height="match_parent" /> |
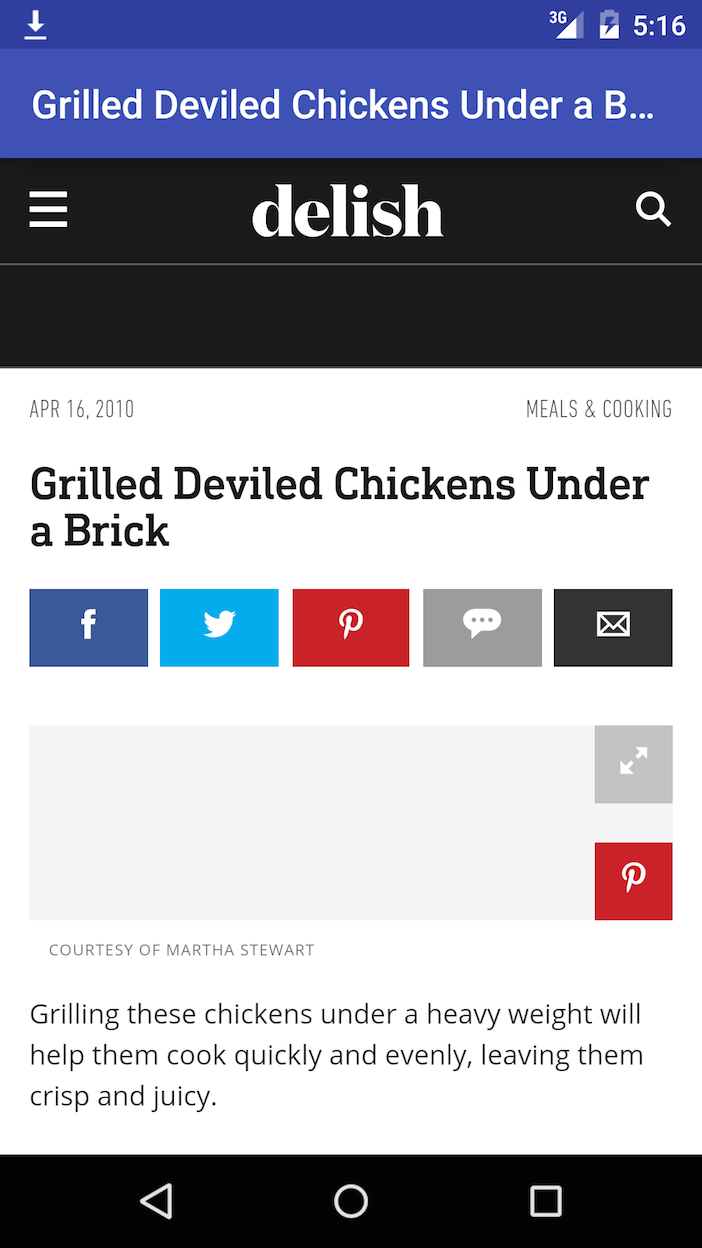
WebView will be used to load and display a webpage containing the selected recipe’s instructions.Open up RecipeDetailActivity.java, and add a
WebView reference as an instance variable by adding the following line within the class definition:private WebView mWebView; |
onCreate method:final Context context = this; mListView.setOnItemClickListener(new AdapterView.OnItemClickListener() { @Override public void onItemClick(AdapterView<?> parent, View view, int position, long id) { // 1 Recipe selectedRecipe = recipeList.get(position); // 2 Intent detailIntent = new Intent(context, RecipeDetailActivity.class); // 3 detailIntent.putExtra("title", selectedRecipe.title); detailIntent.putExtra("url", selectedRecipe.instructionUrl); // 4 startActivity(detailIntent); } }); |
Note: Before you dive into the explanation, make sure you understand the four arguments that are provided by
The first thing you do in the last snippet is set the onItemClick; they work as follows:- parent: The view where the selection happens — in your case, it’s the ListView
- view: The selected view (row) within the ListView
- position: The position of the row in the adapter
- id: The row id of the selected item
OnItemClickListener object for the ListView. The OnItemClickListener class has a method named onItemClick that you override — more on that in a moment. At
@Override, you override the existing onItemClick method and implement the following steps:- Get the recipe object for the row that was clicked
- Create an intent to navigate to your
RecipeDetailActivityto display more information - Let the
RecipeDetailActivityknow the title and URL of the recipe to display by passing that data via the Intent. - Launch the
RecipeDetailActivityby passing the intent object you just created to thestartActivity()method.
Note: To learn more about intents, check out the awesome Android: Intents Tutorial.
Once again, open RecipeDetailActivity.java and add the following snippet at the bottom of the onCreate method:// 1 String title = this.getIntent().getExtras().getString("title"); String url = this.getIntent().getExtras().getString("url"); // 2 setTitle(title); // 3 mWebView = (WebView) findViewById(R.id.detail_web_view); // 4 mWebView.loadUrl(url); |
- You retrieve the recipe data from the
Intentpassed byMainActivityby using thegetExtras()method. - You set the title on the action bar of this activity to the recipe title.
- You initialize
mWebViewto the web view defined in the XML layout. - You load the recipe web page by calling
loadUrl()with the corresponding recipe’s URL on the web view object.
Optimizing Performance
Whenever you scroll the ListView, its adapter’sgetView() method is called in order to create a row and display it on screen. Now, if you look in your
getView() method, you’ll notice
that each time this method is called, it performs a lookup for each of
the row view’s elements by using a call to the findViewById() method. These repeated calls can seriously harm the ListView’s performance, especially if your app is running on limited resources and/or you have a very large list. You can avoid this problem by using the View Holder Pattern.
Implement a ViewHolder Pattern
To implement the ViewHolder pattern, open RecipeAdapter.java and add the following after thegetView() method definition:private static class ViewHolder { public TextView titleTextView; public TextView subtitleTextView; public TextView detailTextView; public ImageView thumbnailImageView; } |
ViewHolder object stores each of the row’s subviews, and in turn is stored inside the tag field of the layout. This means you can immediately access the row’s subviews without the need to look them up repeatedly.
Now, in
getView(), replace everything above (but NOT including) this line:Recipe recipe = (Recipe) getItem(position); |
ViewHolder holder; // 1 if(convertView == null) { // 2 convertView = mInflater.inflate(R.layout.list_item_recipe, parent, false); // 3 holder = new ViewHolder(); holder.thumbnailImageView = (ImageView) convertView.findViewById(R.id.recipe_list_thumbnail); holder.titleTextView = (TextView) convertView.findViewById(R.id.recipe_list_title); holder.subtitleTextView = (TextView) convertView.findViewById(R.id.recipe_list_subtitle); holder.detailTextView = (TextView) convertView.findViewById(R.id.recipe_list_detail); // 4 convertView.setTag(holder); } else{ // 5 holder = (ViewHolder) convertView.getTag(); } // 6 TextView titleTextView = holder.titleTextView; TextView subtitleTextView = holder.subtitleTextView; TextView detailTextView = holder.detailTextView; ImageView thumbnailImageView = holder.thumbnailImageView; |
- Check if the view already exists. If it does, there’s no need to inflate from the layout and call
findViewById()again. - If the view doesn’t exist, you inflate the custom row layout from your XML.
- Create a new
ViewHolderwith subviews initialized by usingfindViewById(). - Hang onto this holder for future recycling by using
setTag()to set the tag property of the view that the holder belongs to. - Skip all the expensive inflation steps and just get the holder you already made.
- Get relevant subviews of the row view.
getView() with the line below.return convertView; |
Where to Go From Here?
You can download the completed project here.When you develop for Android, ListViews (as well as other AdapterViews) are a common concept that you’ll run into over and over again.
If you want to know more about the inner workings of the ListView and performance details, check out this article on performance tips for Android ListViews.
There are actually other ways to create lists, such as subclassing a ListActivity and ListFragment. Both of these links take you to the official Android developer site so that you can learn more about how they work.
Both of these alternatives impose the restriction that the respective activity or fragment can only contain a ListView as its child view. Suppose you wanted an activity that had a ListView as well as some other views, it would be impossible with a ListActivity. The same goes for the ListFragment scenario.
Look out for our upcoming tutorial on GridViews. In the meantime, feel free to share your feedback, findings or ask any questions in the comments below or in the forums. Talk to you soon!


0 comments:
Post a Comment
Note: only a member of this blog may post a comment.